Managing Projects
In this article, you will learn how to add, edit, delete, and deactivate a project in the Projects area of the Web Portal.
Create a Project
To create a new project:
Step 1: Login into the FabStation web portal. Please use the same credentials for logging into the web portal as for logging into the app.
Step 2: Click on Projects > All Projects within the webportal left menu.
Step 3: If this is your first time uploading a project file, click on Add Project in the top left corner.
Step 4: Register your new project by entering:
1. Job Title (mandatory)
2. Project Name (mandatory)
3. Project Type: Choose Steel or Metal (mandatory). If Project Type is not available to you but you need access to Metal projects or you work with different file formats, please contact support@fabstation.com
Note: Click the ? icon next to each label to check which file types belong to each category.
Steel
Detailing Software: Solid Works, Inventor, Revit, AutoCad
File types: .sldprt, .sldasm, .ipt, .iam, .rvt, .step, .stl, .sat, .pdf
Metal
Detailing Software: Solid Works, Inventor, Revit, AutoCad
File types: .sldprt, .sldasm, .ipt, .iam, .rvt, .step, .stl, .sat, .pdf
Note: If you chose incorrect project type, you will be able to change it later, by editing the project.
4. Project Description
Once you’ve entered the information, the options Add Project and Add Project & Upload Files will be activated.
Select Add Project if you only want to register a new project or select Add Project & Upload Files to proceed with uploading your files.

NOTE: Once the project is created, you will also need to upload your project data files from your detailer. Learn more about it here.
Step 5: Upload the ZIP project files.
Fill in the fields on the Project Upload page.
1. Upload Files – Drag and drop your ZIP file into the box or click “Choose File” to select it manually.
2. Confirm Project Name – Type the project name exactly as you see it to ensure the correct project is selected.
3. Add Package Name Details – Include revision number, revision date, and other details to track revision history.
Once all required fields are filled, the Upload Package button will be activated. Click it to start the upload.

Edit a Project
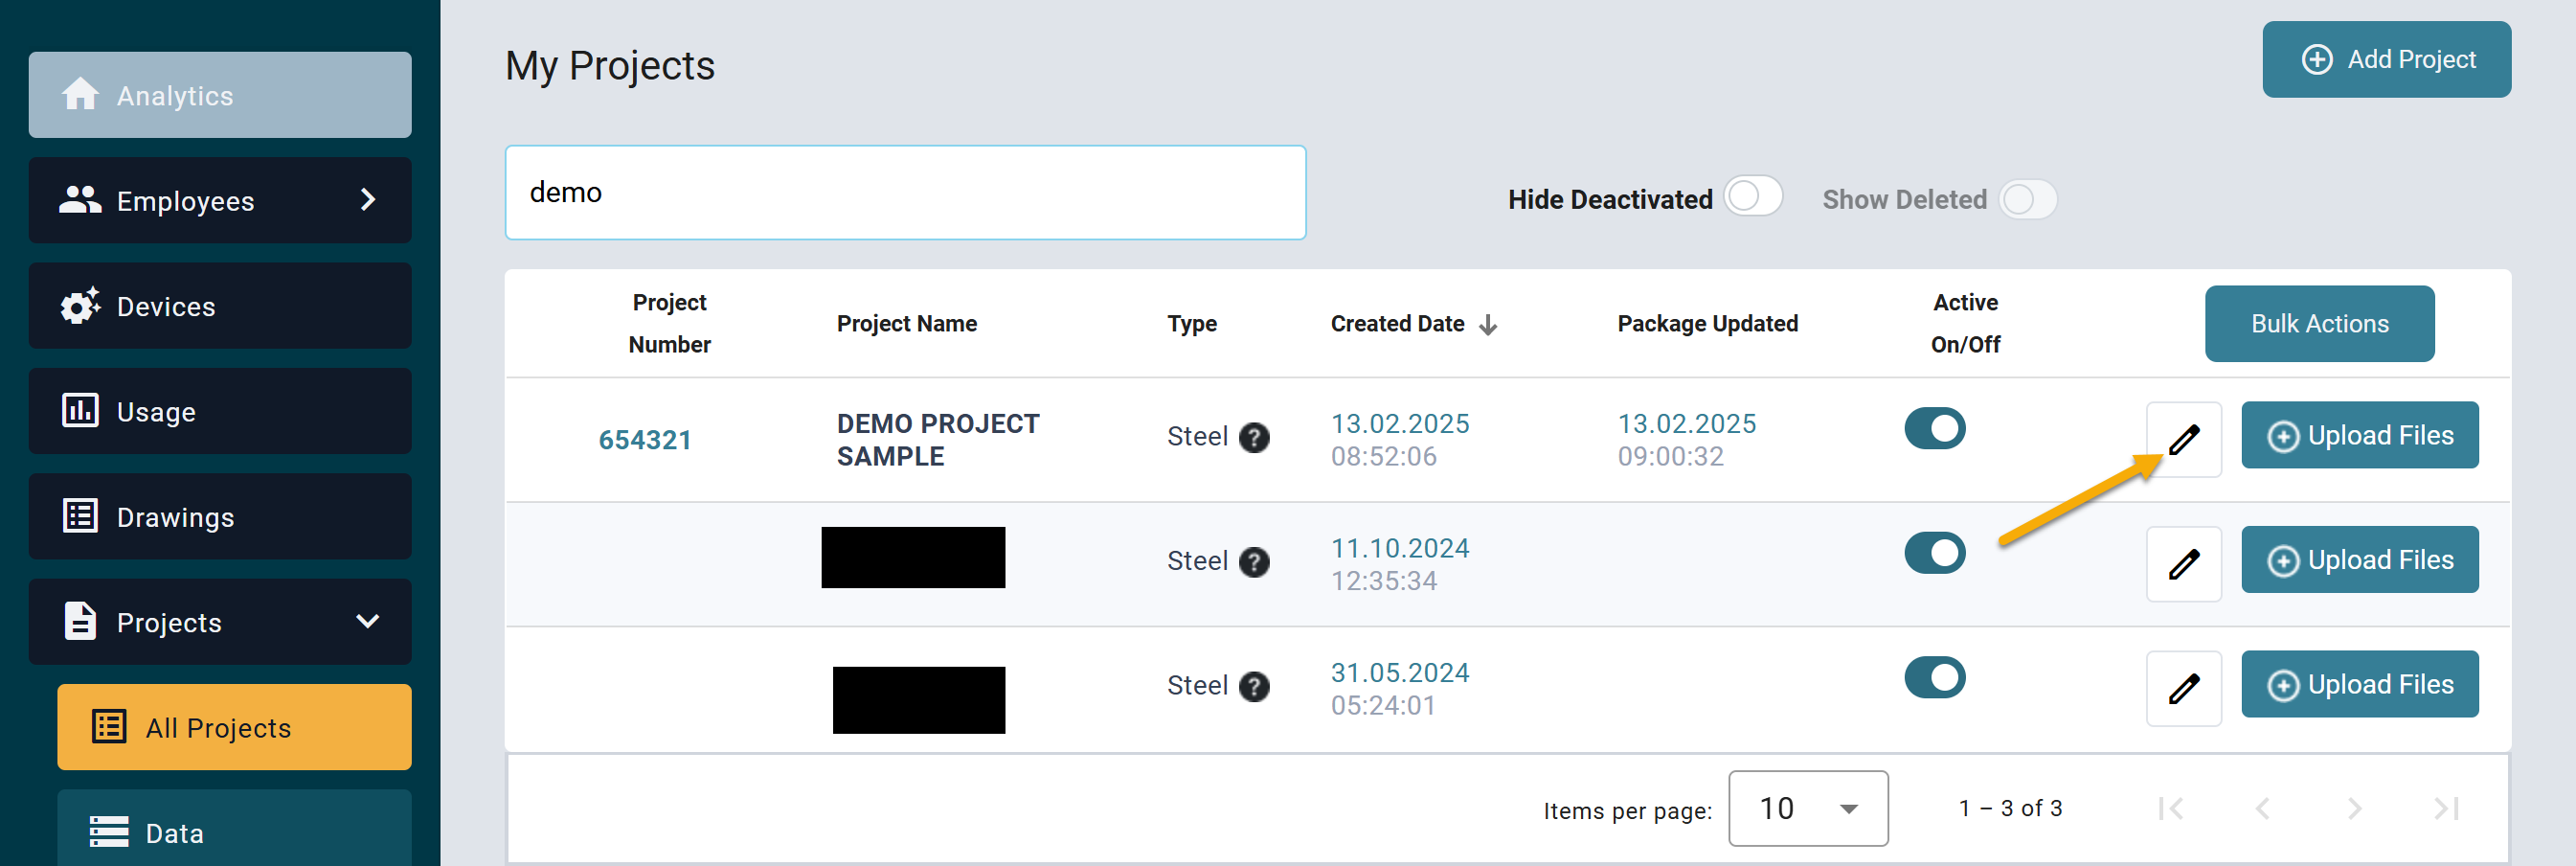
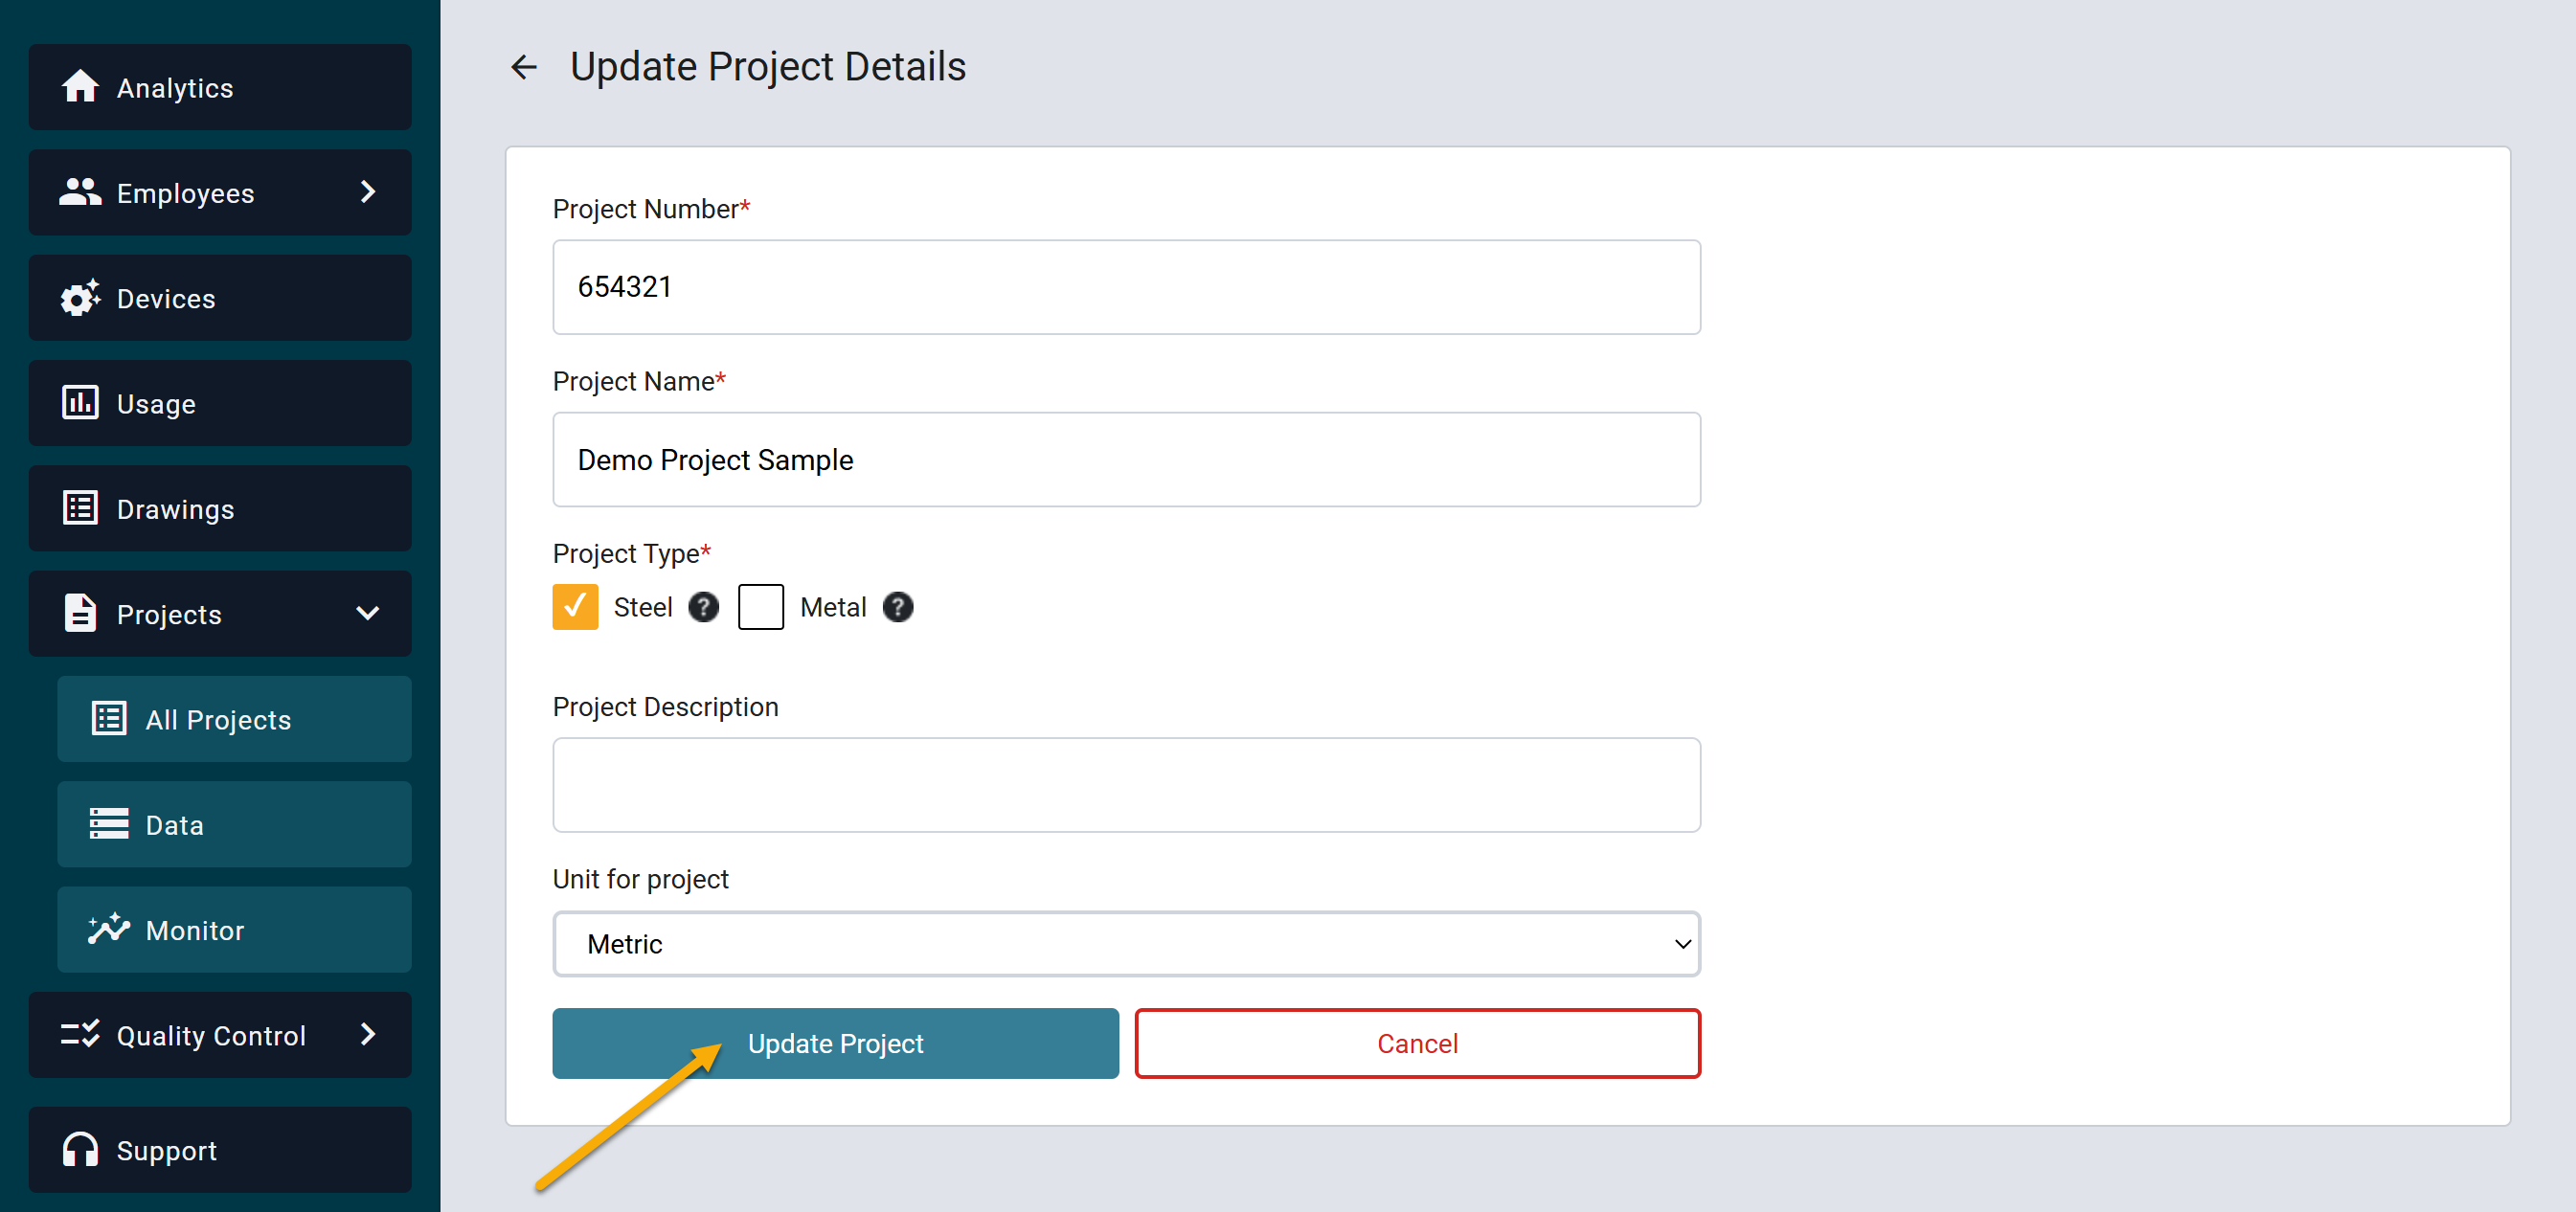
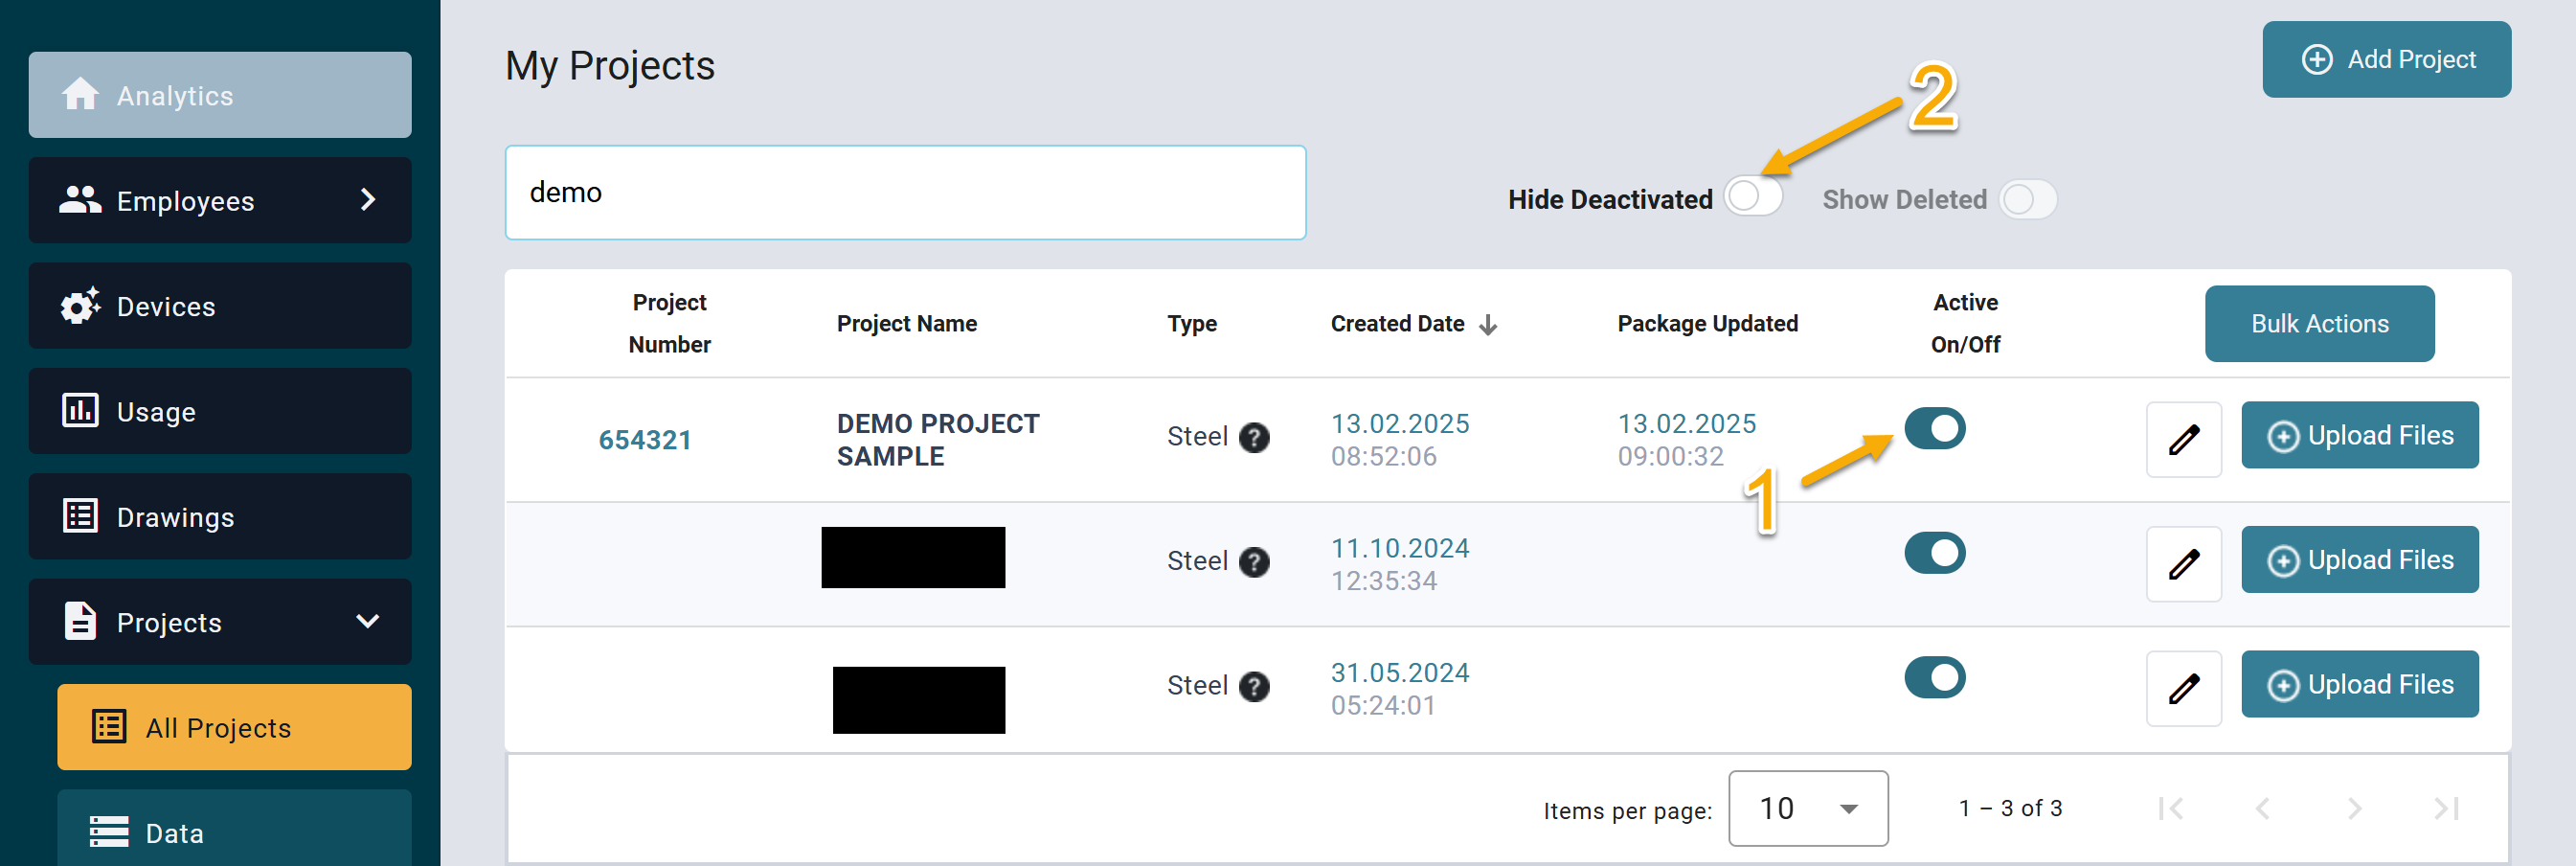
To modify an existing Project Number, Project Name, Project Type, or Project Description:
1. Click the pencil icon under Projects > All Projects.
De-activate a Project
To deactivate an existing project:
1. In the web portal menu, go to Projects > All Projects.
2. Search for the project and click the slider under Active On/Off to turn it off. The slider will turn clear to indicate the project is no longer active.
3. The project will be deactivated. To reverse this, select Hide Deactivated from the top menu and toggle it back ON.
Deactivating a project means:
- All devices will be updated, and the project and its files will be removed from the FabStation App on the devices.
- All project data will still be stored on FabStation servers.

Once deleted, the project and all files will be removed from the FabStation software. It is recommended to use the de-activate feature to clean up older projects.