Managing Project Files/Packages
In FabStation, project data files are uploaded as ZIP archives, referred to as packages. These packages contain project data required for viewing your assemblies and projects within your HoloLens and other devices.
Once uploaded to the WebPortal, the files are processed and made available within the FabStation App.
Before uploading, ensure your project files are correctly organized into a ZIP file. Refer to Creating a ZIP file for more information.
Package Upload Overview
Before uploading a ZIP package, you need to create a project for it. Click here to learn how to create a new project. You can upload multiple packages related to the same project within your steel shop into one FabStation Project.
To upload project data:
Step 1: Login into the FabStation webportal. Please use the same credentials for logging into the web portal as for logging into the app.
Step 2: Click on Projects>All Projects within the portal left menu.
Step 3: If this is your first time uploading a project file, click on Add Project in the top left corner.

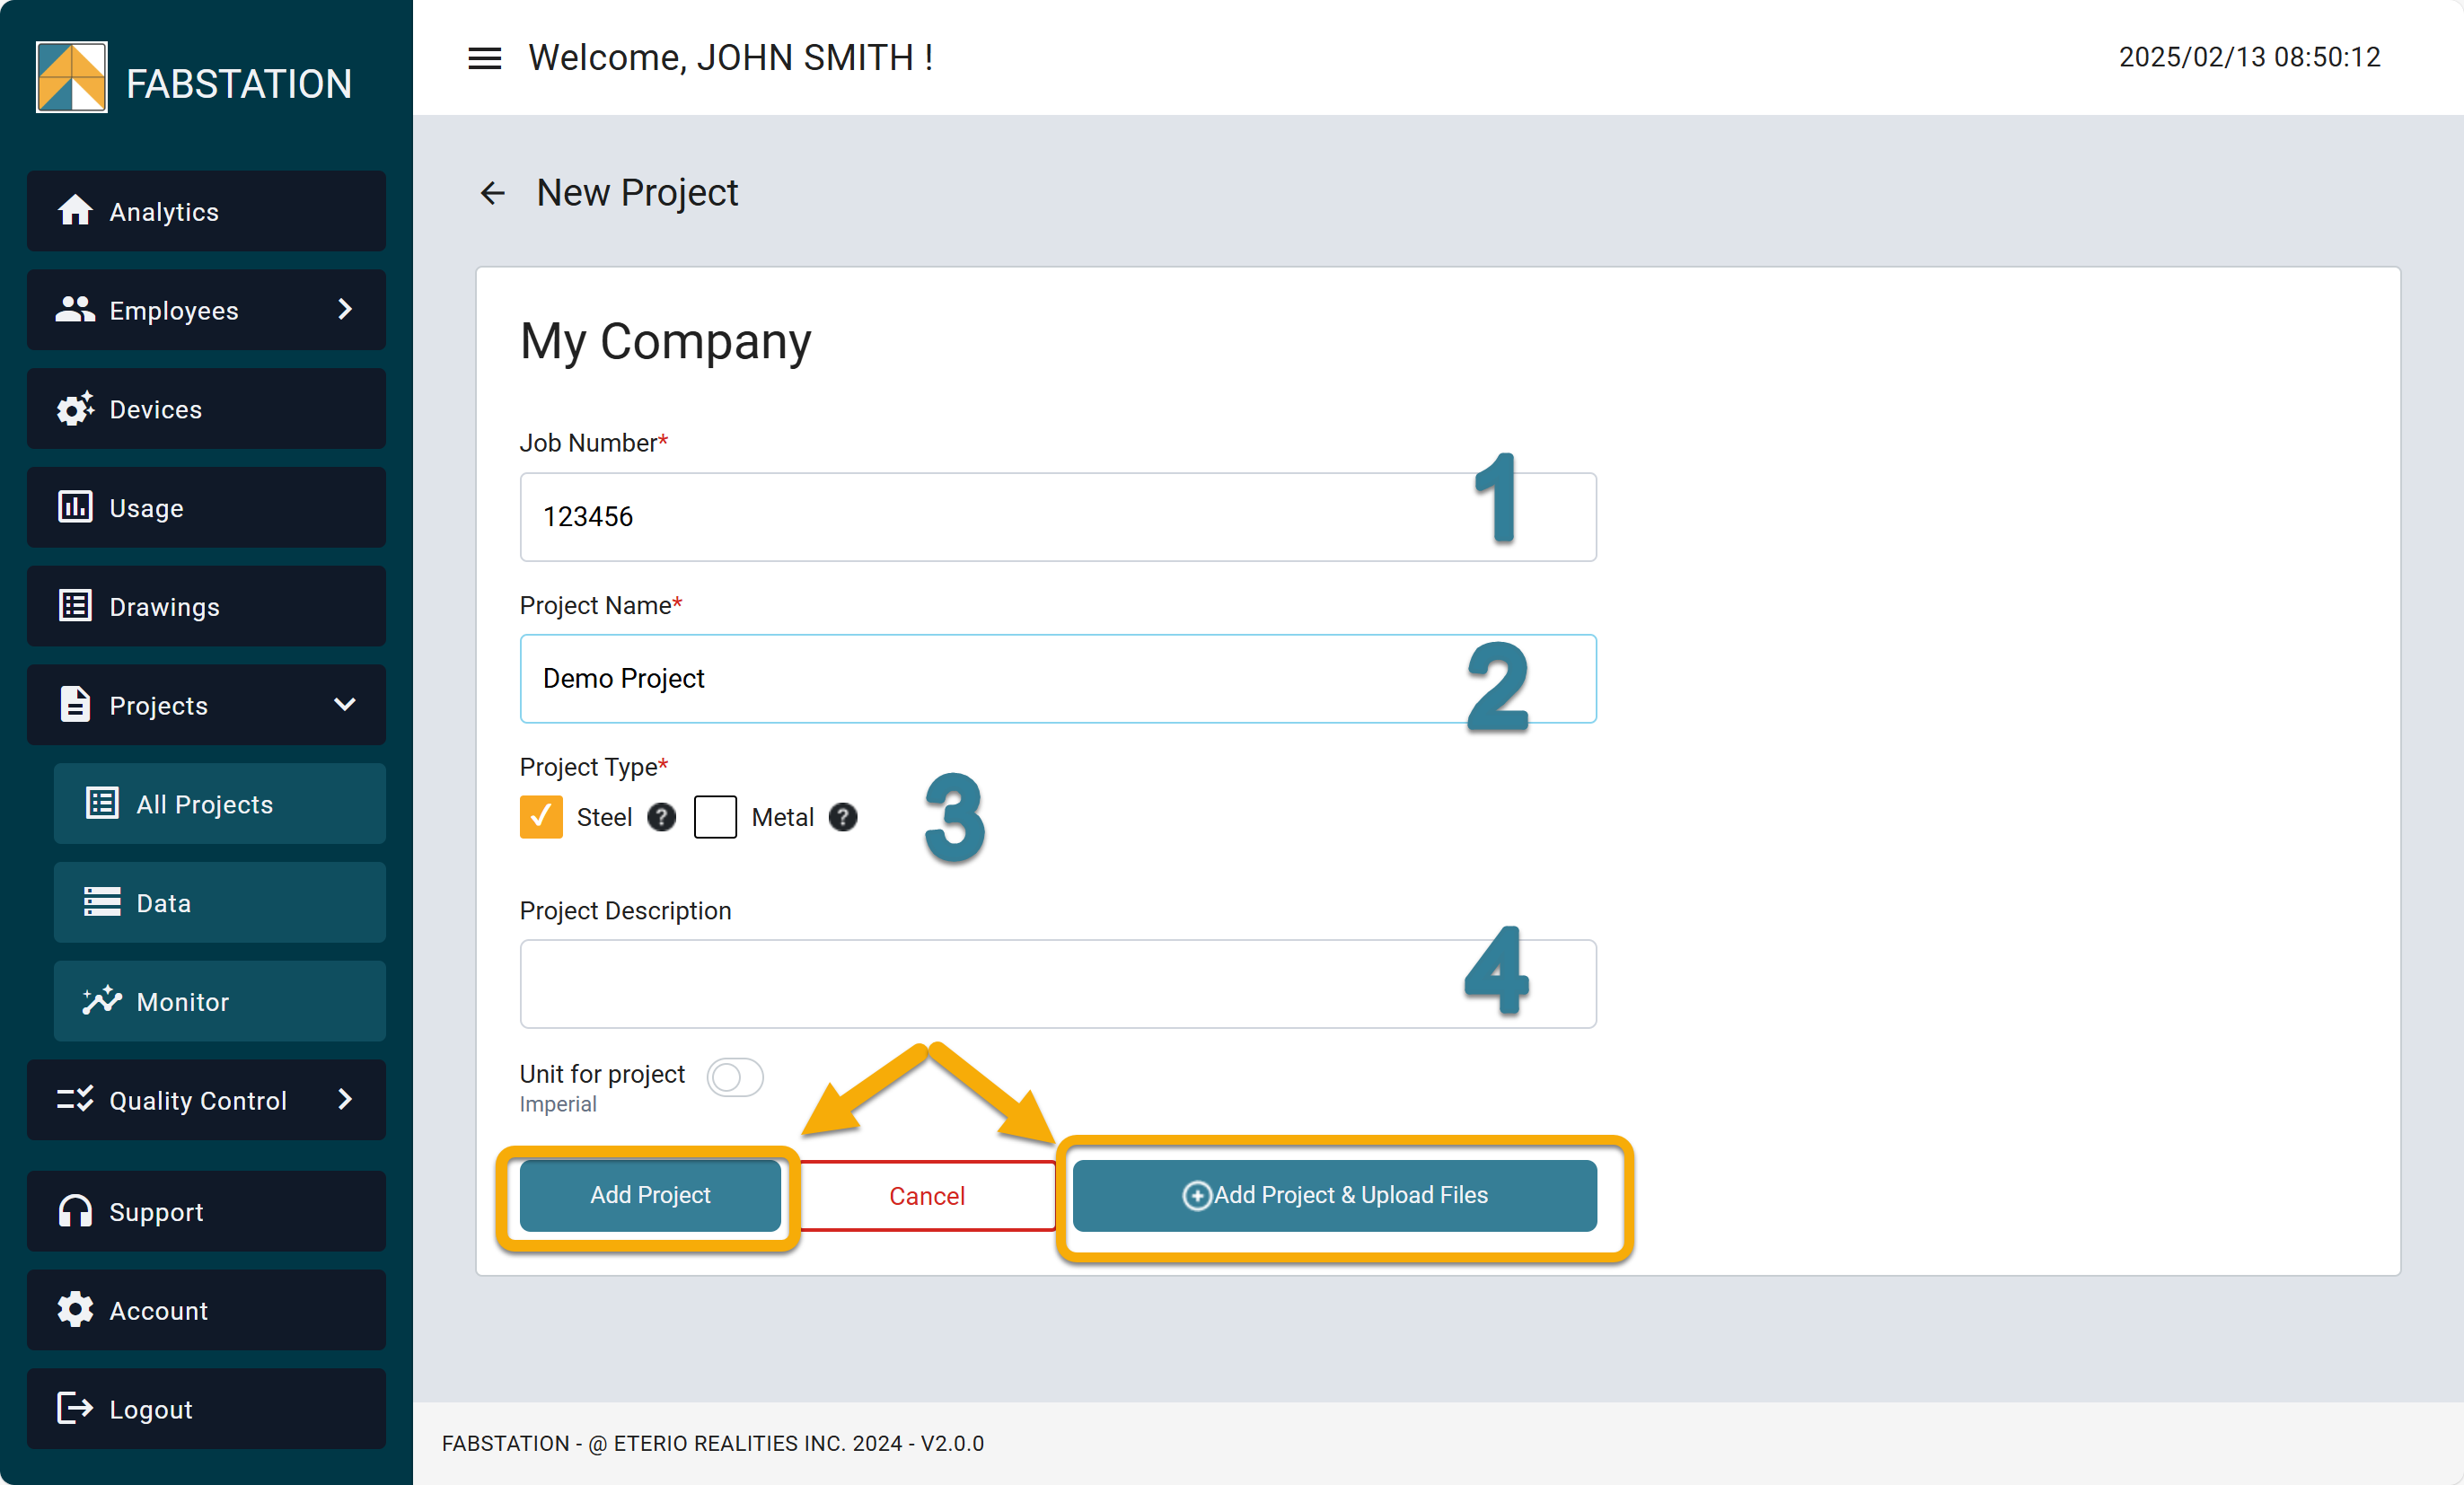
Step 4: Register your new project by entering:
1. Job Title (mandatory)
2. Project Name (mandatory)
3. Project Type: Choose Steel or Metal (mandatory). If Project Type is not available to you but you need access to Metal projects or you work with different file formats, please contact support@fabstation.com
Note: Click the ? icon next to each label to check which file types belong to each category.
Steel
Detailing Software: Solid Works, Inventor, Revit, AutoCad
File types: .sldprt, .sldasm, .ipt, .iam, .rvt, .step, .stl, .sat, .pdf
Metal
Detailing Software: Solid Works, Inventor, Revit, AutoCad
File types: .sldprt, .sldasm, .ipt, .iam, .rvt, .step, .stl, .sat, .pdf
Note: If you chose incorrect project type, you will be able to change it later, by editing the project.
4. Project Description
Once you’ve entered the information, the options Add Project and Add Project & Upload Files will be activated.
Select Add Project if you only want to register a new project or select Add Project & Upload Files to proceed with uploading your files.
Step 5: Upload the ZIP project files.
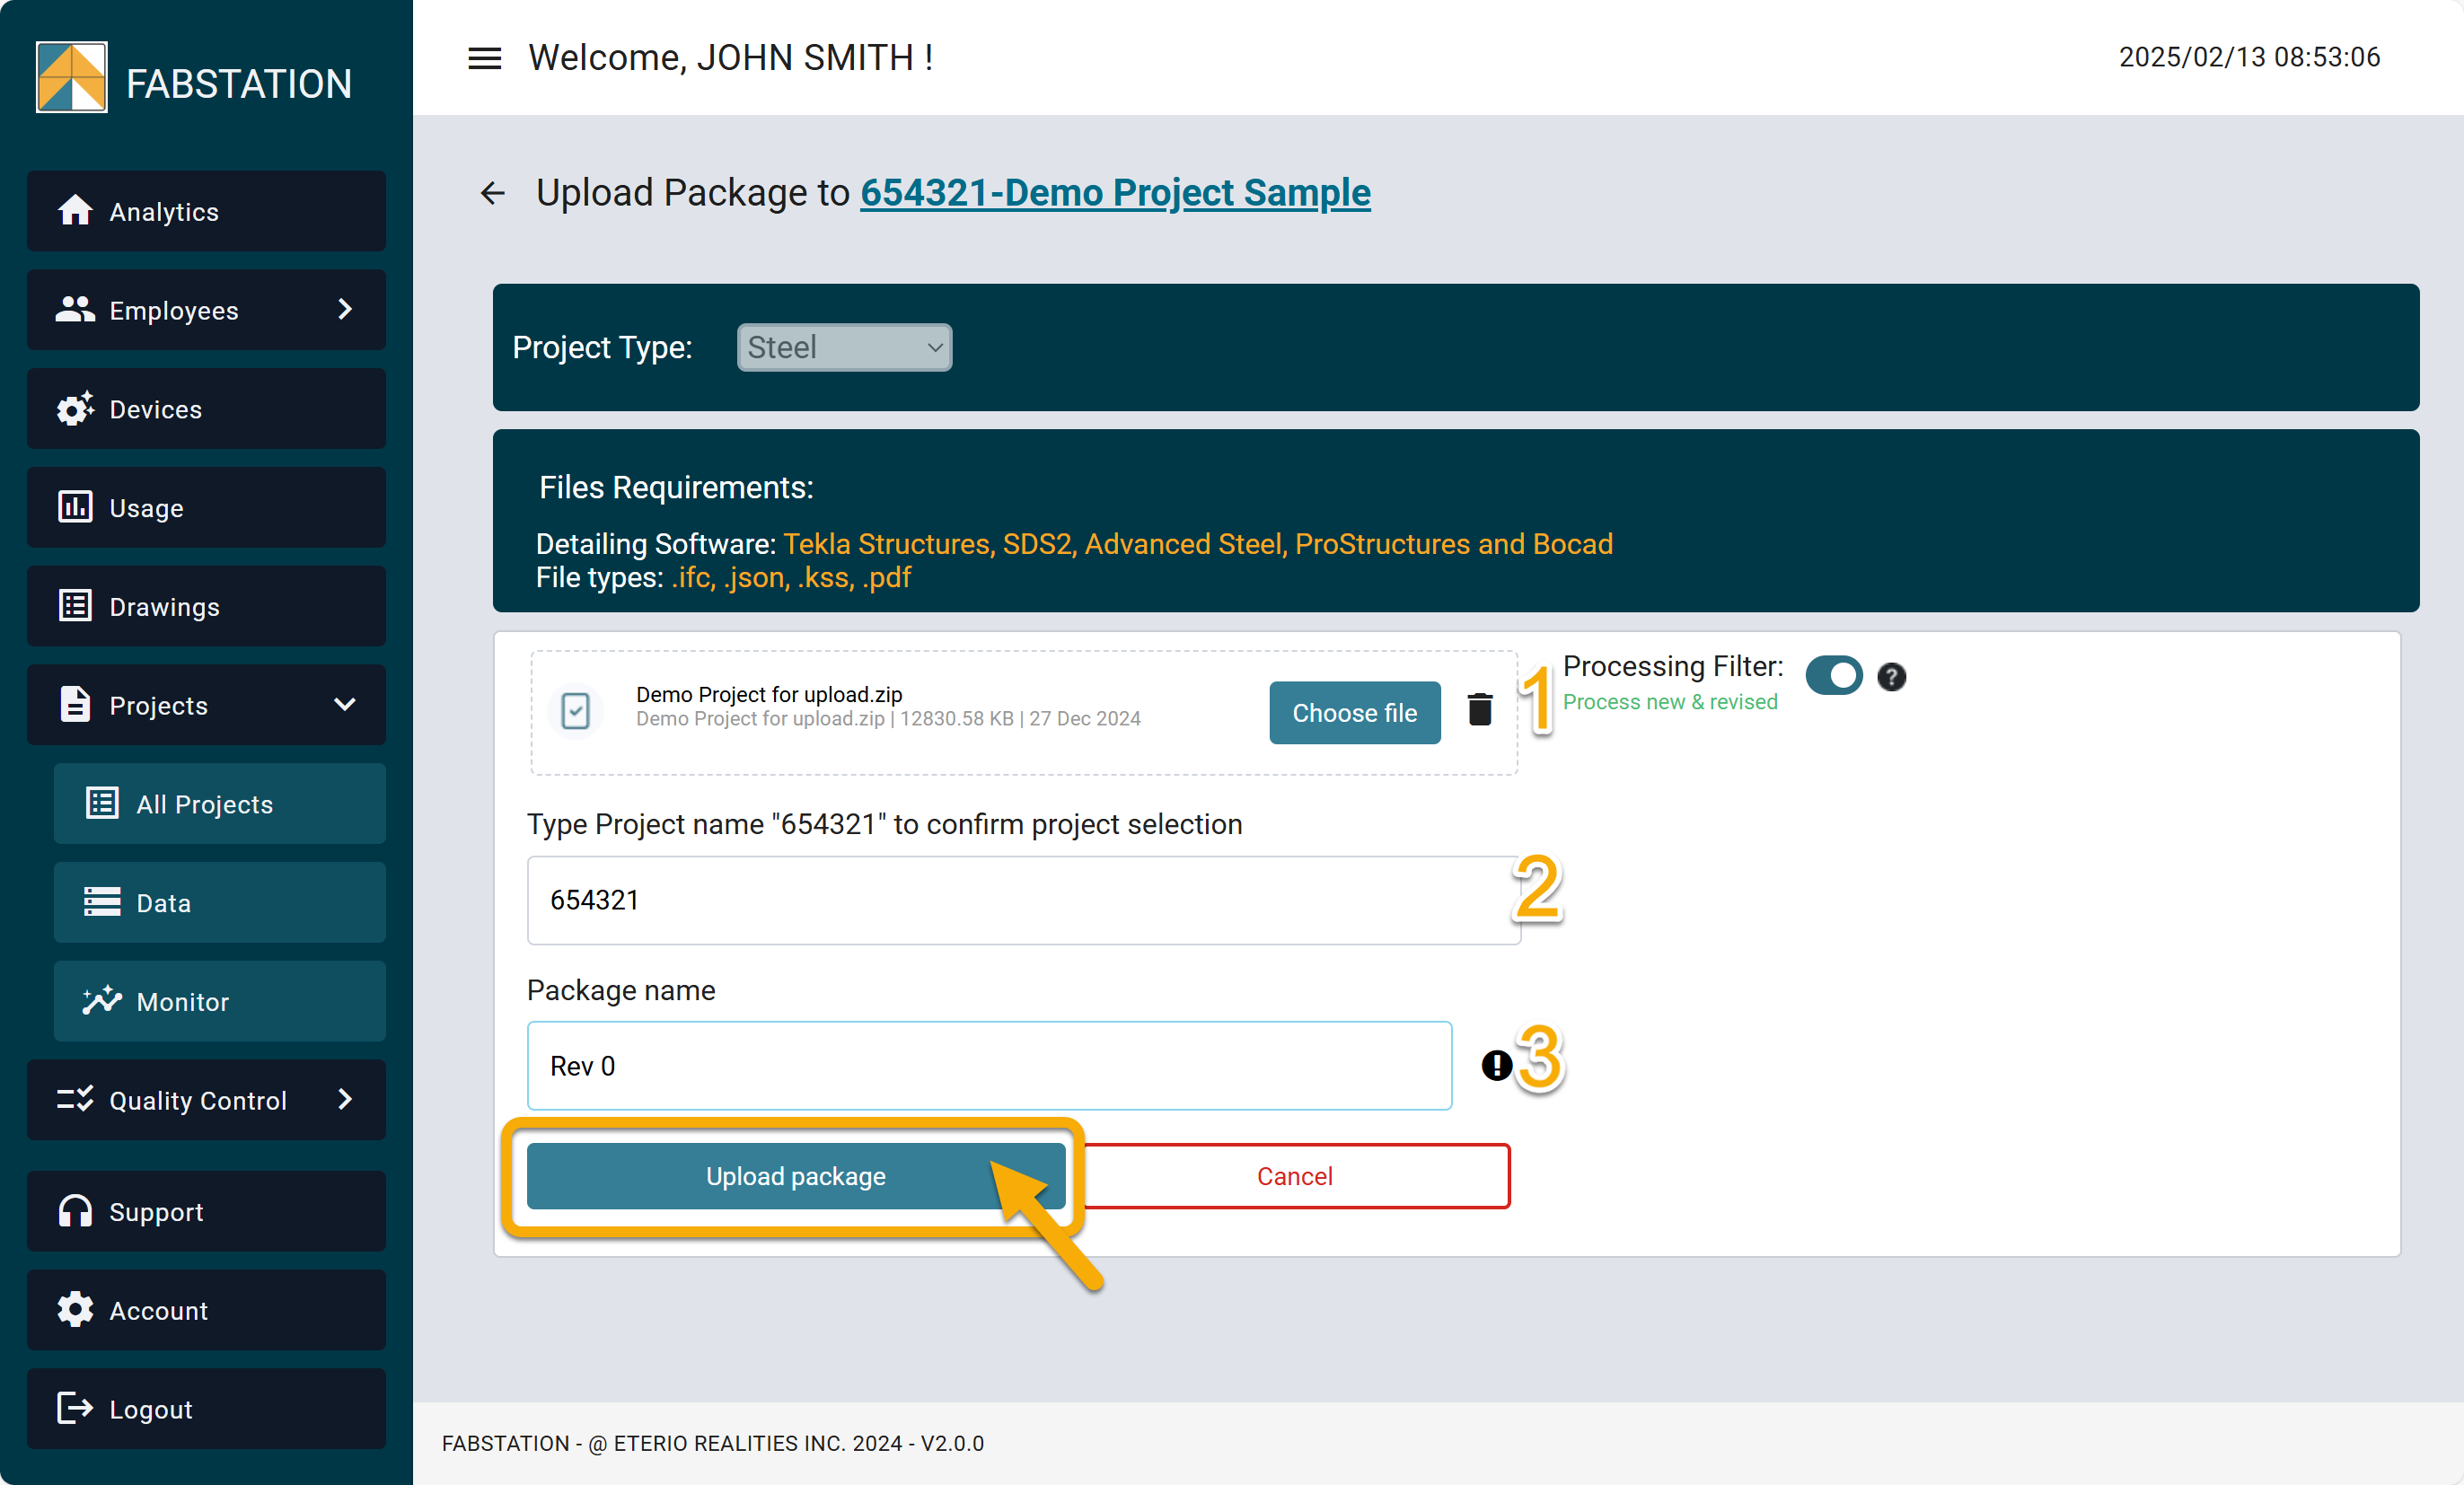
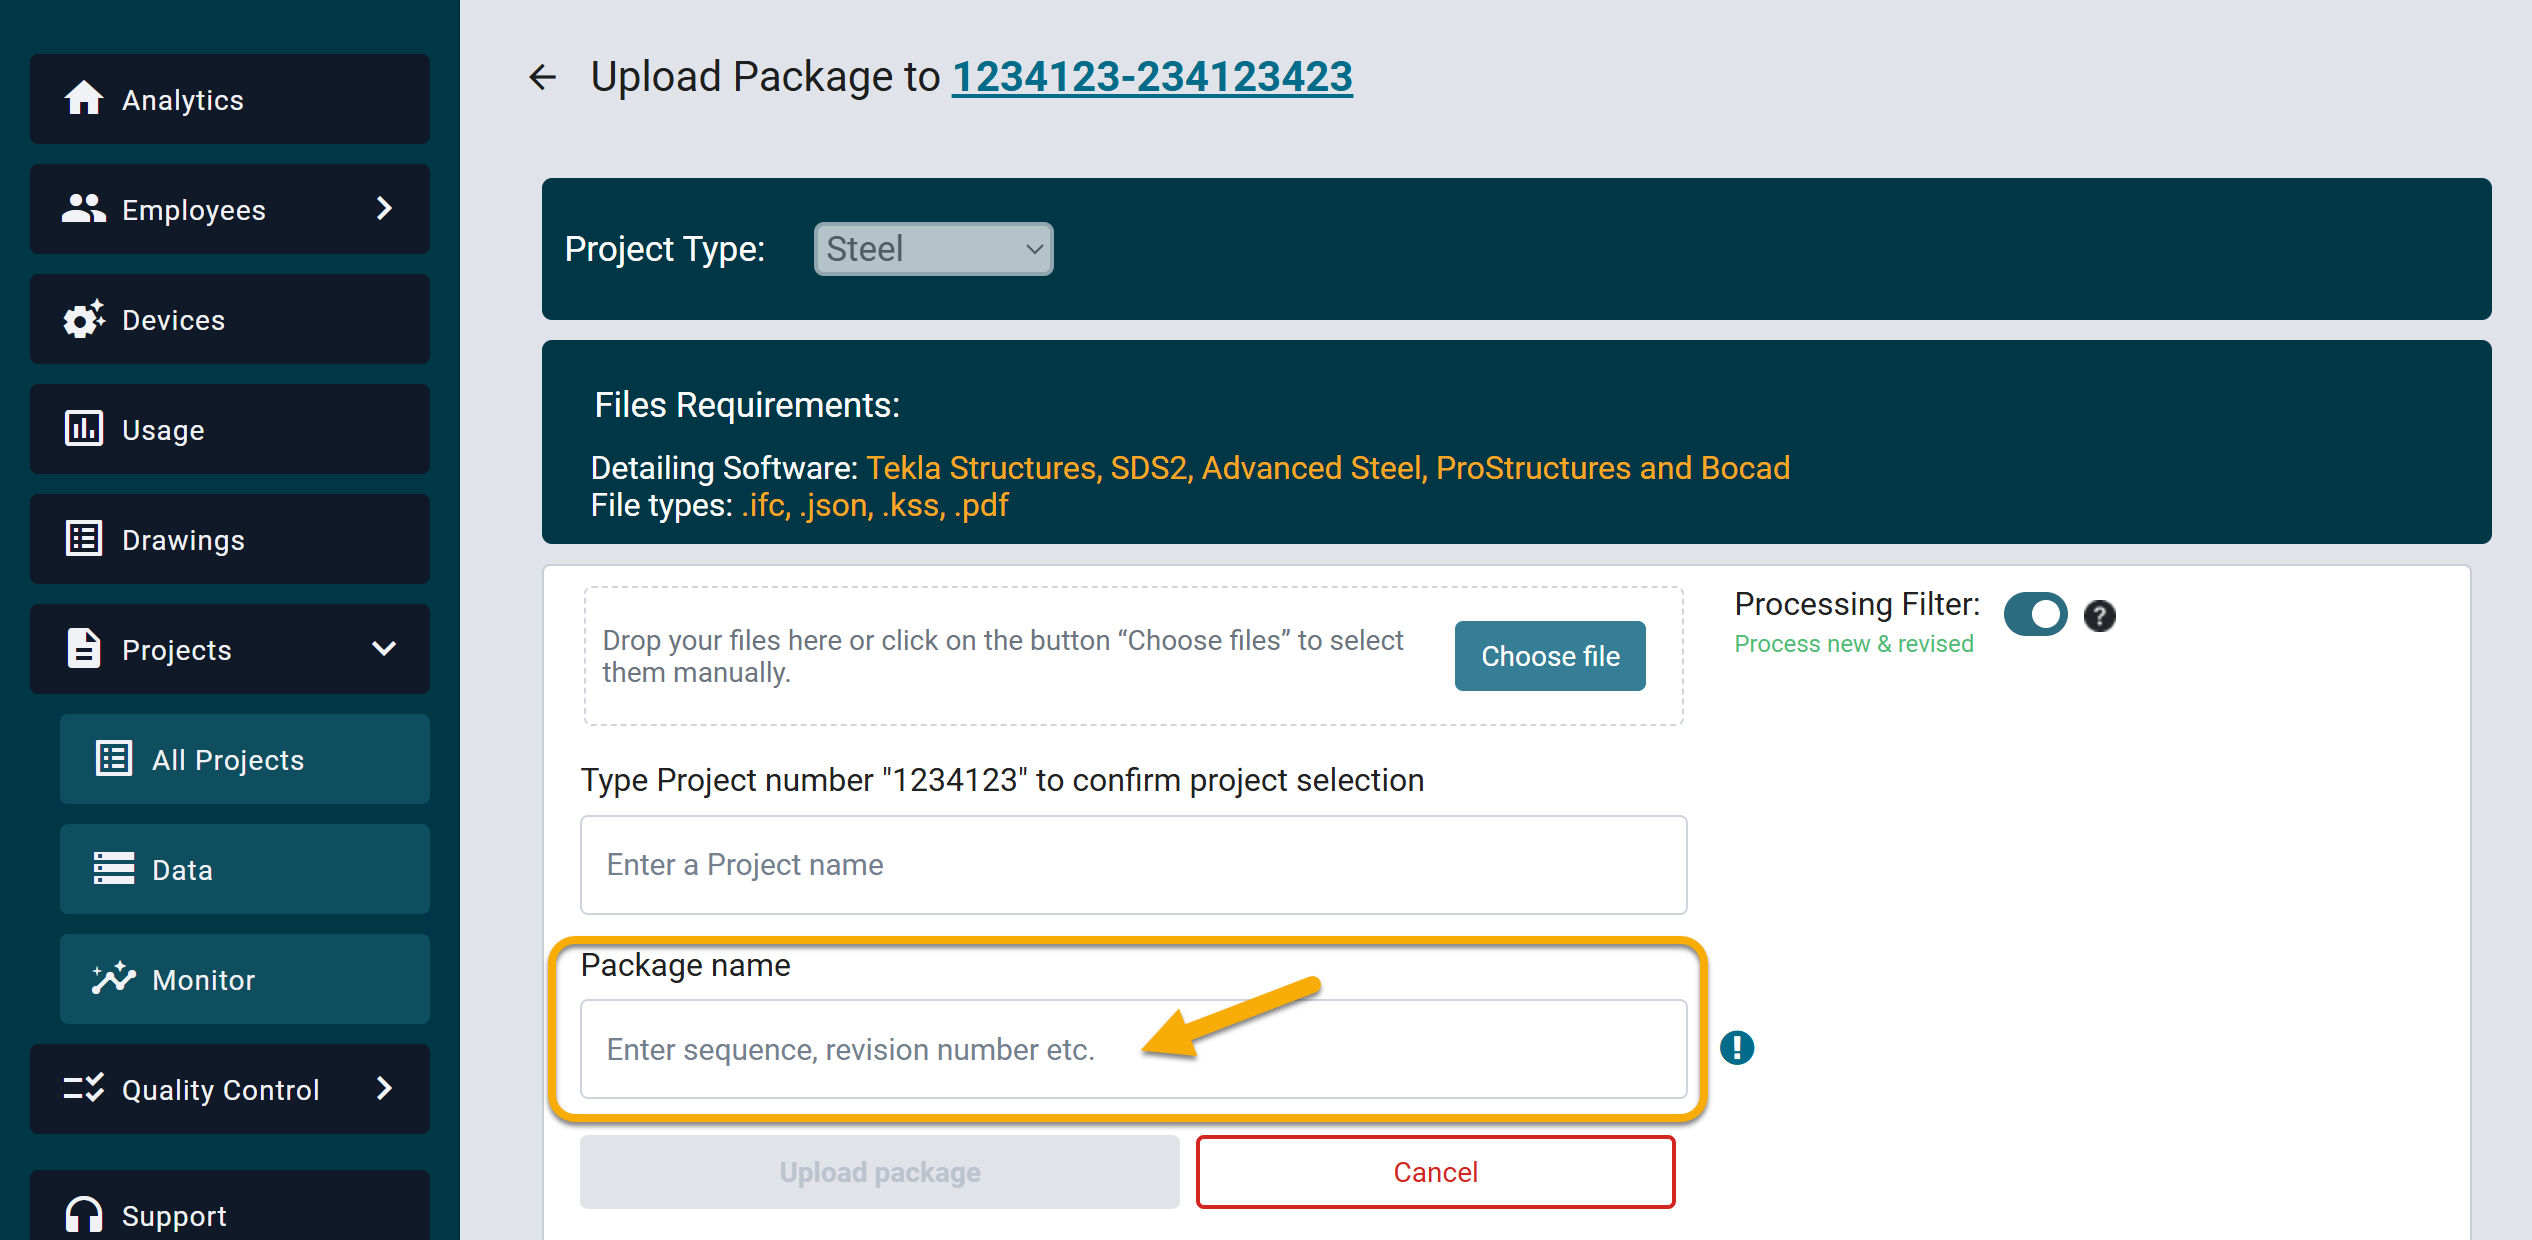
Fill in the fields on the Project Upload page.
1. Upload Files – Drag and drop your ZIP file into the box or click “Choose File” to select it manually.
2. Confirm Project Name – Type the project name exactly as you see it to ensure the correct project is selected.
3. Add Package Name Details – Include revision number, revision date, and other details to track revision history.
Once all required fields are filled, the Upload Package button will be activated. Click it to start the upload.
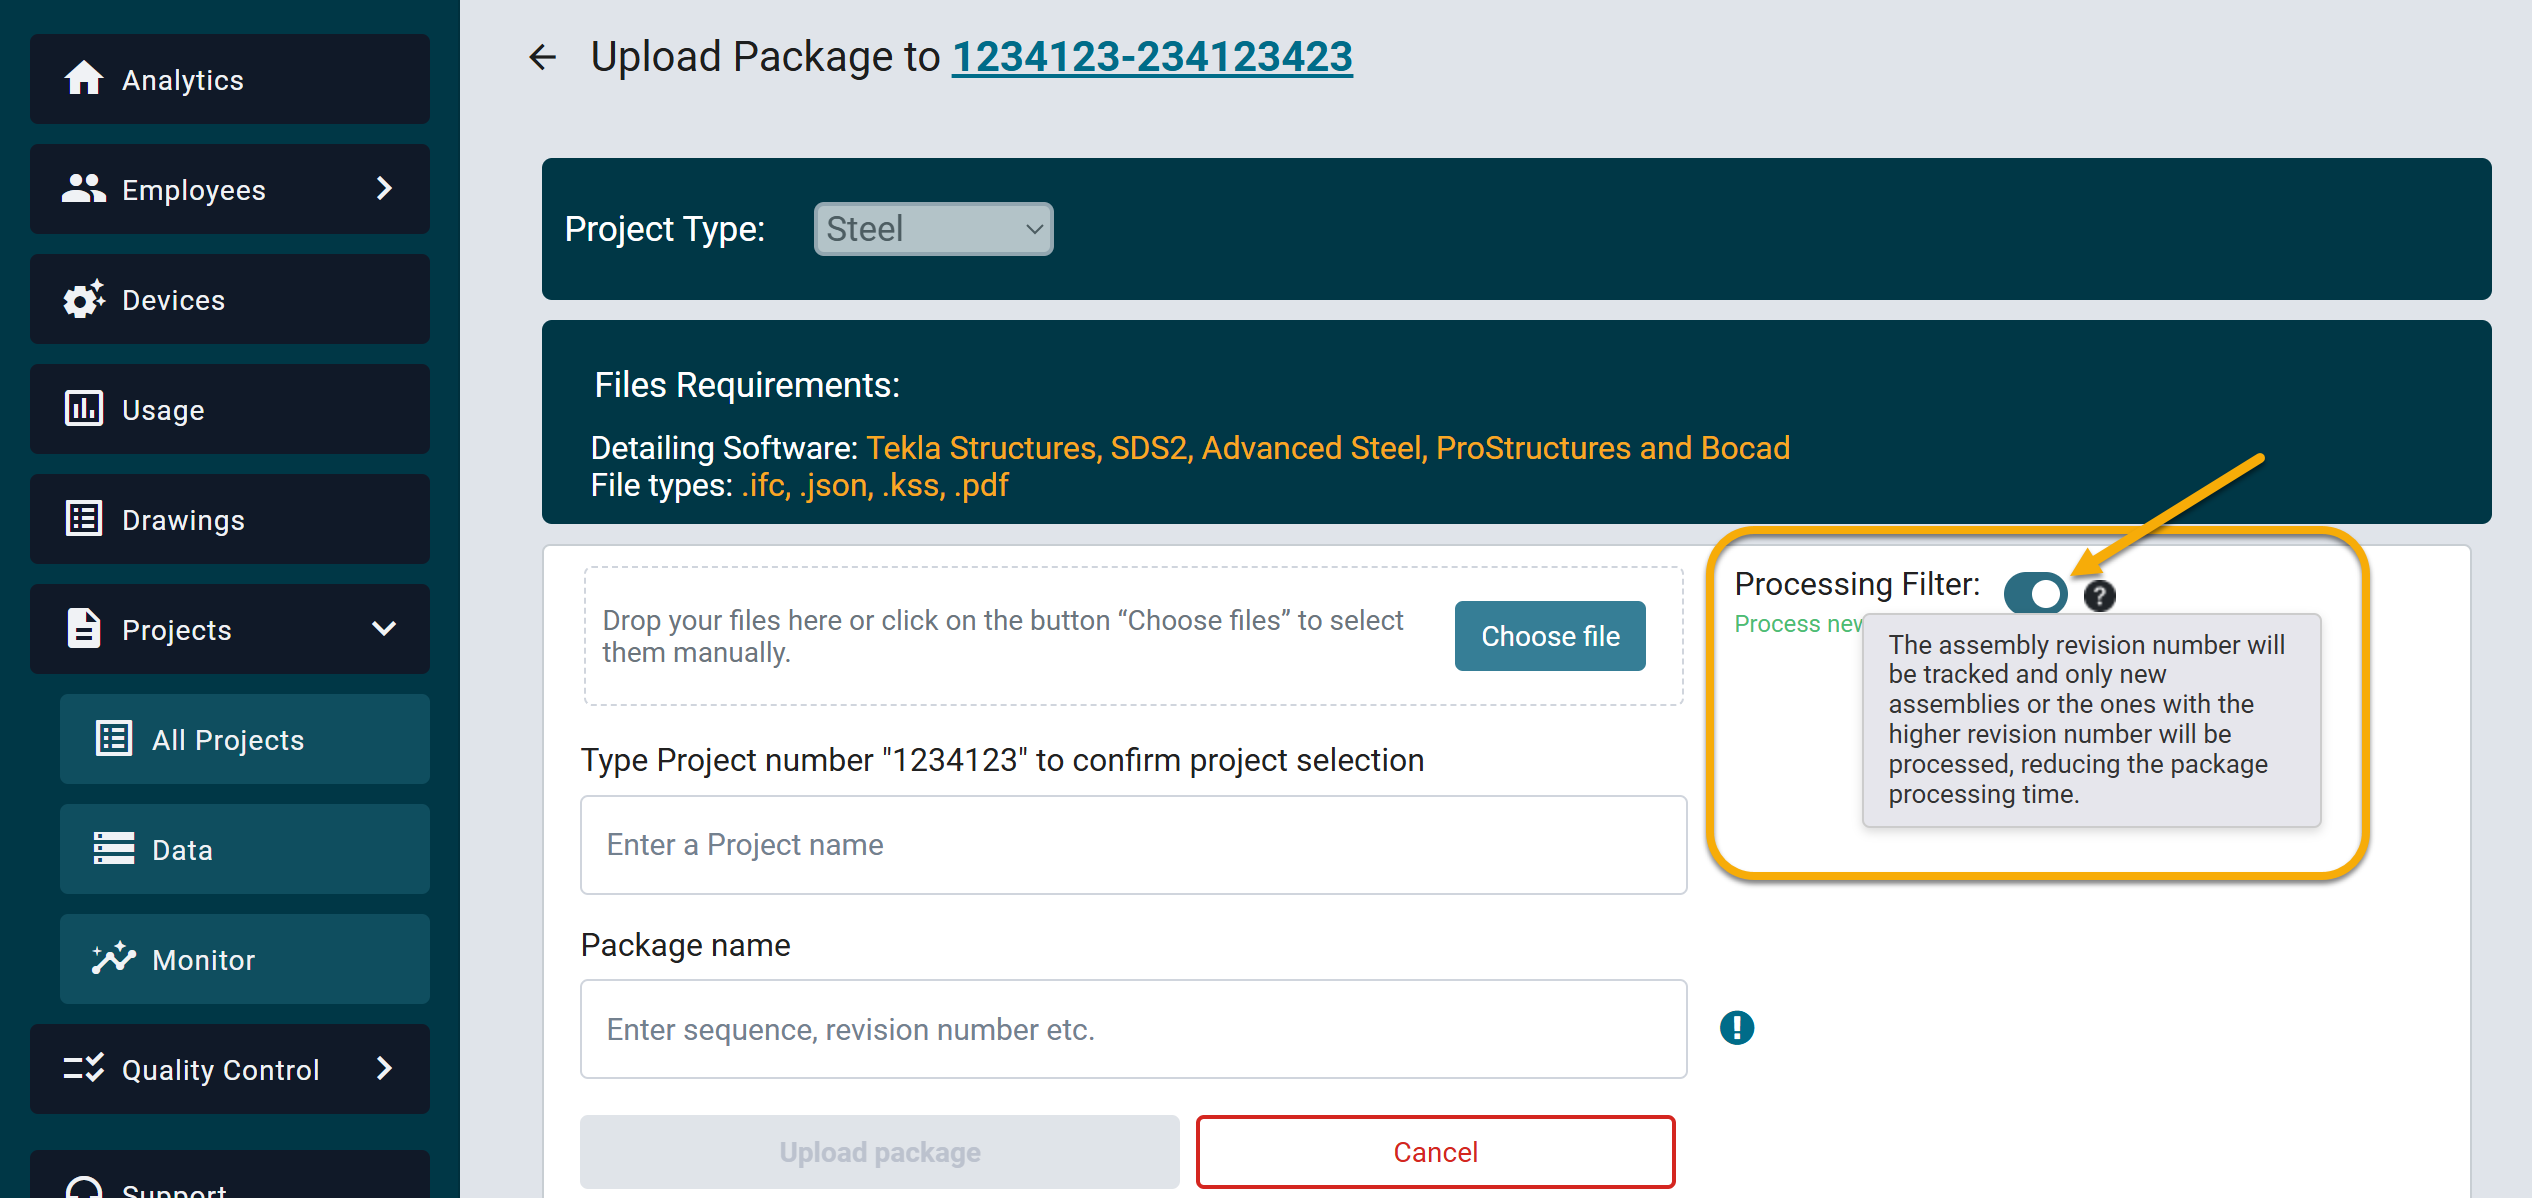
Processing Filter – Steel Projects Only
- ON: Tracks assembly revision numbers and processes only new or updated assemblies, reducing processing time.
- OFF: Processes all assemblies, regardless of revision.
NOTE: If an assembly (e.g., B1000, Rev 0) was incorrectly exported (e.g., missing parts in IFC), and the detailer corrects the IFC without changing the revision, the Processing Filter set to ON will skip it. To ensure reprocessing with the corrected file, turn the Processing Filter OFF before uploading.
Do not close your tab until the processing bar is complete. If the progress bar is not displayed, check that the Project Name is entered correctly and all fields are filled in.

Once uploaded, you will be automatically redirected to Monitor feature to track the project.
If there are any issues with the project, you will see yellow or red message describing the issue.
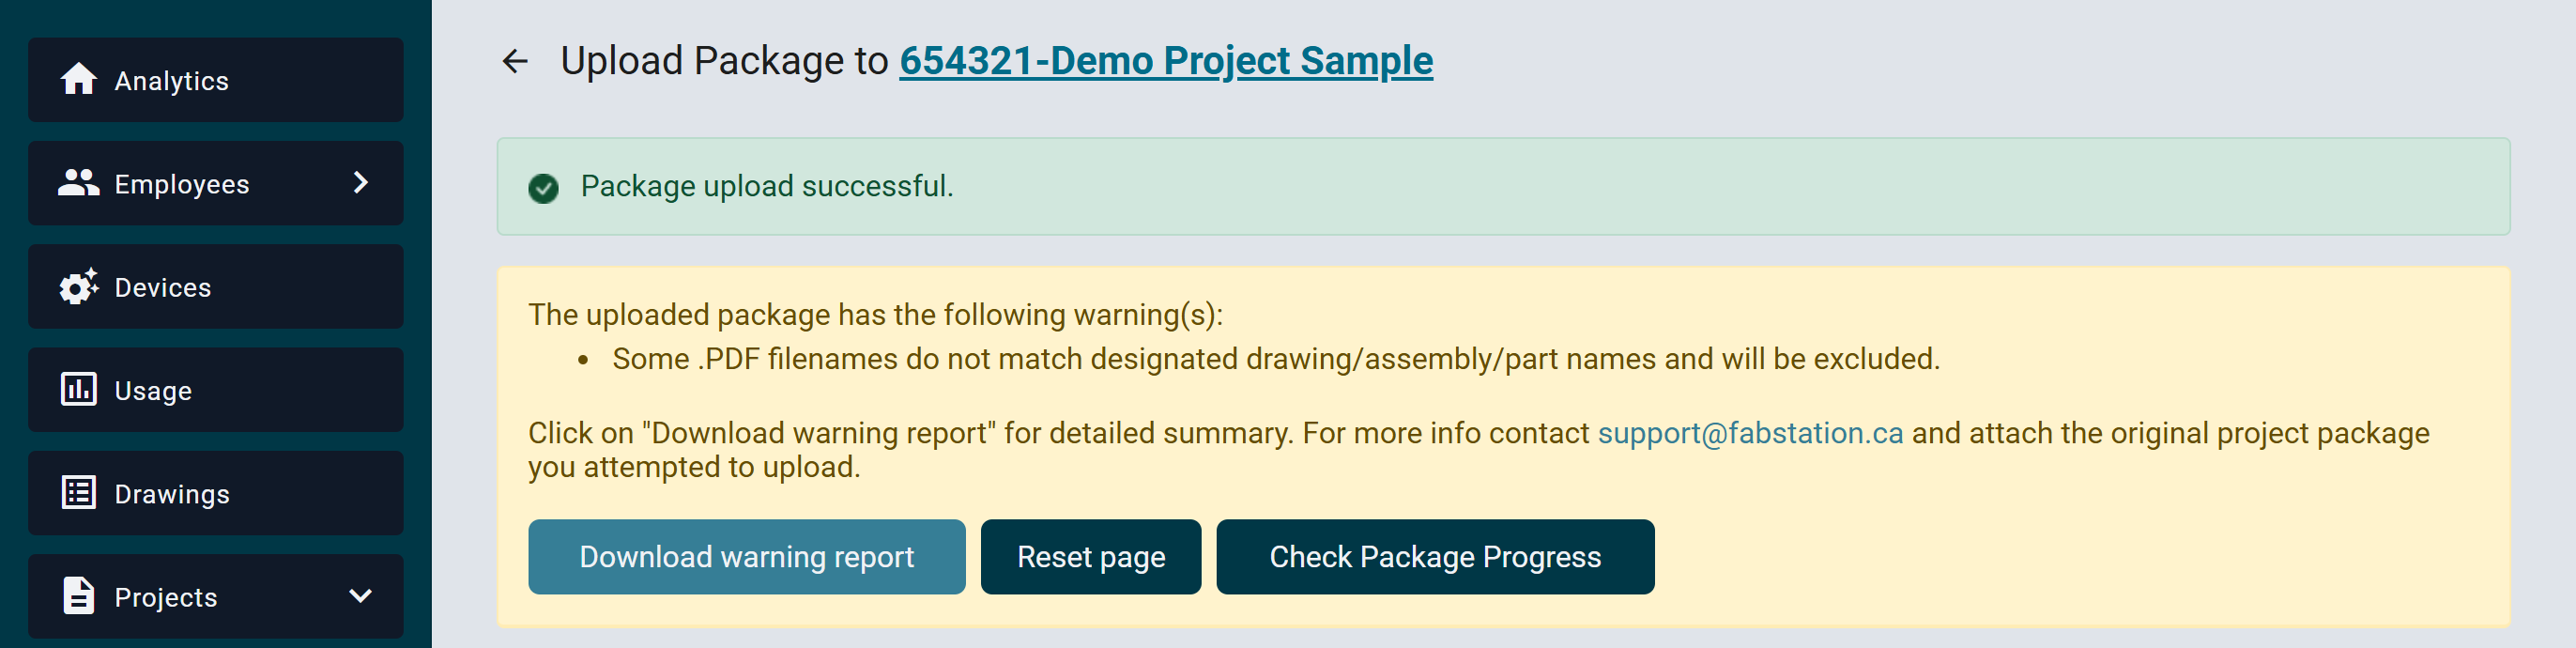

If you receive a yellow or red message, please proceed with this files upload troubleshooter.
Please note that if there is a warning (yellow message) it’s optional to resolve and the package will still be uploaded and processesed.
Editing Projects and Adding Files
Uploading Additional Files
If needed, you can upload additional files or revisions to a project you’ve already created. Go to Projects > All Projects, search for the project you want to upload files to, and select ‘Upload Files‘. Upload ZIP files the same way as above.

Editing a Project Name
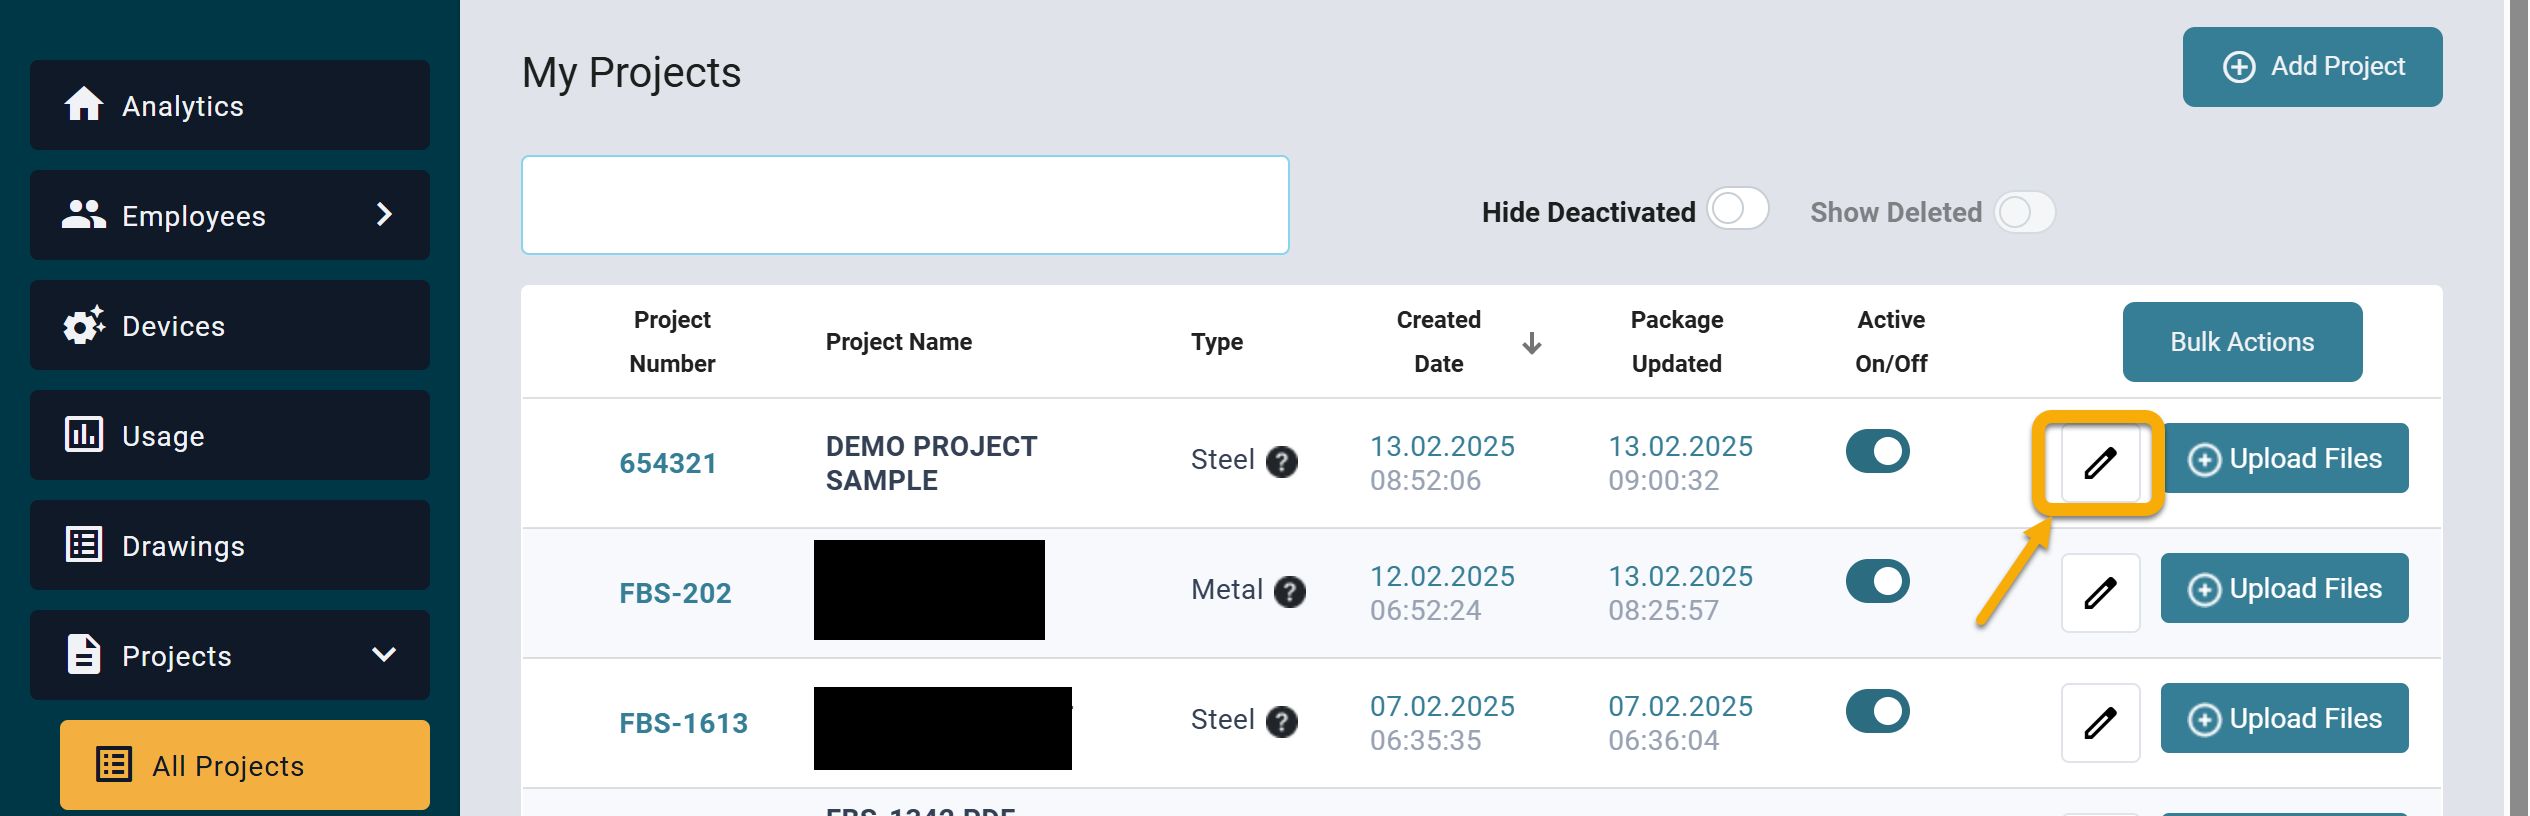
To edit the Project Number, Project Name, Project Type, or Project Description, click the pencil icon under Projects > All Projects.
Deactivating Projects from the FabStation App
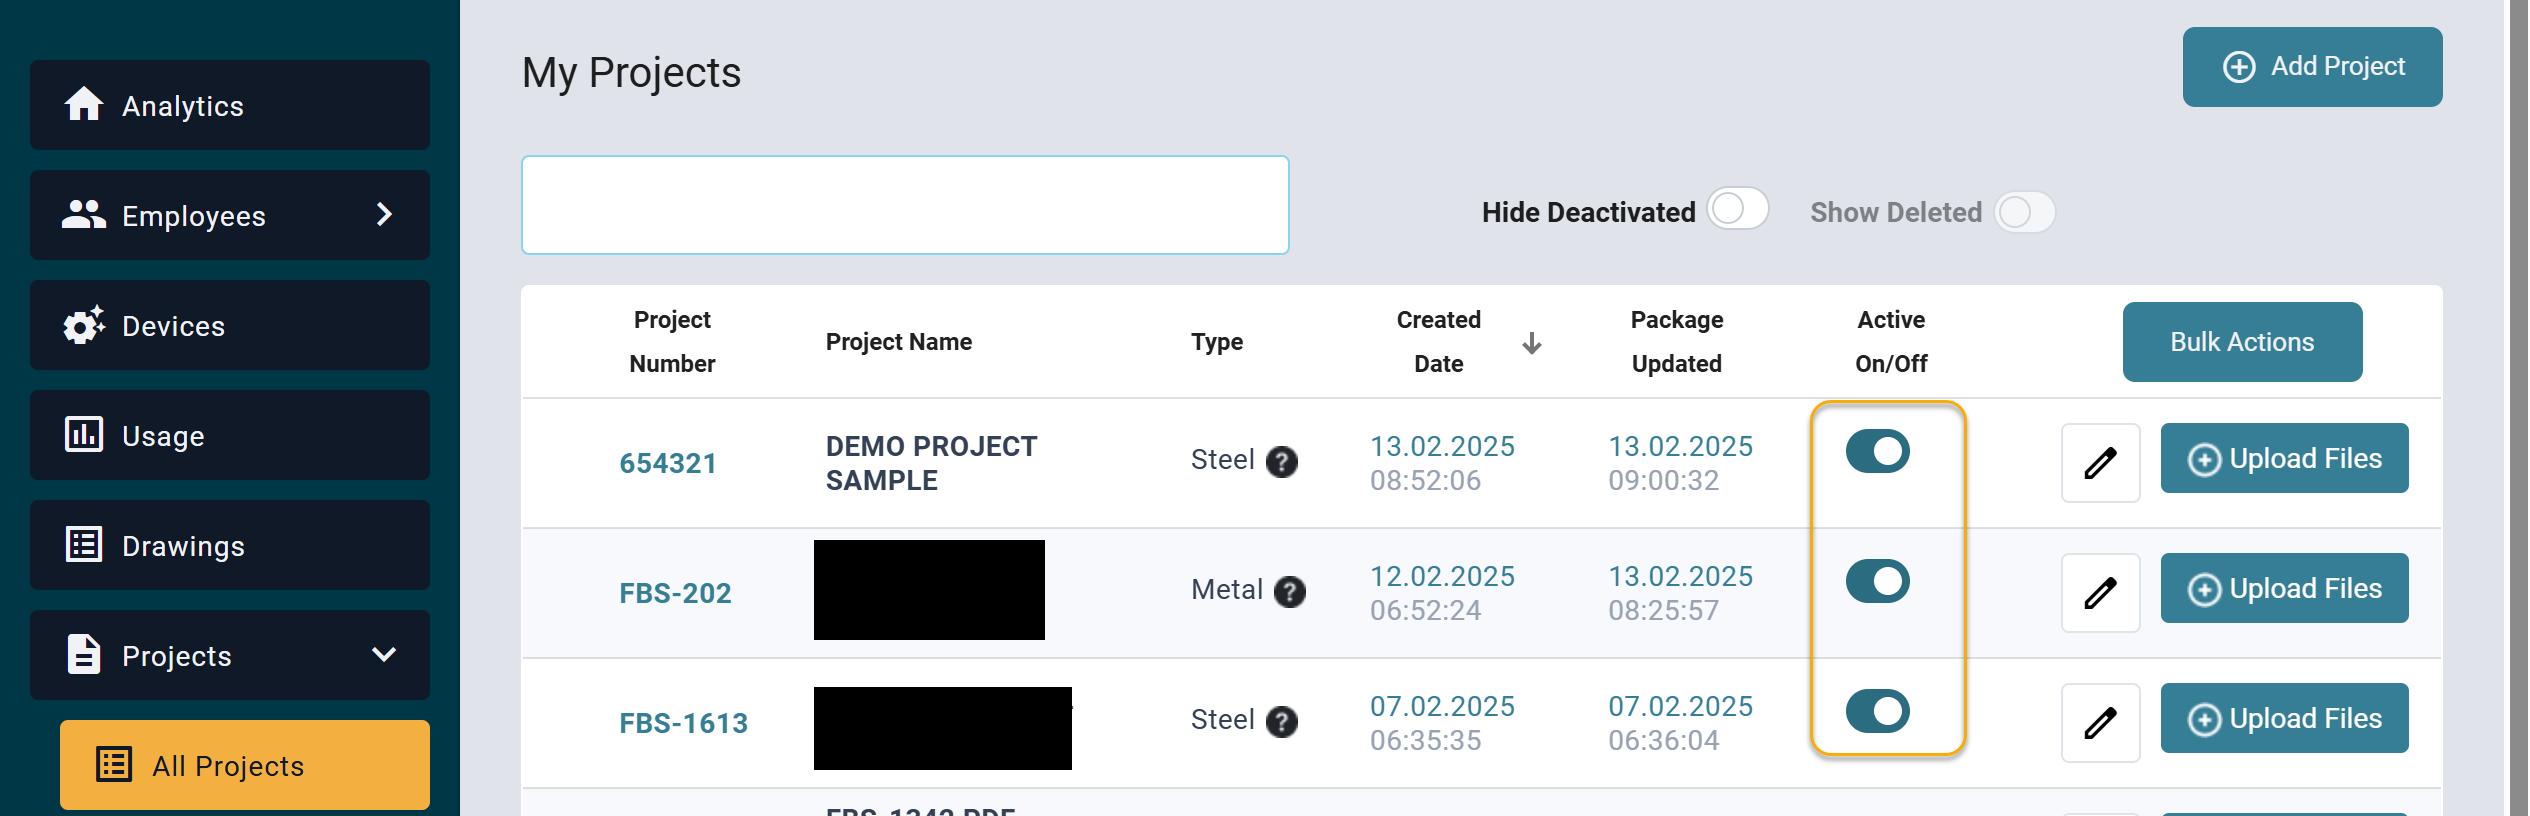
If you no longer want a project to be visible on the FabStation app, you can use the Active On/Off toggle to turn the project off in the app. This will not delete your data from the FabStation web portal
Uploading Project by Transmittal (Sequences) or with many KSS files
Only one KSS file can be included within a ZIP archive to upload. If you have multiple KSS files within the same project, you need to either combine those KSS files into one, or separate other ZIP files according to the KSS files content, and upload those ZIPs separately into the project, one by one.
If your project contains many sequences and you’re uploading a different times to FabStation, it’s recommended to upload the entire project (or the full part you need within the FabStation) at once. Each time you upload a new part of the project, the program will sync with the previously uploaded files.
While it is still possible to upload many sequences separately, it will take longer than uploading the whole project at once.
In the future, you can upload a sequence or revision separately to the same project, but it must include a KSS file.
If your project contains multiple KSS files, each created for different assemblies (not related to sequences), follow these steps:
1. Ask your detailer to create a new KSS file that will contain all assemblies mentioned within the IFC file.
2. Delete multiple KSS files within the project, and add the one with all assemblies in it.
3. Upload this project (ZIP file) within FabStation website, as per instructions above.

Package Processing and Tracking
Processing a file package is a separate operation from uploading; it begins once the package has been successfully uploaded.
Once the file upload is complete, you can use the Monitor> Package(s) in progress feature to track its progress.
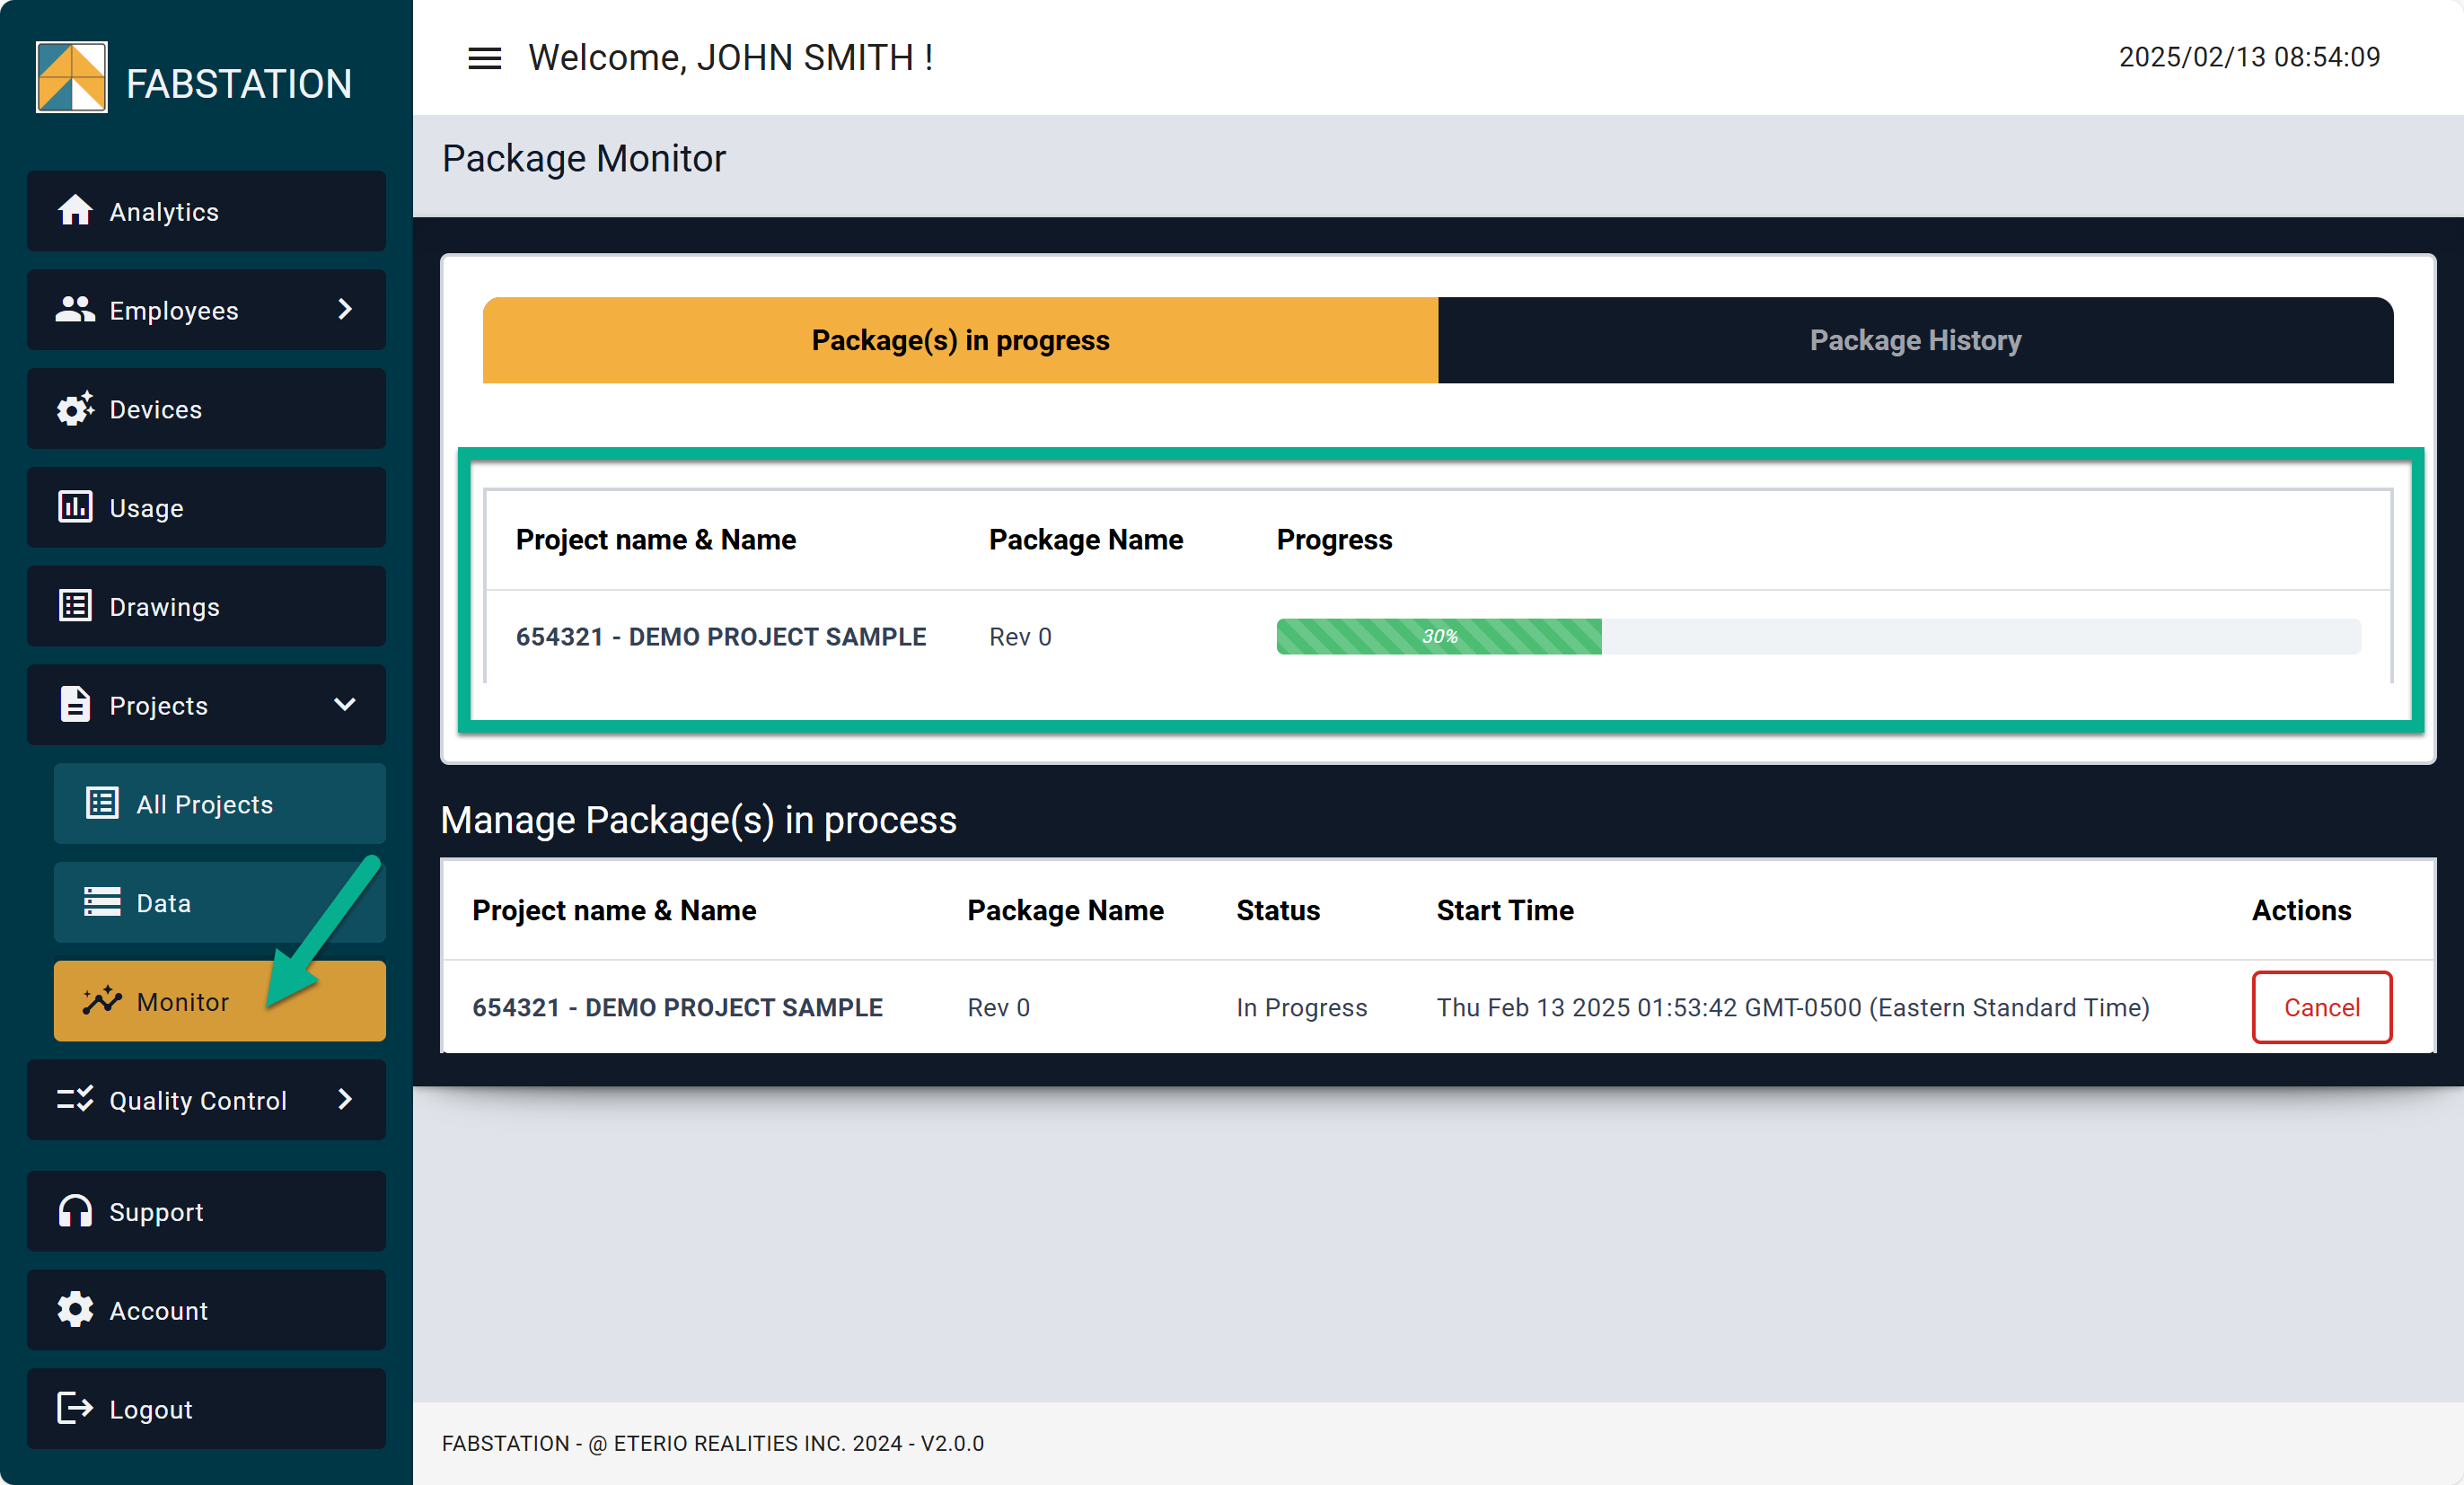
Additionally, you’ll have the option to cancel the package processing if it was uploaded by mistake or for any other reason.
If you no longer see your package under the ‘Package in Progress’ tab, you can check the status of all packages by going to the Monitor > Package History
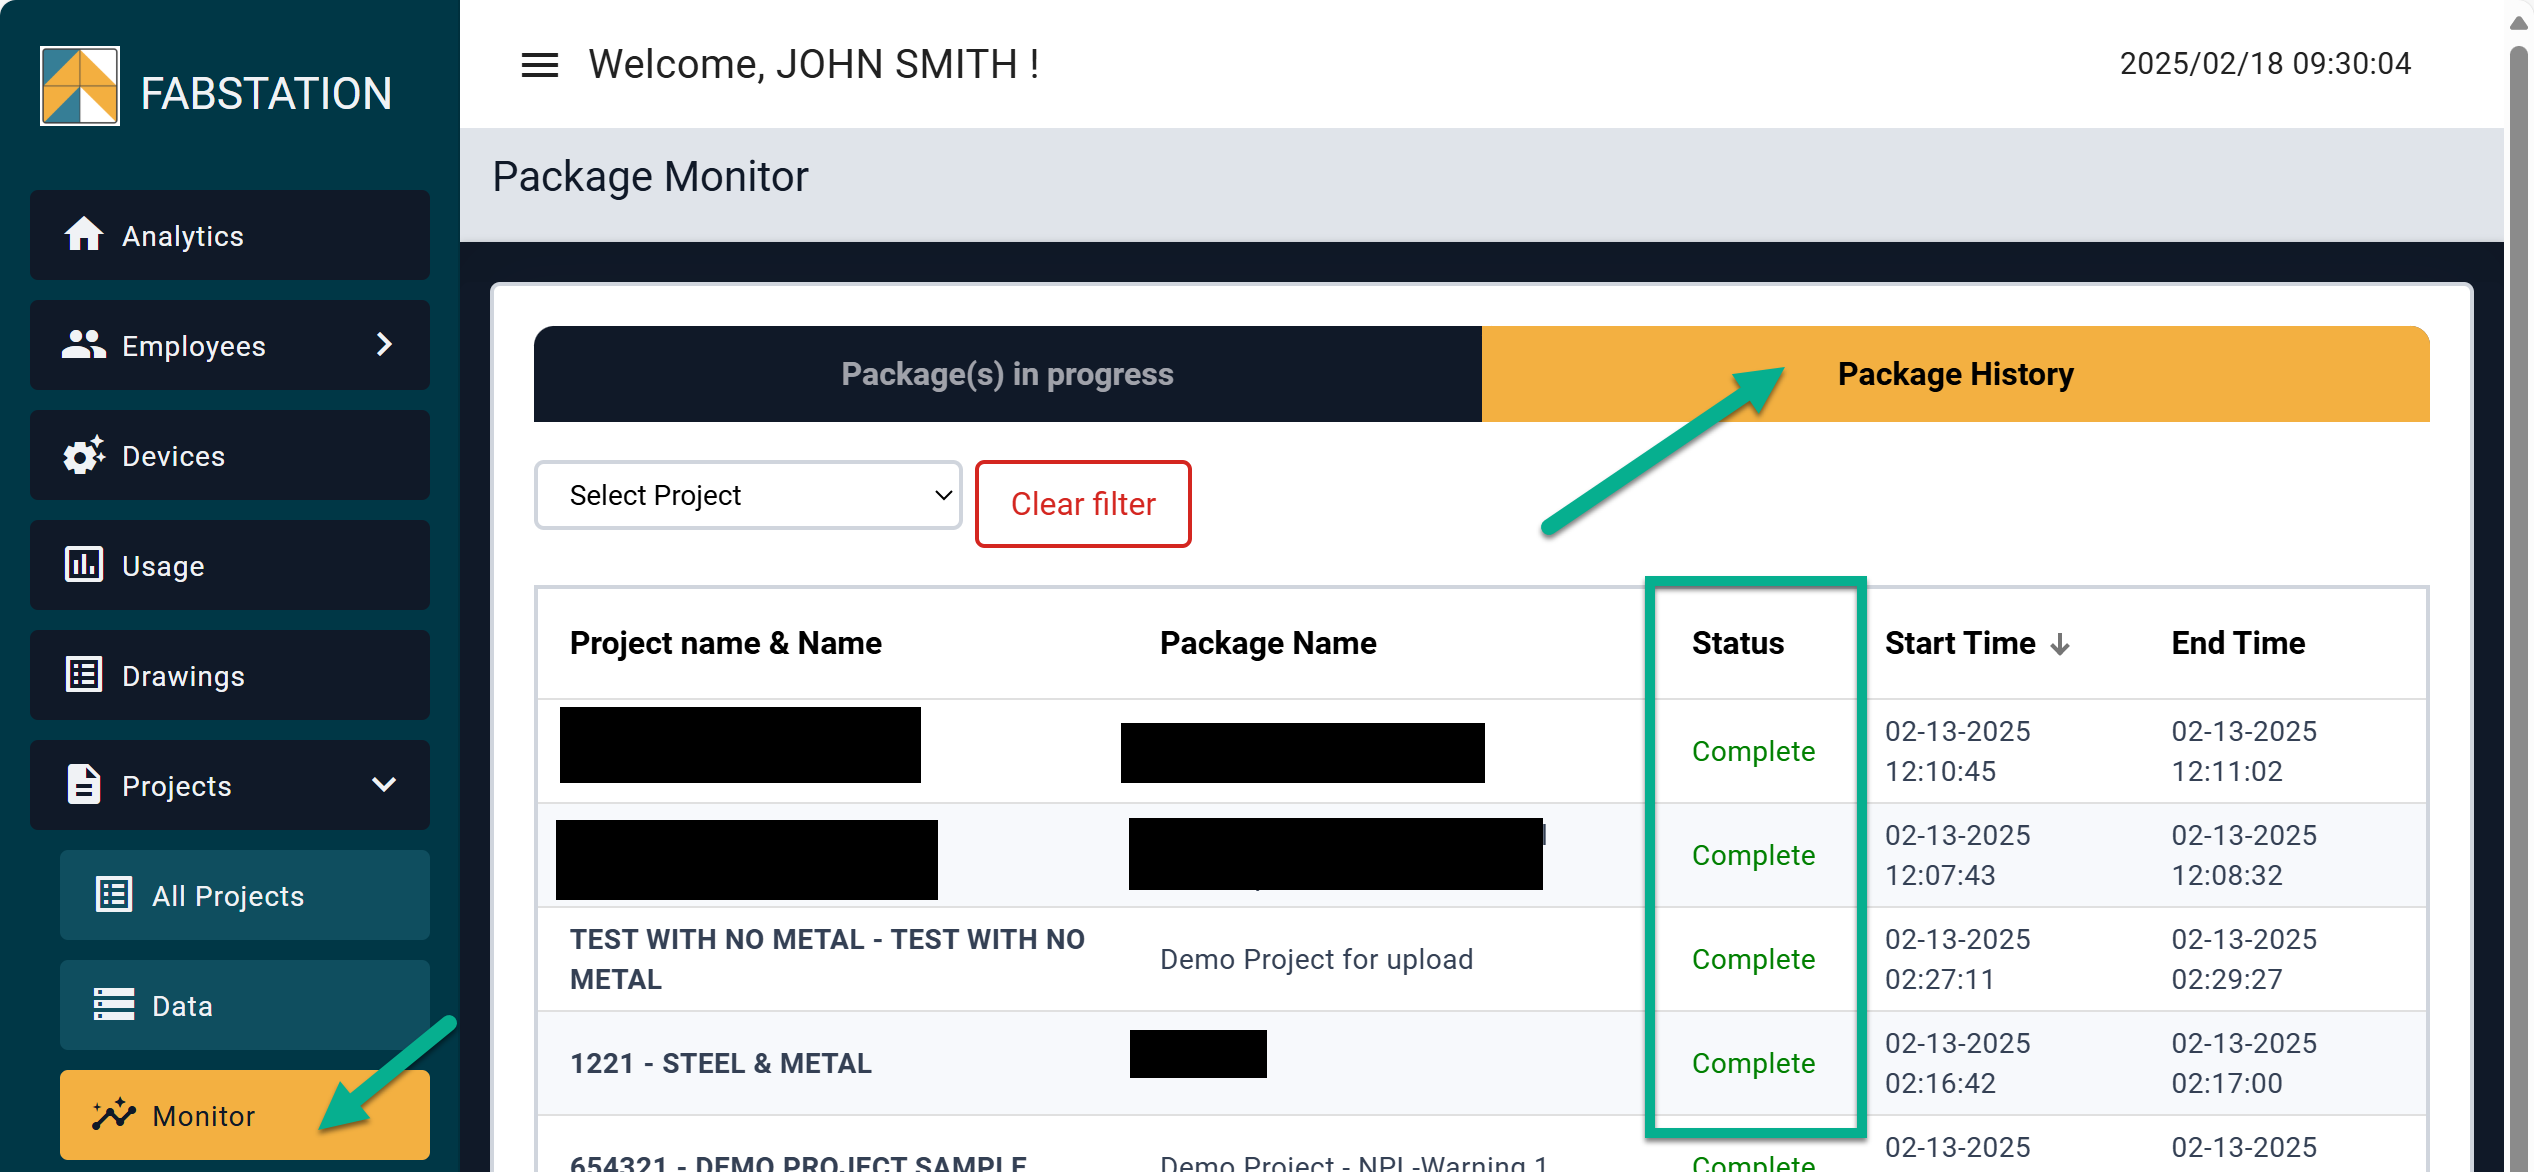
There are different statuses available:
- In Progress – The package is being processes, and you can see its progress in “Package in progress” tab.
- Complete – The package has been successfully processed. You can now sync the FabStation App on your tablet and start using it.
- Failed – The package was not processed. Please contact us for more information without re-uploading the package.
- Cancelled – The package was manually cancelled by you and will not be processed.
Note: Until the package is processed, the assemblies may not appear correctly within the FabStation App. Processing may take up to 24 hours, depending on the file sizes. Smaller projects may become available in the App quickly, while larger projects might require additional time.
Once processing is complete, you’ll be able to use the project within the FabStation App.
Email Notifications
If you need to receive a notification that the files are processed and ready to use, make sure that you have an email address added within the Employees section on the FabStation Portal:
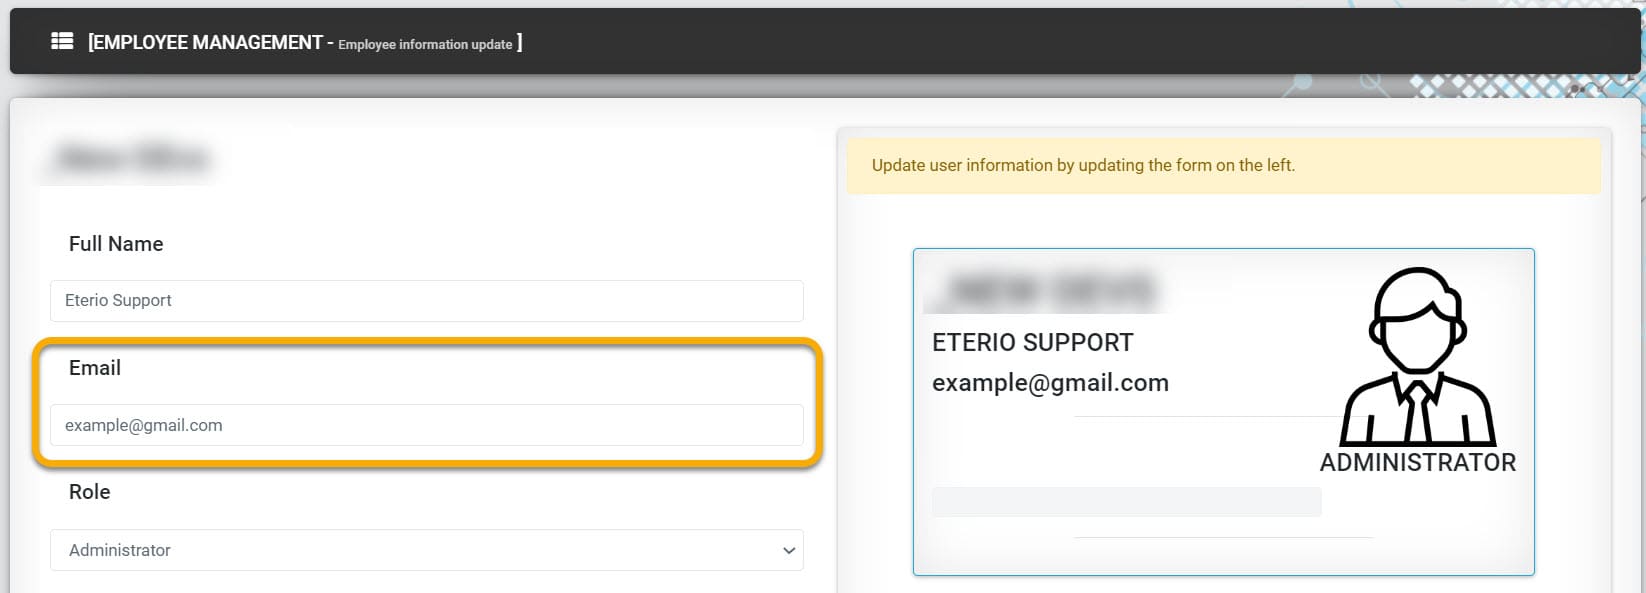
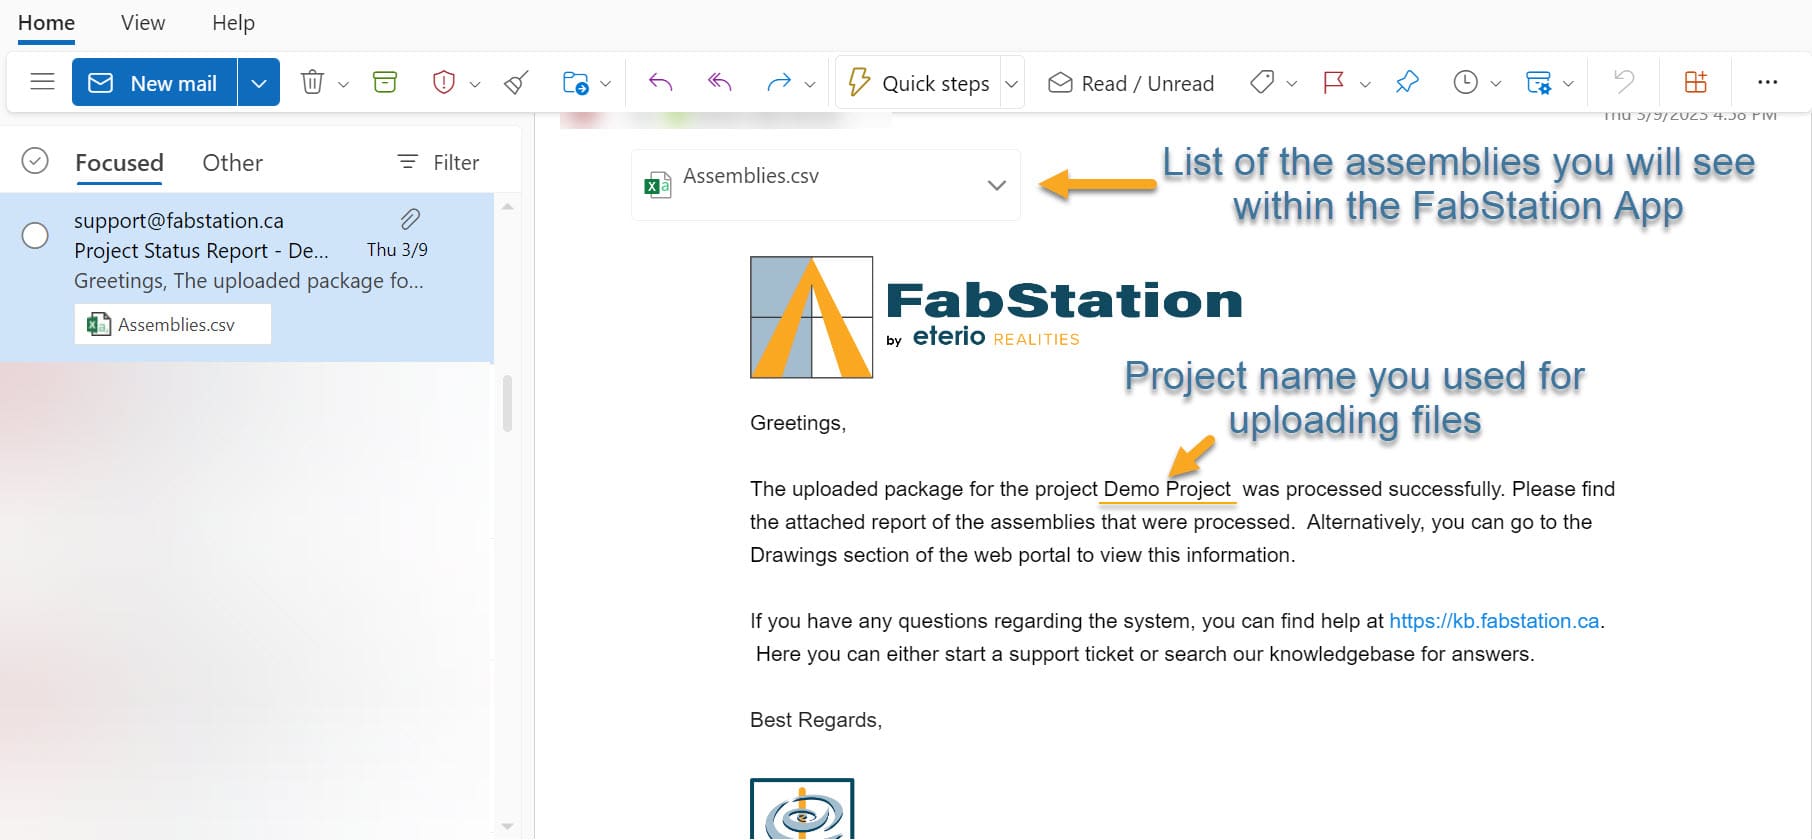
If the email address is added, you will receive the following email after the files are processed:
Click here to learn how to add email and manage employees within FabStation Webportal.
Tracking Package Specific Information
Using the Package History, you can also track any package-related information, such as transmittals, sequences uploaded, or other important details.
To do this, when you upload a package, include the relevant information in the Package Name (e.g., ‘Sequence 100’).
Go to the Monitor > Package History and use the dropdown filter to search for the project name. You can also type the project name directly, and it will appear at the top of the list.
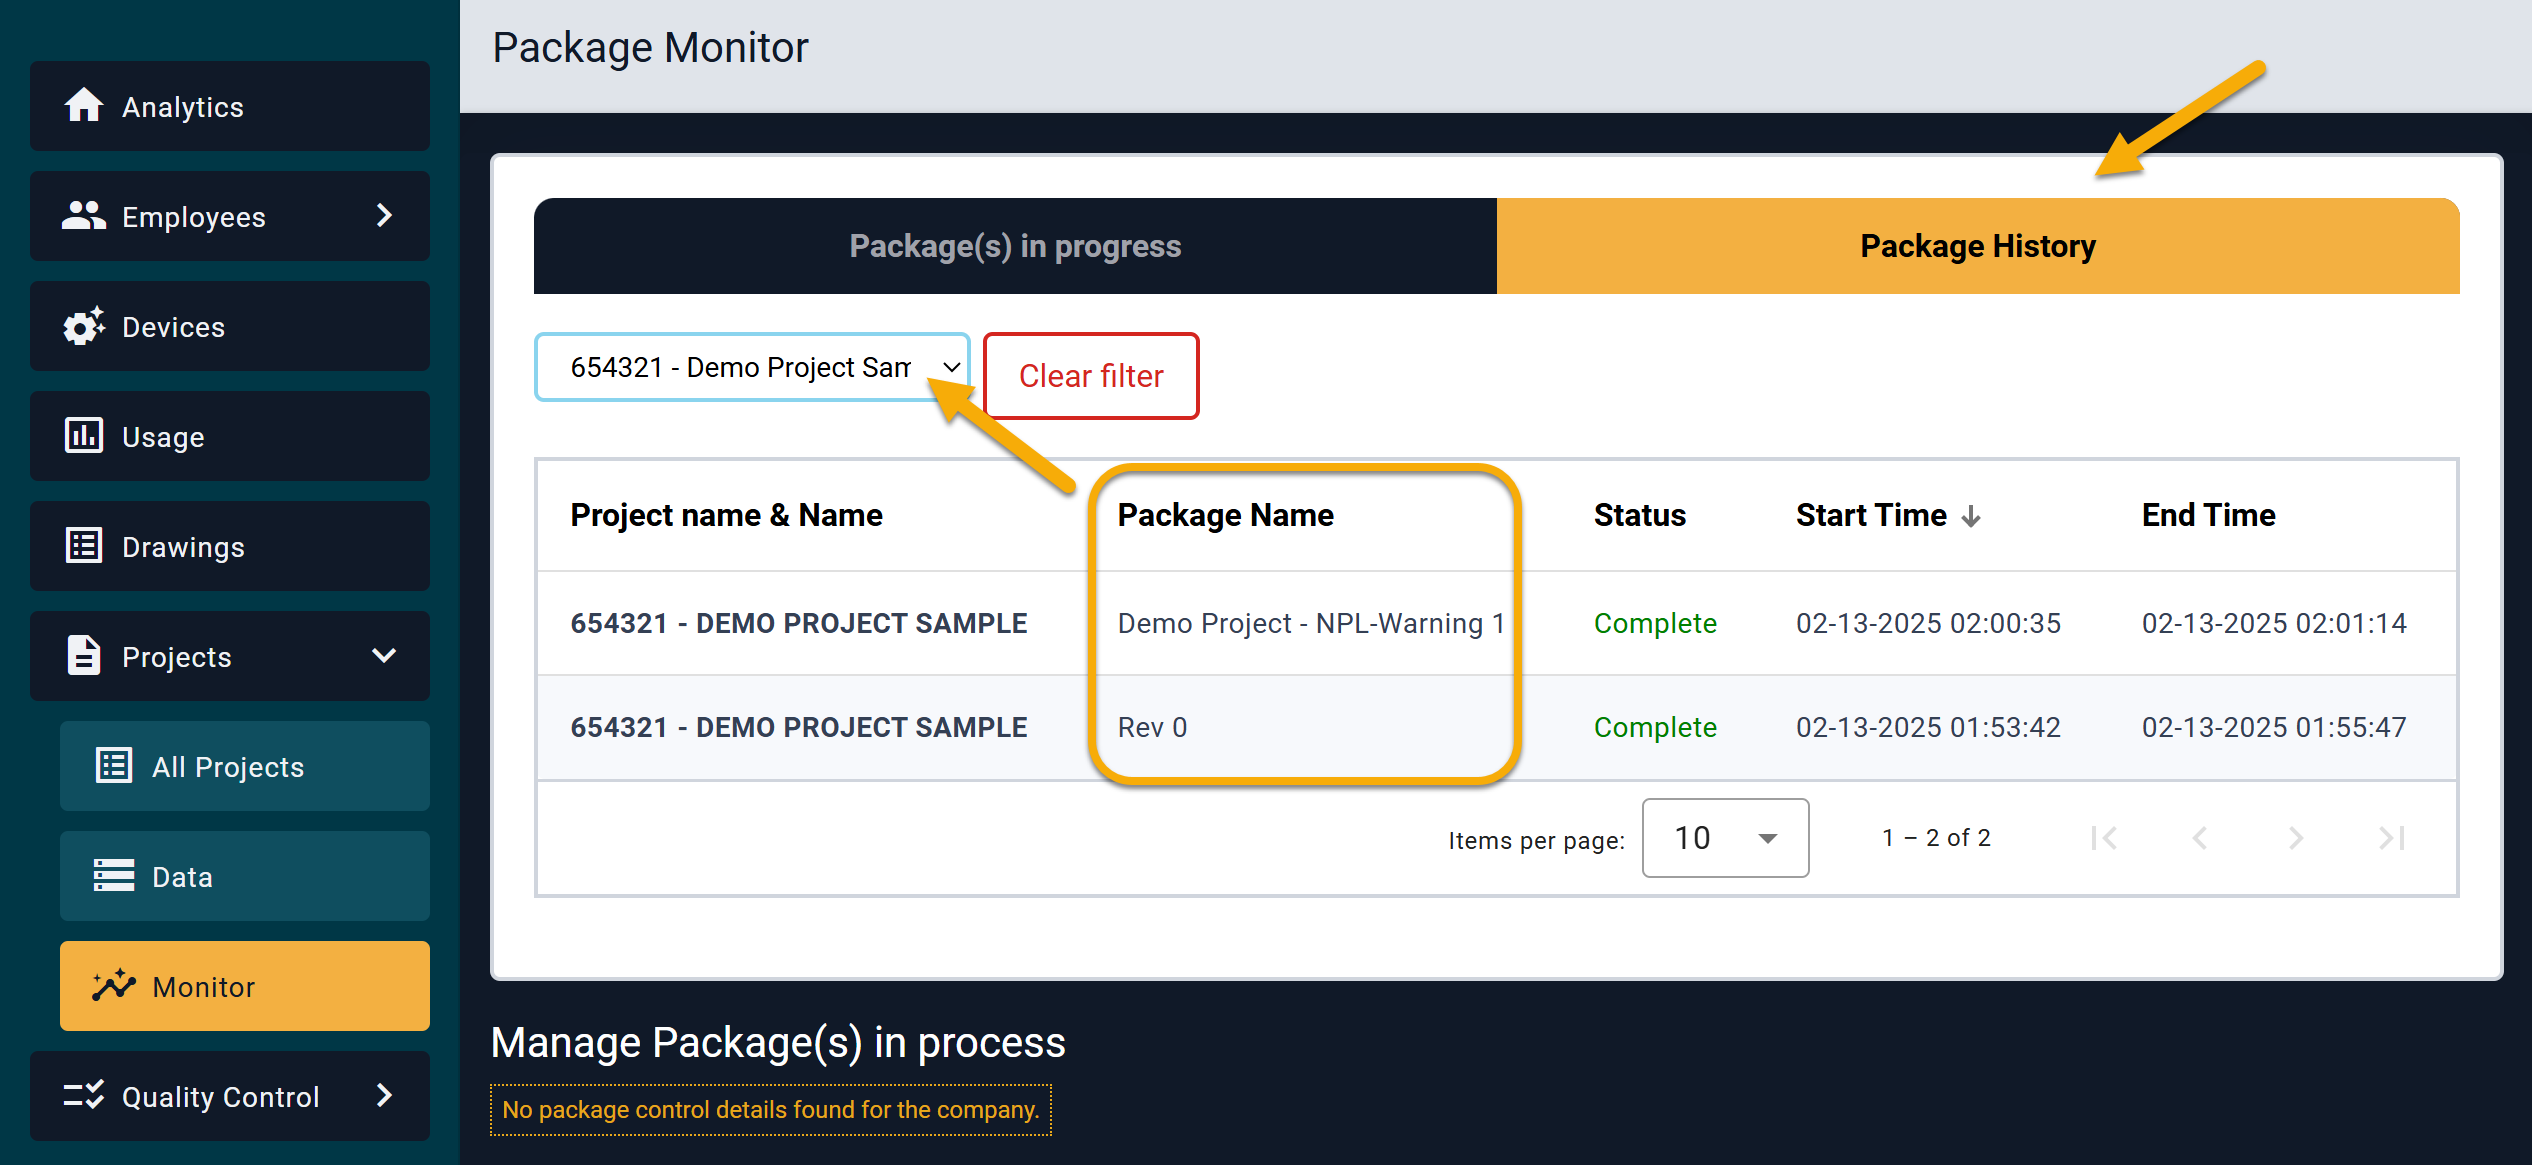
In this view, you’ll be able to see the packages uploaded for that project, along with the package name, status, and upload date.