Local Mode for Precise Tracking
As we work on tracking for both headset and tablet, we created 2 tracking versions that can help to improve tracking and maintain accuracy during inspection and layout within a limited area.
Local Mode is an advanced feature that requires practice and good understanding of the alignment process, as it overrides general alignment with separate local adjustments.
Please keep it OFF in app Settings unless you learn how to use it.
Improved Tracking
As we improved tracking, you will now see magnets (including QR code) visualized in AR mode during mapping:
Please note that there is no need to deliberately register them during mapping (registered magnet will have MARKER DETECTED on it) unless you want to:
- Use Local Mode
- Extend the Working area for the iPad Pro with Lidar to 30 feet / 10 meters.
For the 2nd option, there is no need to enable Local Mode – just register the magnets during mapping and proceed as usual.
V1 or V2?
There is no specific difference in v1 and v2, except that the v2 gives you an option to activate Local Mode, which will enable precise local tracking of a limited area related to an Active magnet.
You can change tracking version and enable/disable local mode in Settings > AR:
If you are still going through or haven’t done onboarding, we strongly recommend you to keep Local Mode disabled.
Local Mode
Local Mode will enable local adjustments in a 6 feel / 2 meter area around each Active magnet and will override the global alignment in this specific area.
When do I need it?
There are a couple of usecases where you may need this feature:
- Layout;
- Get submillimeter accuracy on iPad Pro in a specific area (cluster of parts, complex piece).
What if I want to do my standard alignment or overall check?
Easy. Nothing is changed in your workflow. Local Mode is just an additional feature for precise tracking in a limited area.
You can switch it off in app Settings > AR, and there is no need to register the magnets – you can still do mapping as usual and disregard the registration.
How is it different from my normal FabStation workflow?
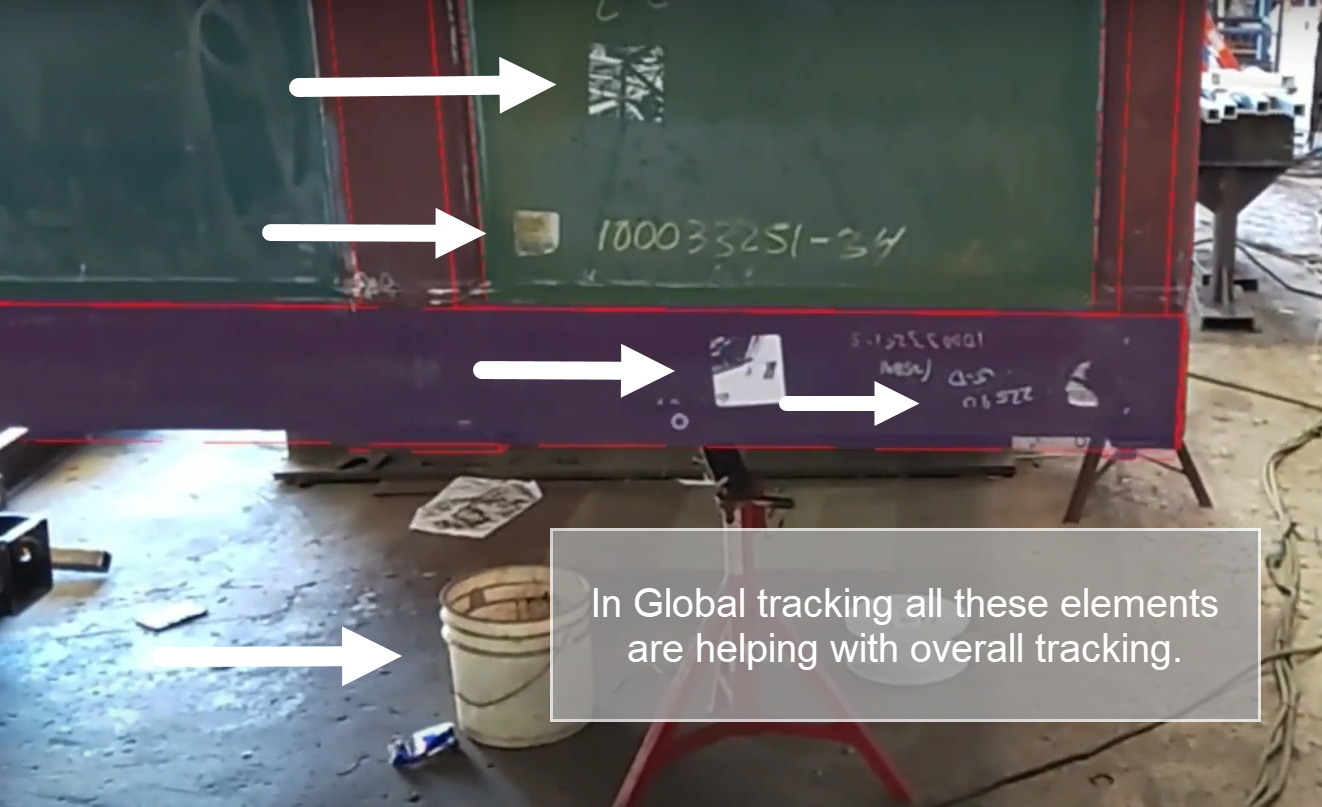
Normally, FabStation tracks an overall area that you map. We call it Global tracking.
In Global tracking, AF magnets are used just to create a feature rich area – and are working in the same way as chalkmarks or other parts of the environment that were standing out in the background.
In Local Mode we still keep Global tracking, however, you can override it with local adjustments/corrections, which will be based on the AF magnets that you set next to a plate/cluster of parts/point of interest where you want to achieve submillimeter accuracy.
Important: Each local correction is done separately for each Active magnet.
How Local Mode works
You need to be an expert in Advanced Alignment before trying Local Mode. Please click here to check advanced alignment guide. You can also get certified with us to confirm your skills. Contact support@fabstation.com for more details.
Local Mode doesn’t exclude standard alignment, and as it goes on top of it, there are a couple of additional steps that are required to make Local Mode work. It also works the same on the iPad Pro and HoloLens.
1. Preparations
1. Place magnets on assembly. Since now AF magnets can be registered and are taken as anchors, place some of them strategically on the points of interest, where you plan to achieve high accuracy. Mind that QR code is also considered to be a magnet that can be Active.
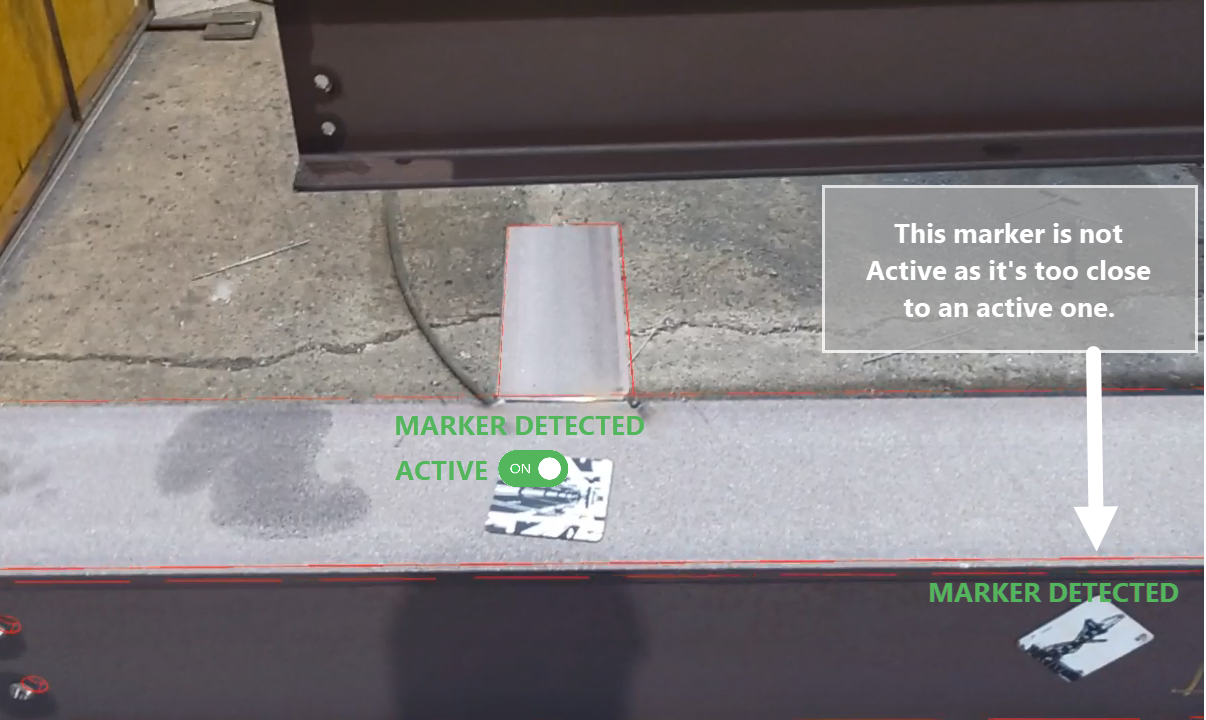
If the magnets are placed closer than 3 feet /1 meters, only one of them will be Active. And only Active magnets can be used for Local Mode adjustments.
NOTE: You can still place more magnets as you usually do, just to create a feature rich area and not for Local Mode registration. In case, make sure to first register magnets that you want Active.
2. Reference dimension. *Important*
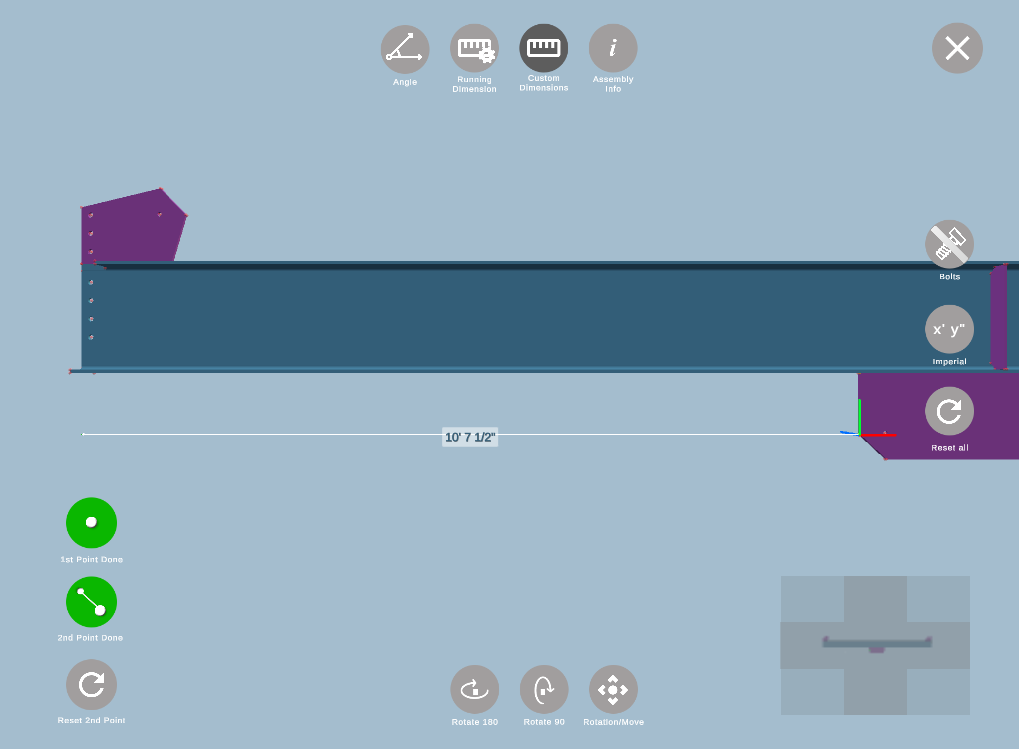
It is important to take a reference dimension, such as a running dimension, to the areas of interest that you wish to use the local mode on. This can be done while you measure the overall assembly length. Start by taking one reference dimension from the origin point to each point of interest.
You can use Tools > Custom Dimensions to get a 3D model measurement and then compare it with a measure taken on the actual model with a measure tape.
2. Mapping
As you are done with preparations:
- Locate assembly in the app.
- Open Auto-Fab/Fab-Assist
- Scan the QR code.
- Click on flashing button, “Start mapping”.
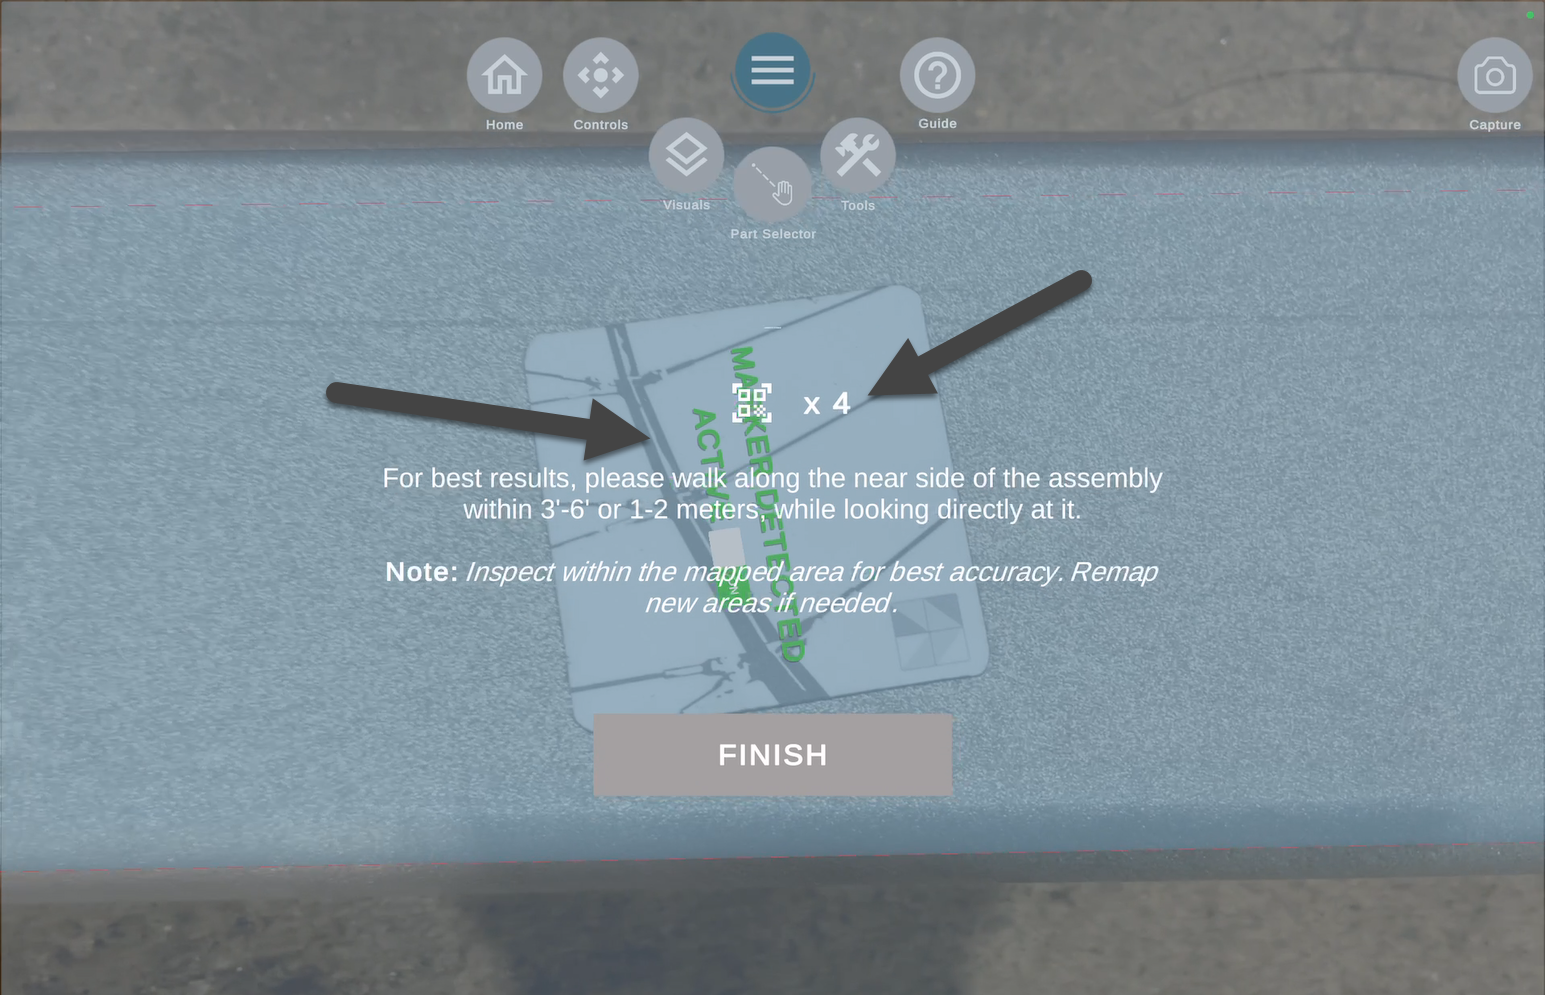
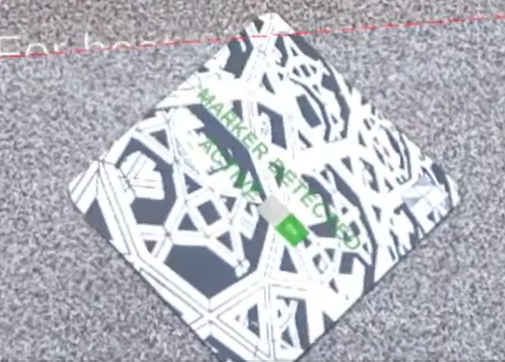
To register a magnet, look at it for around 3 seconds until you get a count on the tablet and see MARKER DETECTED over a magnet. If it’s Active, you will also see it as on the screenshot on the left:
As you go to the opposite side, only register the magnets that you want for the Local mode.
And as you go back to QR code, feel free to register the rest, but it’s not required.
Registering the rest of the magnets will help with the general tracking in iPad Pro with Lidar, increasing the working area to 30 feet/10 meters.
But even without registration they will be a part of the rich environment, and you already have 30 feet/10 meters working area using the HoloLens.
3. Alignment and Local Mode corrections
1. General alignment. Once magnets are registered, do your standard general alignment. Make sure you get roll, pitch, yaw and scale right as you will not be able to use them during Local Mode.
Keep Local Mode Passive to prevent activation before you are ready to do local adjustments.
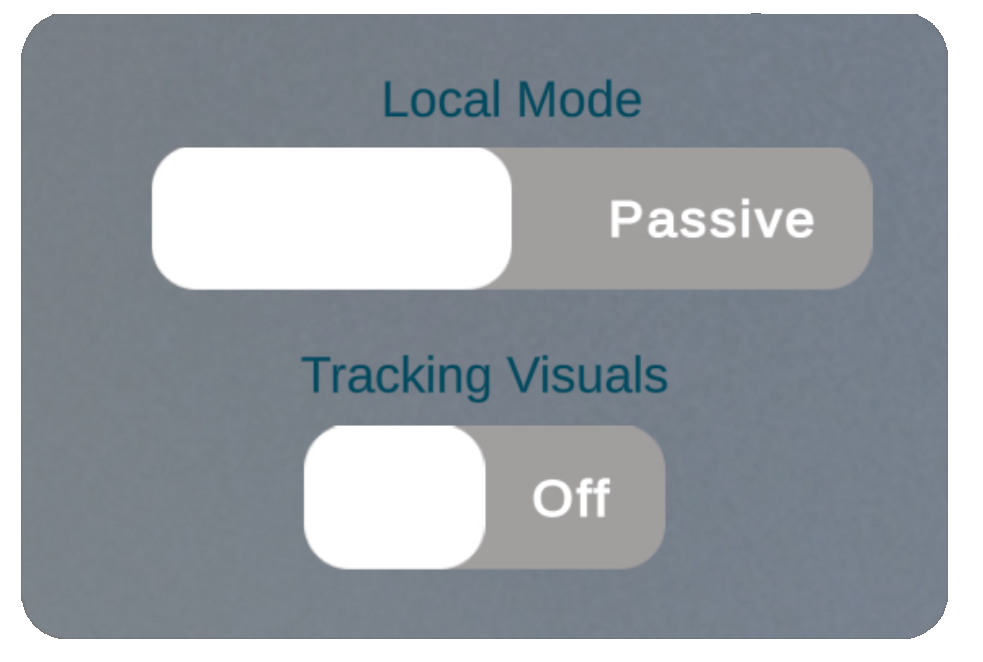
2. Once you are done with general alignment, turn on Local Mode. Tracking Visuals can also be turned on to remind you which AF magnets are active. From this moment, the positional changes (right hand controls) you are making in AF magnet area will be local and related to a specific magnet that is Active.
*Note* When adjusting position in the vicinity of the QR Target, the adjustments will still be global.
3. Go to an Active magnet where you want to achieve high precision. Use only Right-Hand controls to make your alignment more precise.
4. Once you are done with one interest area – move to another Active magnet.
You can perform inspection as you move between the Active area or at the end of all local corrections.
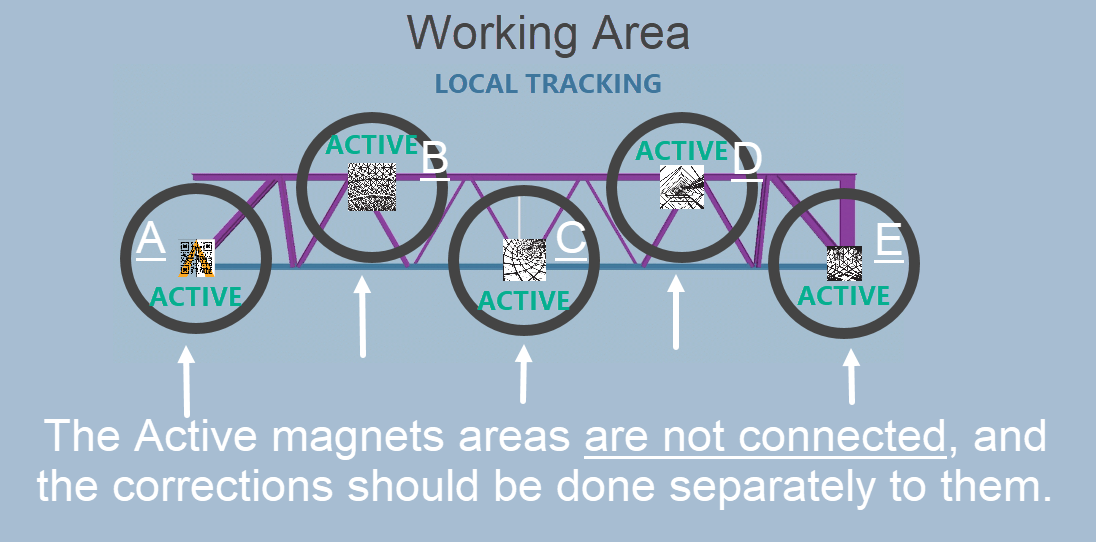
Active magnets areas are not connected. So, any actions done to area A, will not be affecting area B, C, D or E. Also, before you do Local correction, all areas have last global alignment change as default.
Typical Issues
- If you are trying to get submillimeter precision with Local Mode for one or two specific areas, there is no need to locally adjust/correct everything else. If Local adjustments are not applied to a specific ACTIVE magnet, it will retain the Global tracking alignment you have done initially.
- Do not use Left-Hand (rotational) controls during Local Mode, as they will be applied globally and move the position of the whole model. Only Right-Hand controls should be used for a Local Mode.
- Local Mode corrections only work when the Active magnet is in the view. So if you made adjustments on the flange and then switching to web and the magnet is not in the view, your alignment may snap back to Global tracking.
Layout (In progress. Contact us for all steps)
Layout is another use case possible to do with the Local mode since it enables high precision tracking.
Preparations
1. Establish areas of high accuracy.
2. When you verify the length of the material, check one reference dimension from the baseline as mentioned in the How Local Mode Works > Preparations above. As you check it, set the magnet, but make sure they are not on a way of the parts you will be laying out, as you cannot move the magnets afterwards.
Adjust position only, not rotation.
Summary
- Local Mode doesn’t exclude standard alignment, and as it goes on top of it, there are a couple of additional steps that are required to make Local Mode work.
- Local areas are not connected, and should be corrected separately.
- There is no need to use Local Mode for every assembly and every area of an assembly, as the tool is designed to help with complex layout or inspection to precisely identity the location of a cluster of parts.
- You are required to check one reference dimension in the area, which is why the tool is effective when the area has complex structure or cluster of parts.