Managing Drawings (Data)
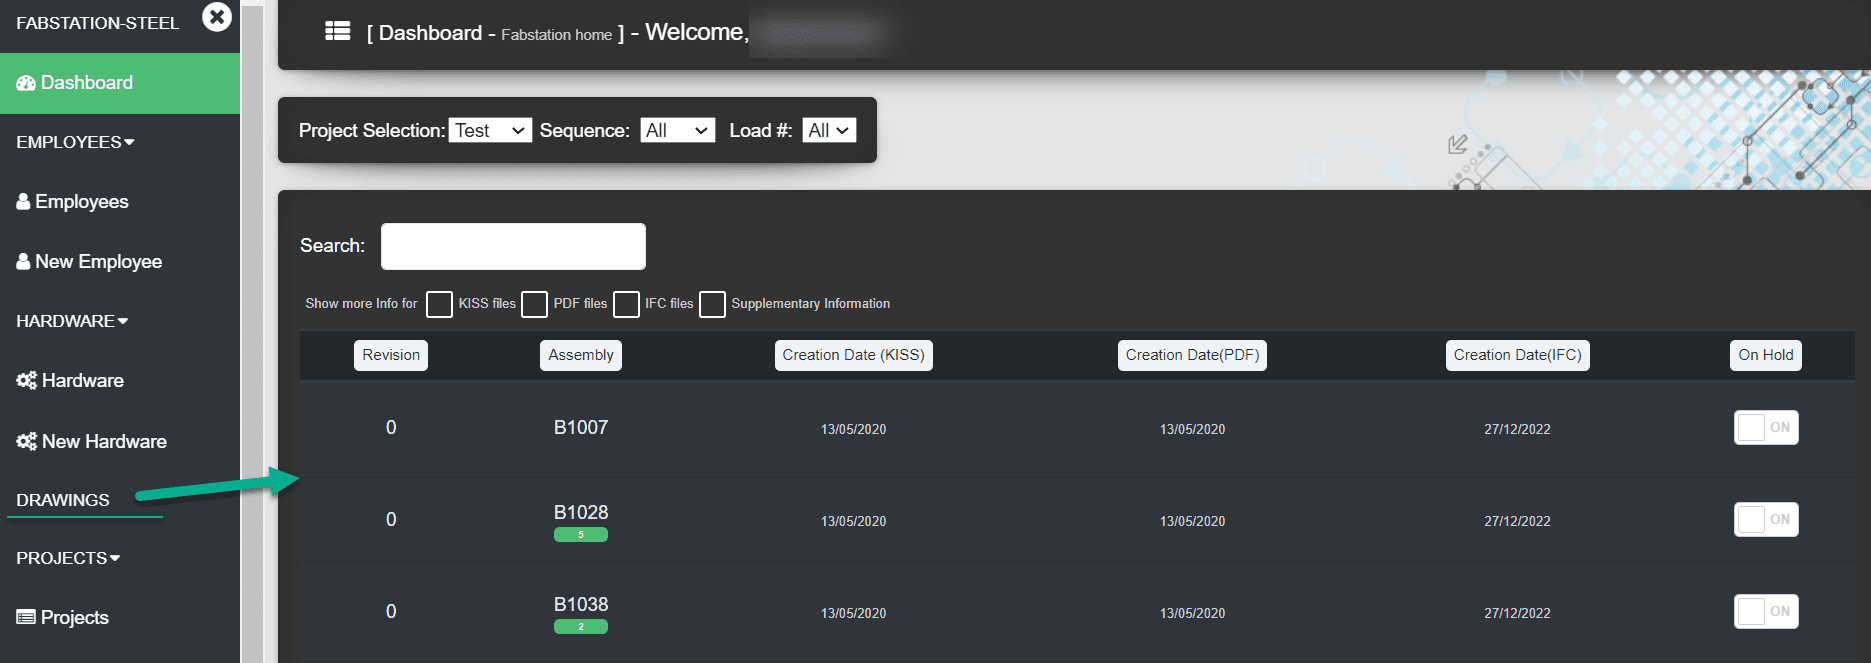
The drawings section of the FabStation portal allows the following actions:
- Viewing the drawings upload details for the project;
- Creating and deleting comments for other FabStation users;
- Place assemblies on hold.
- Viewing and adding Assets
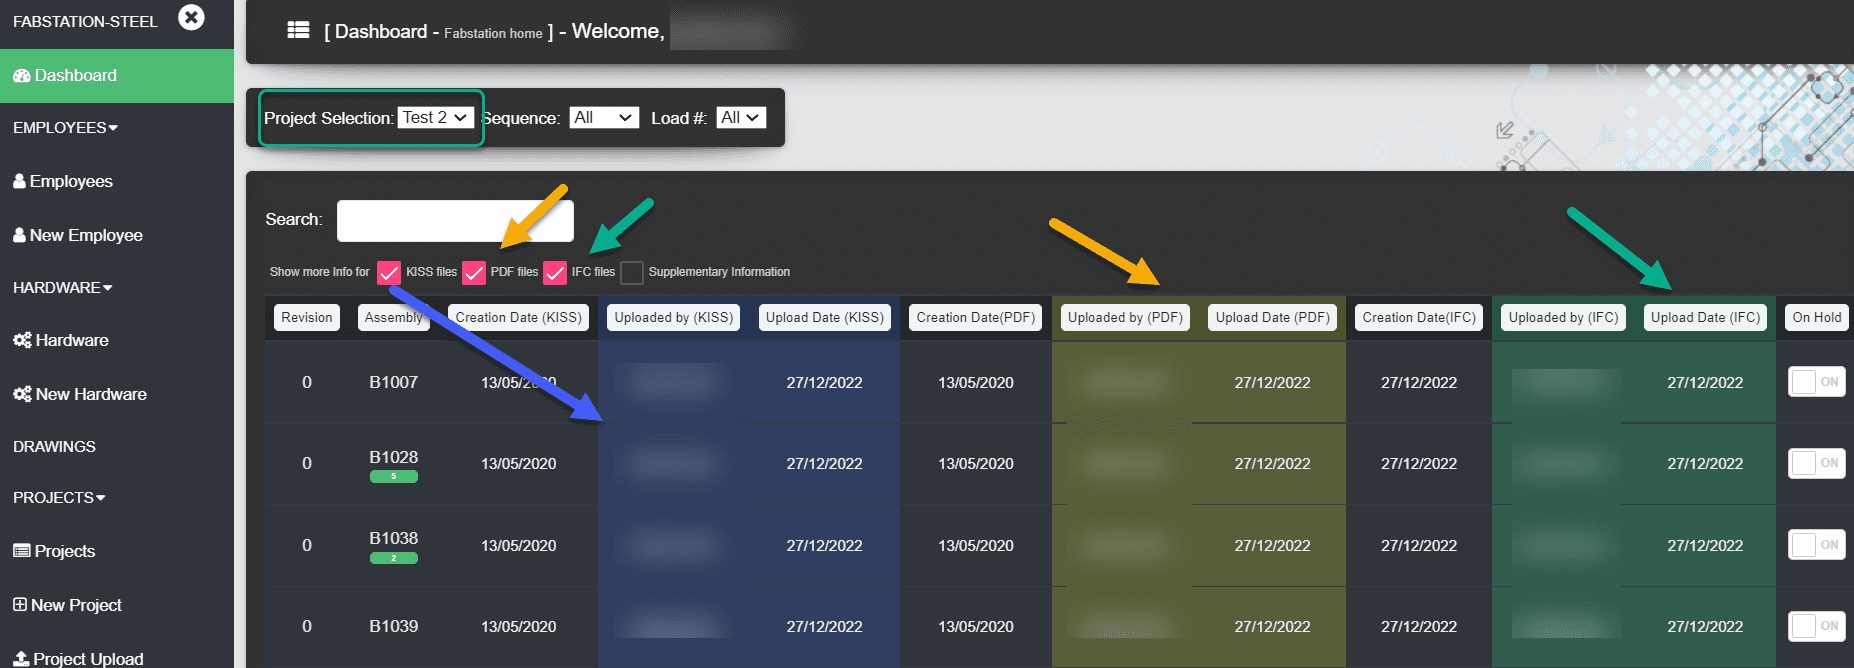
If the field is blank for a file type, check the project upload package to ensure the file was included in the package. Refer to Creating a ZIP for guidance on the upload package.
Creating and Deleting Assembly Comments
You can add a comment to an assembly to provide information to other Fabstation users.
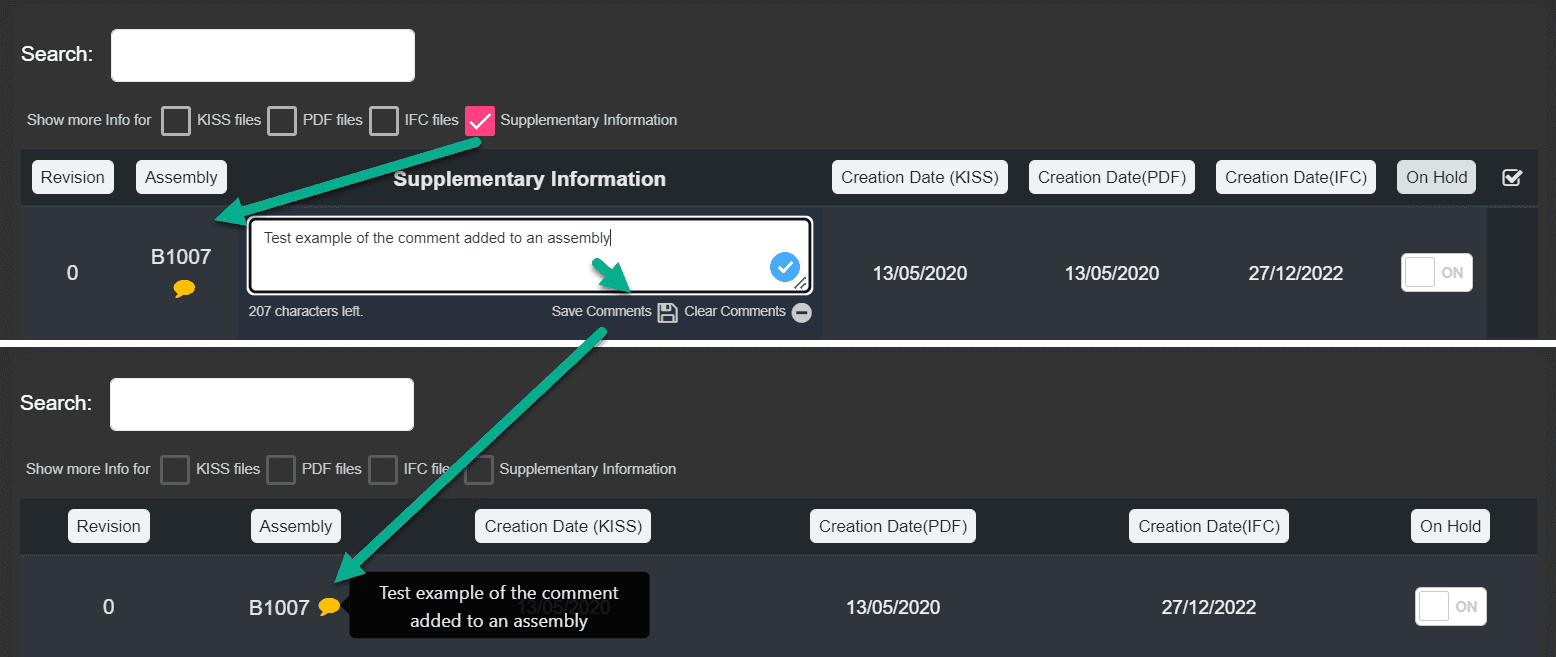
To create a comment:
- Click on “Suplementary information”;
- Type the message within the text area;
- Click on “Save comments”.
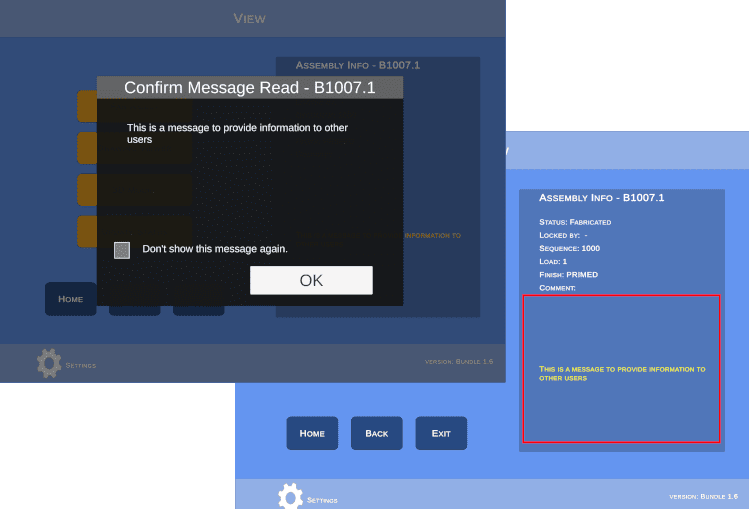
Once a comment is created, it will be displayed on the Web Portal within a message icon. You can hover over it to see the actual message. Additionally, the comment will be sent to the tablets as a pop-up and displayed on the Assembly Info area.
To remove a comment within the Drawings section on Web portal:
- Click on “Suplementary information”;
- Click the “Clear Comments” button.
Placing Assembly on Hold
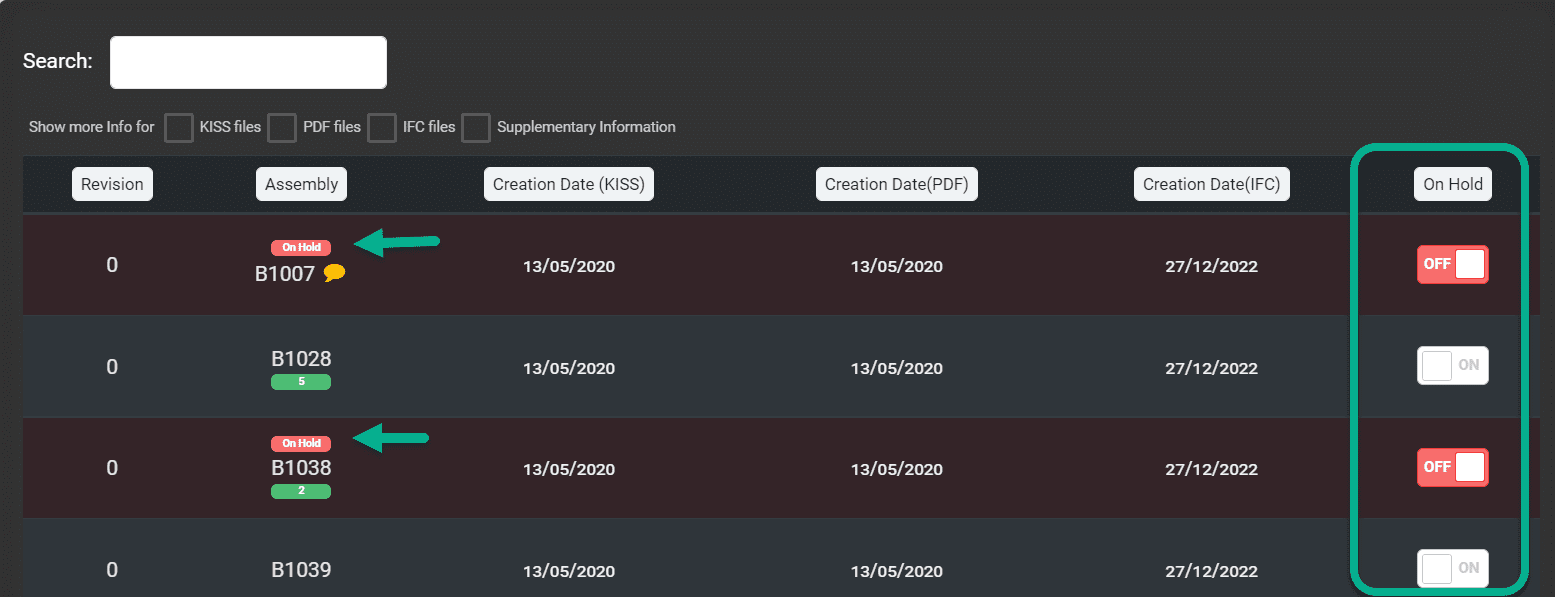
Assemblies can be placed on hold using the switch ![]() in the last column of the display.
in the last column of the display.
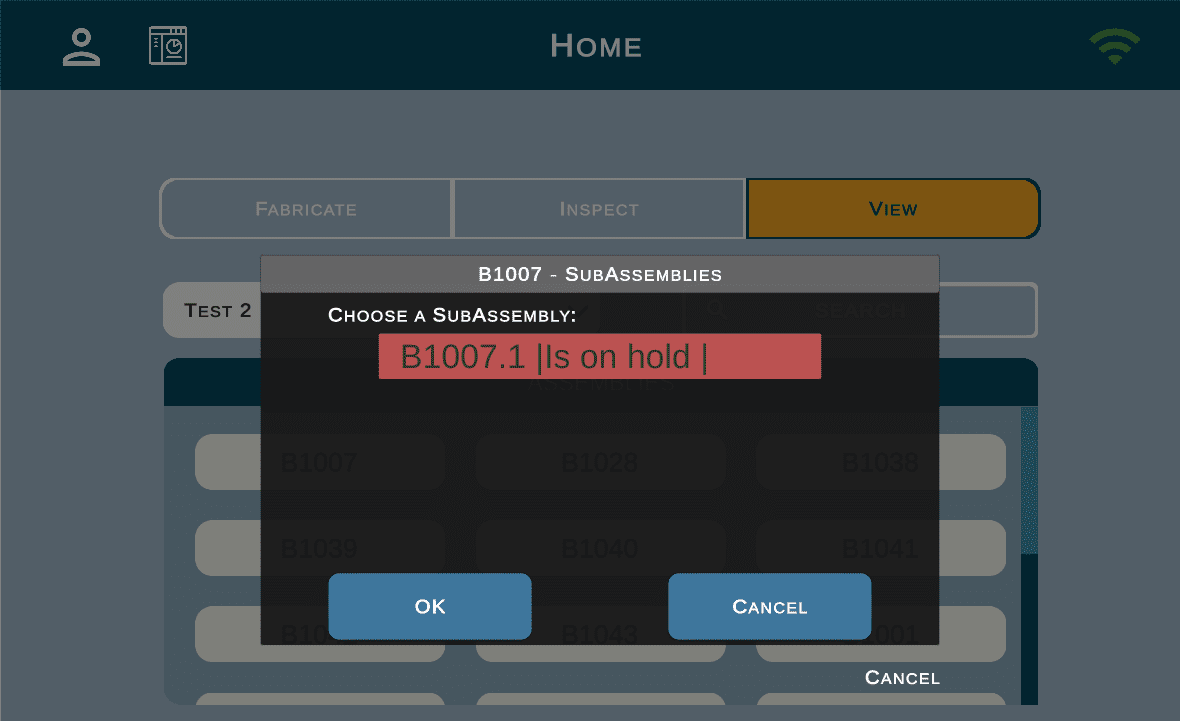
When an assembly is placed on hold, it will display as “Is on hold” on the user’s tablet. The Fabricate and Inspect paths are not available, and the user will only be able to view the assembly.
When placing an assembly on hold, it is good practice to add a comment describing the reason for the hold.
Viewing Assets
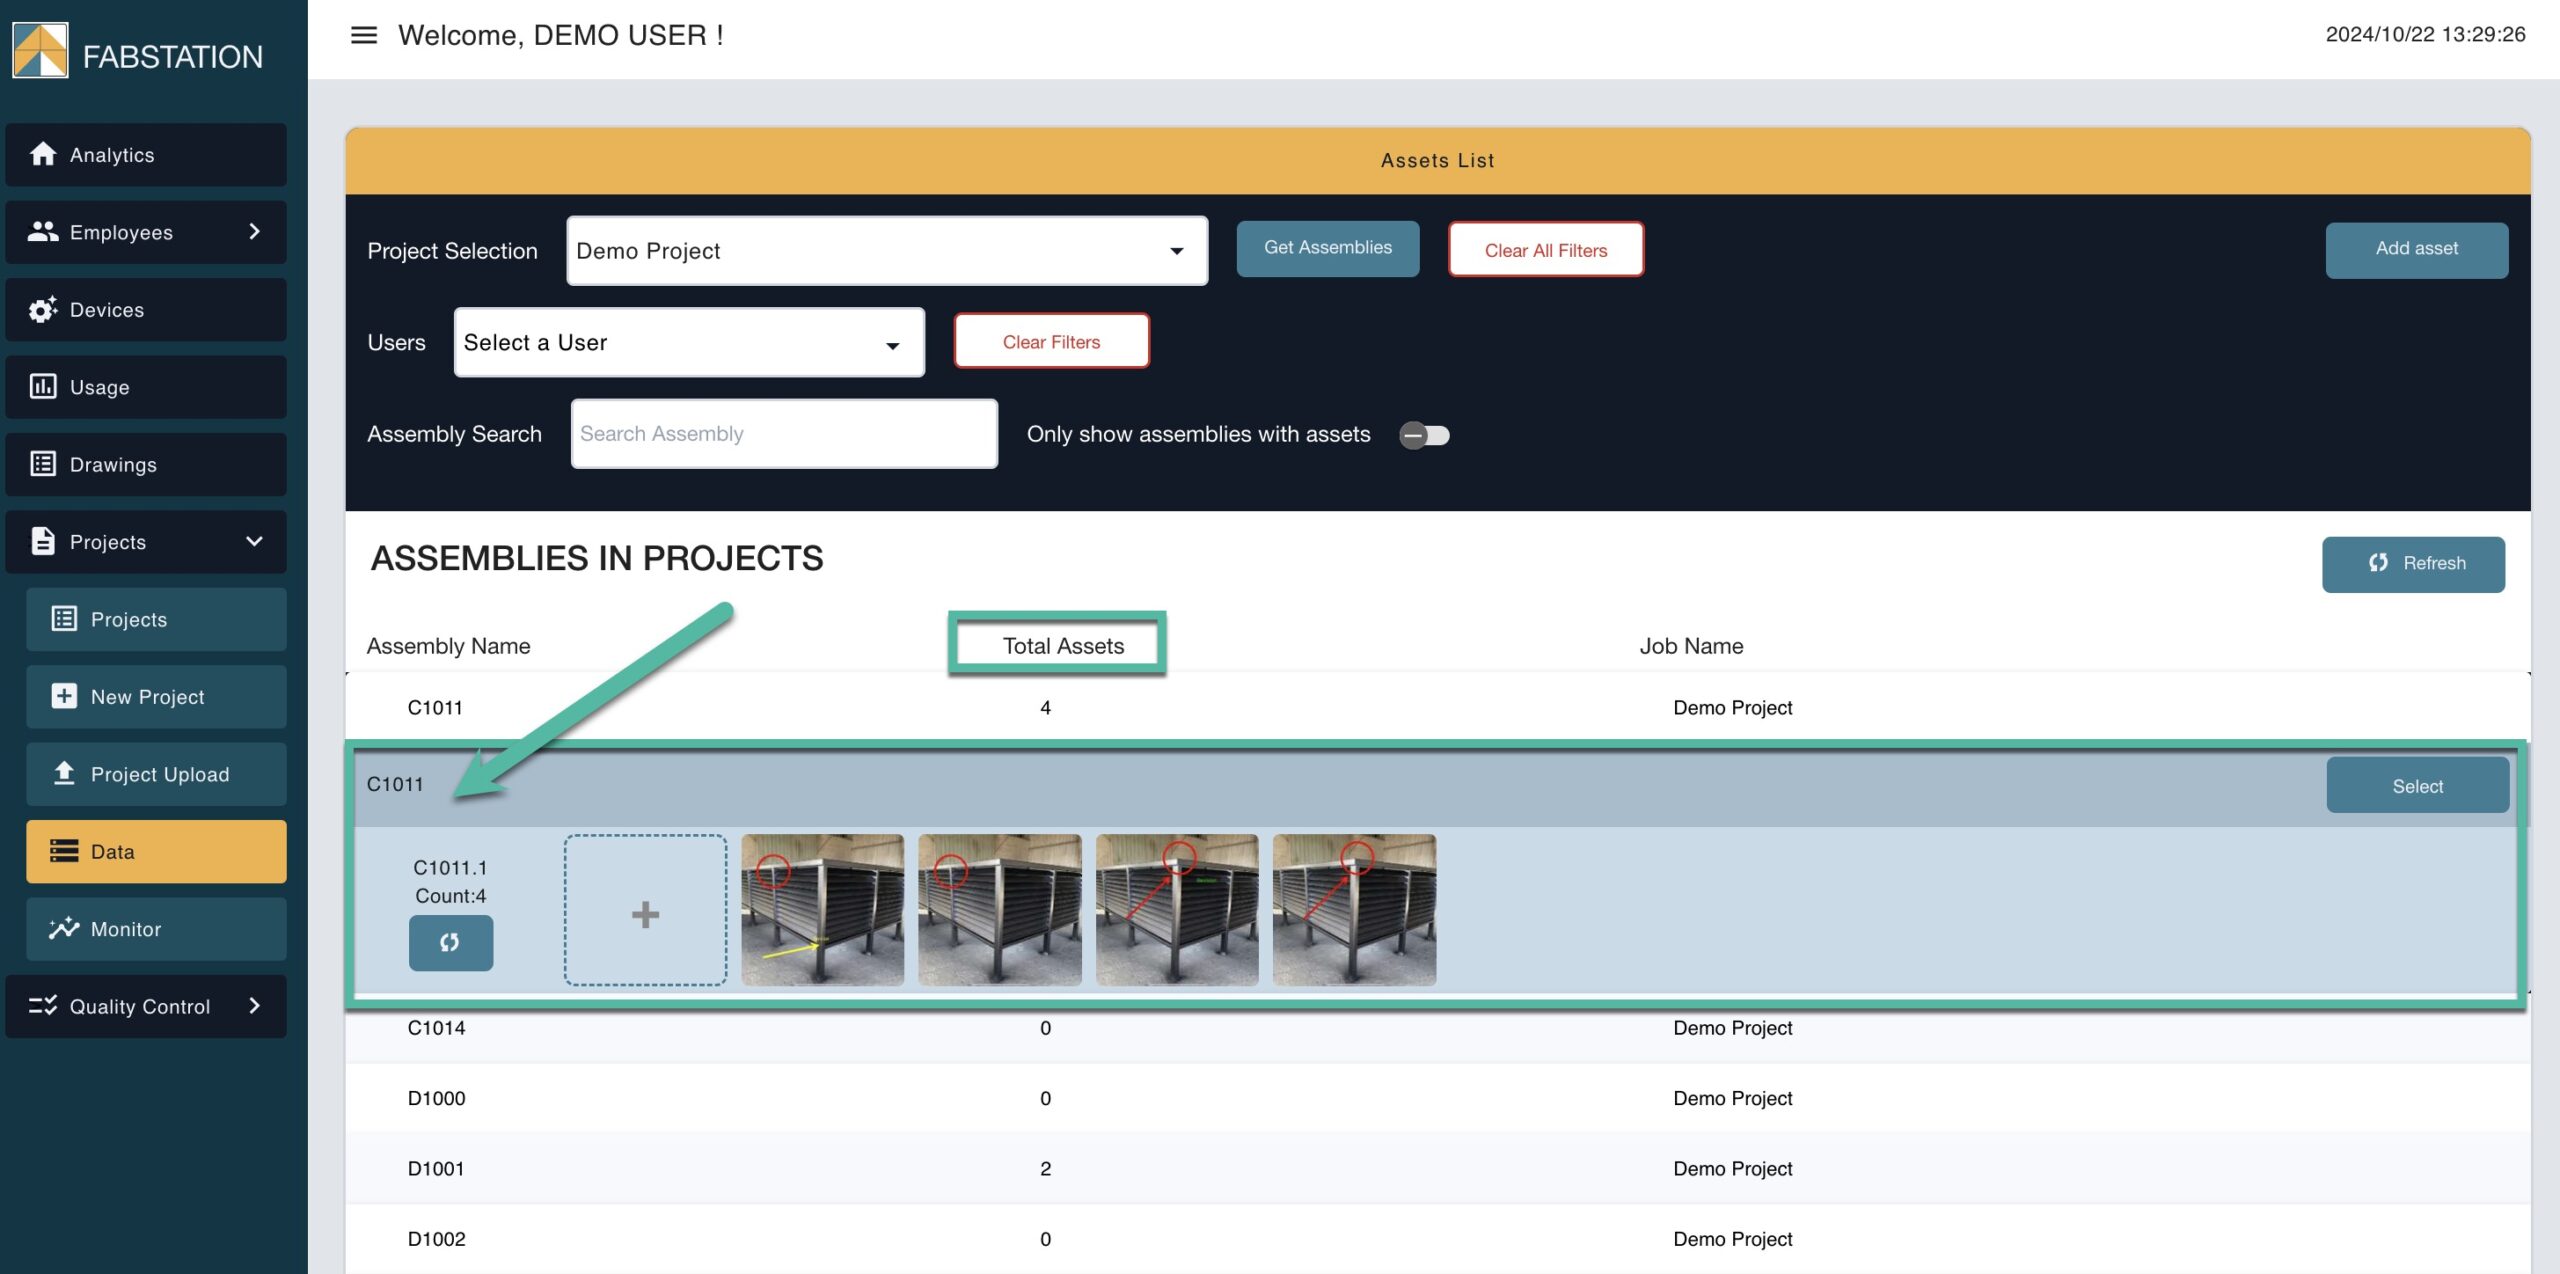
Photos that are captured and saved on the FabStation app under Assets, can also be accessed through the web portal.
Follow these steps to access and manage your assets on the web portal:
- Log in to the web portal.
- Navigate to Projects > Data.
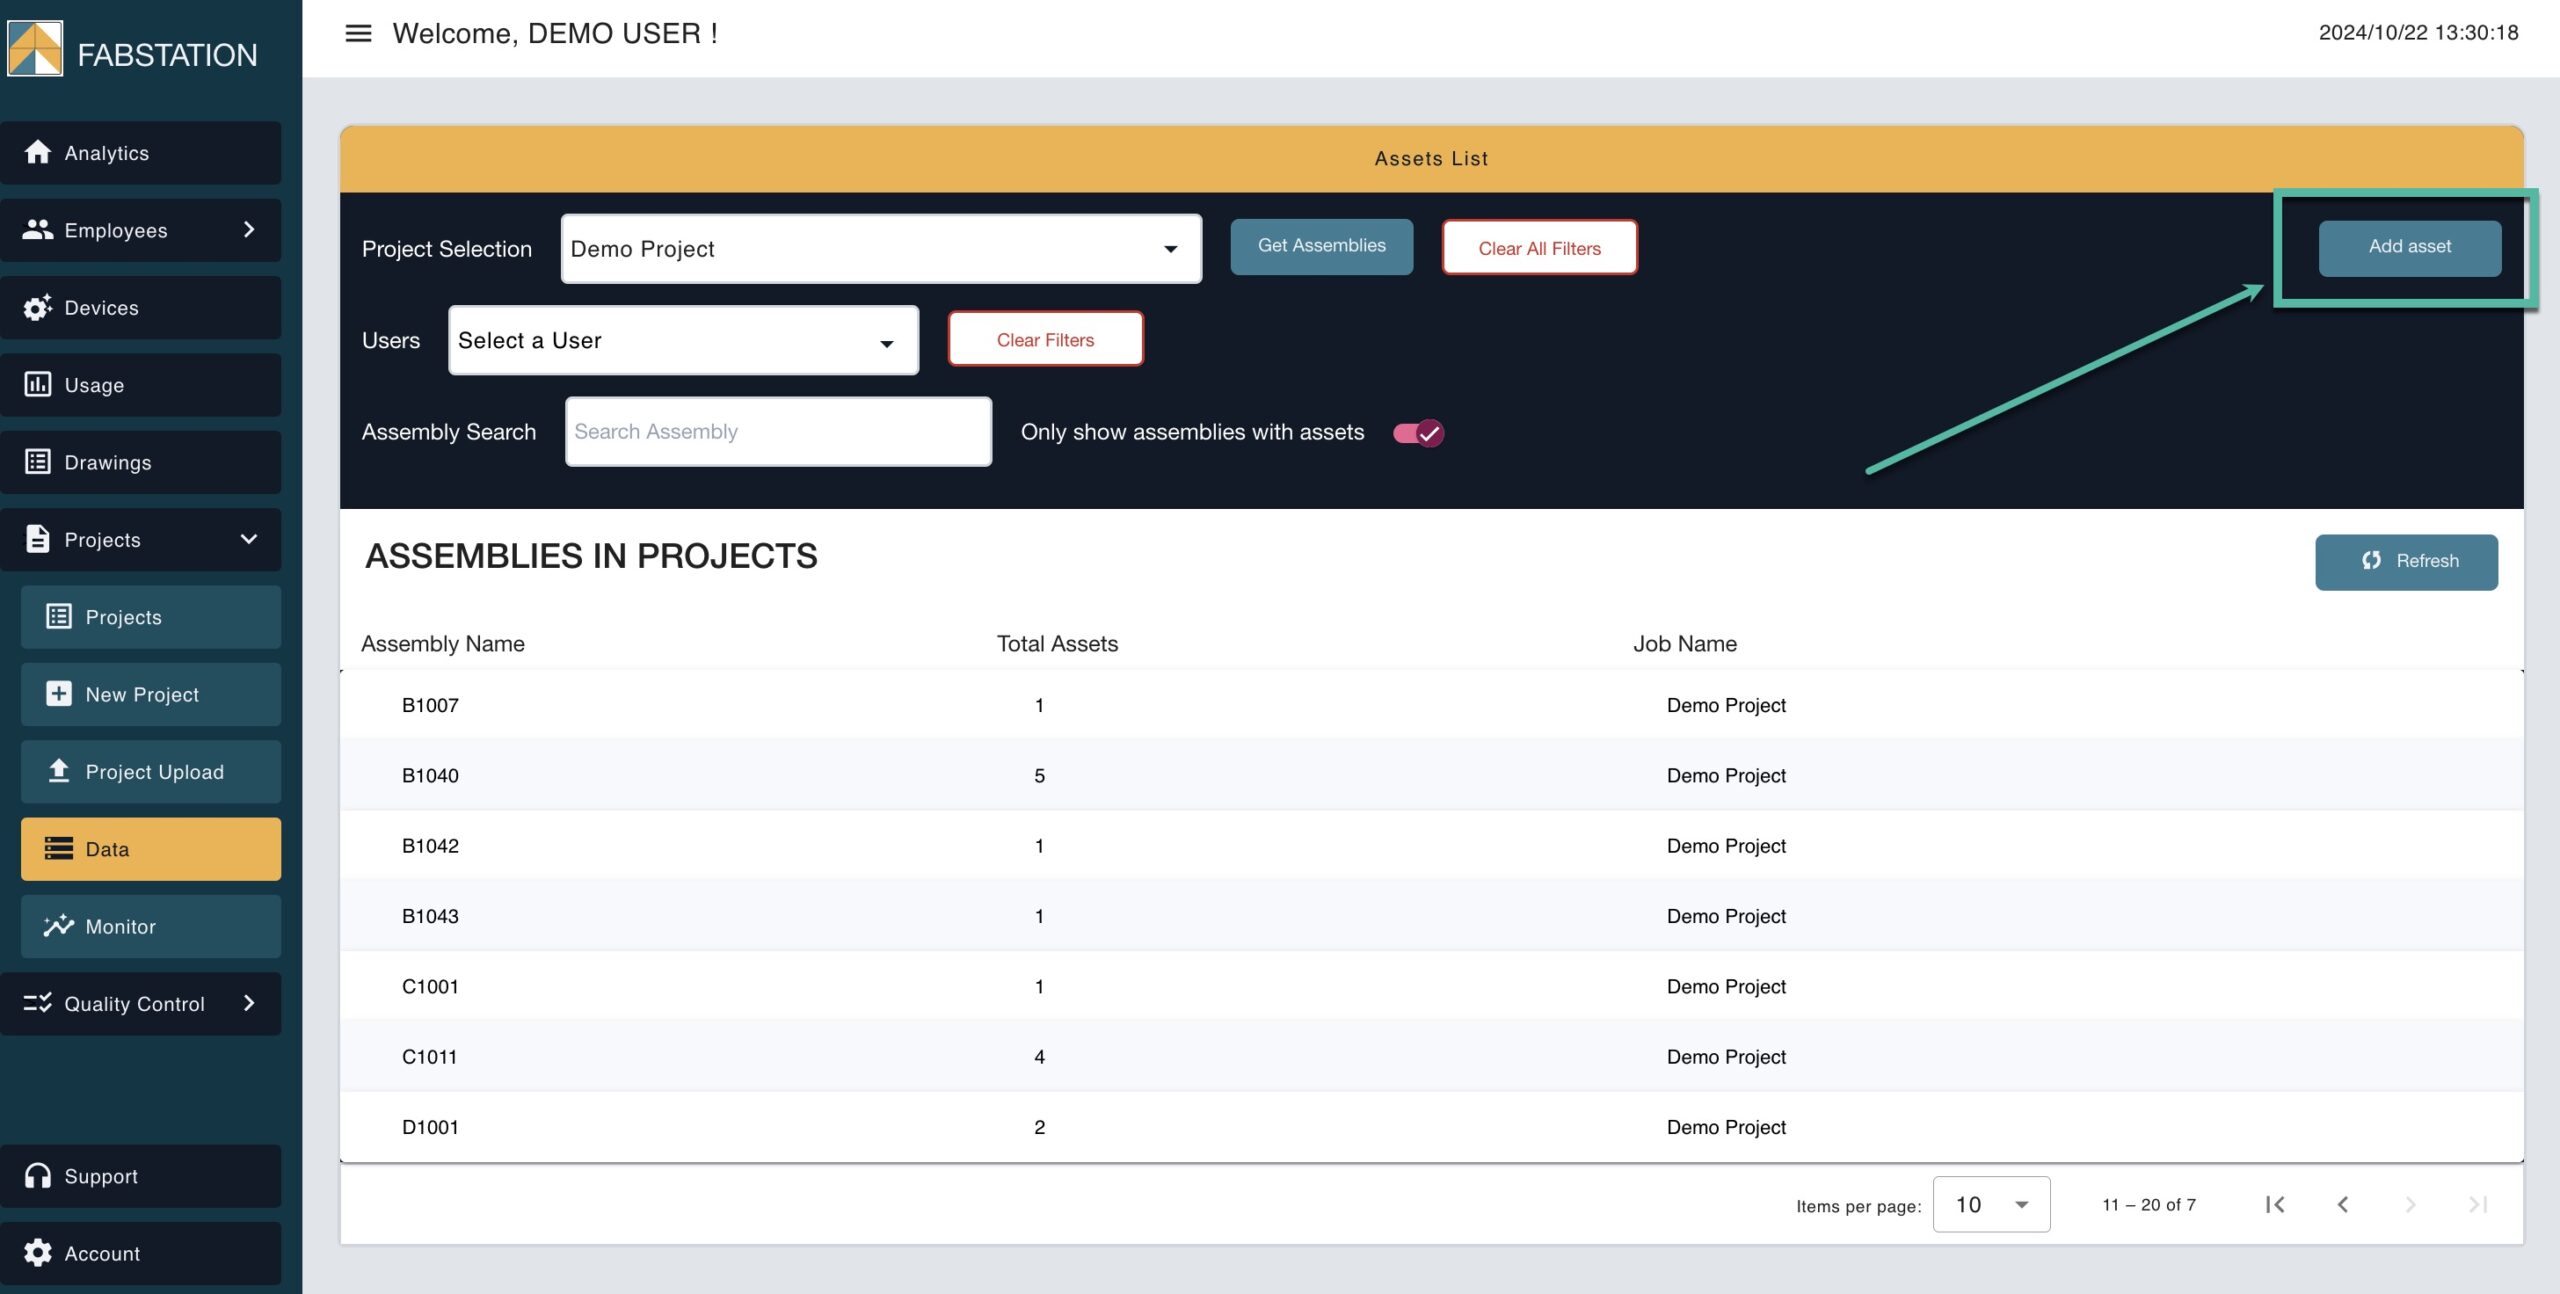
- Under Project Selection, choose your project.
- Click on Get Assemblies.
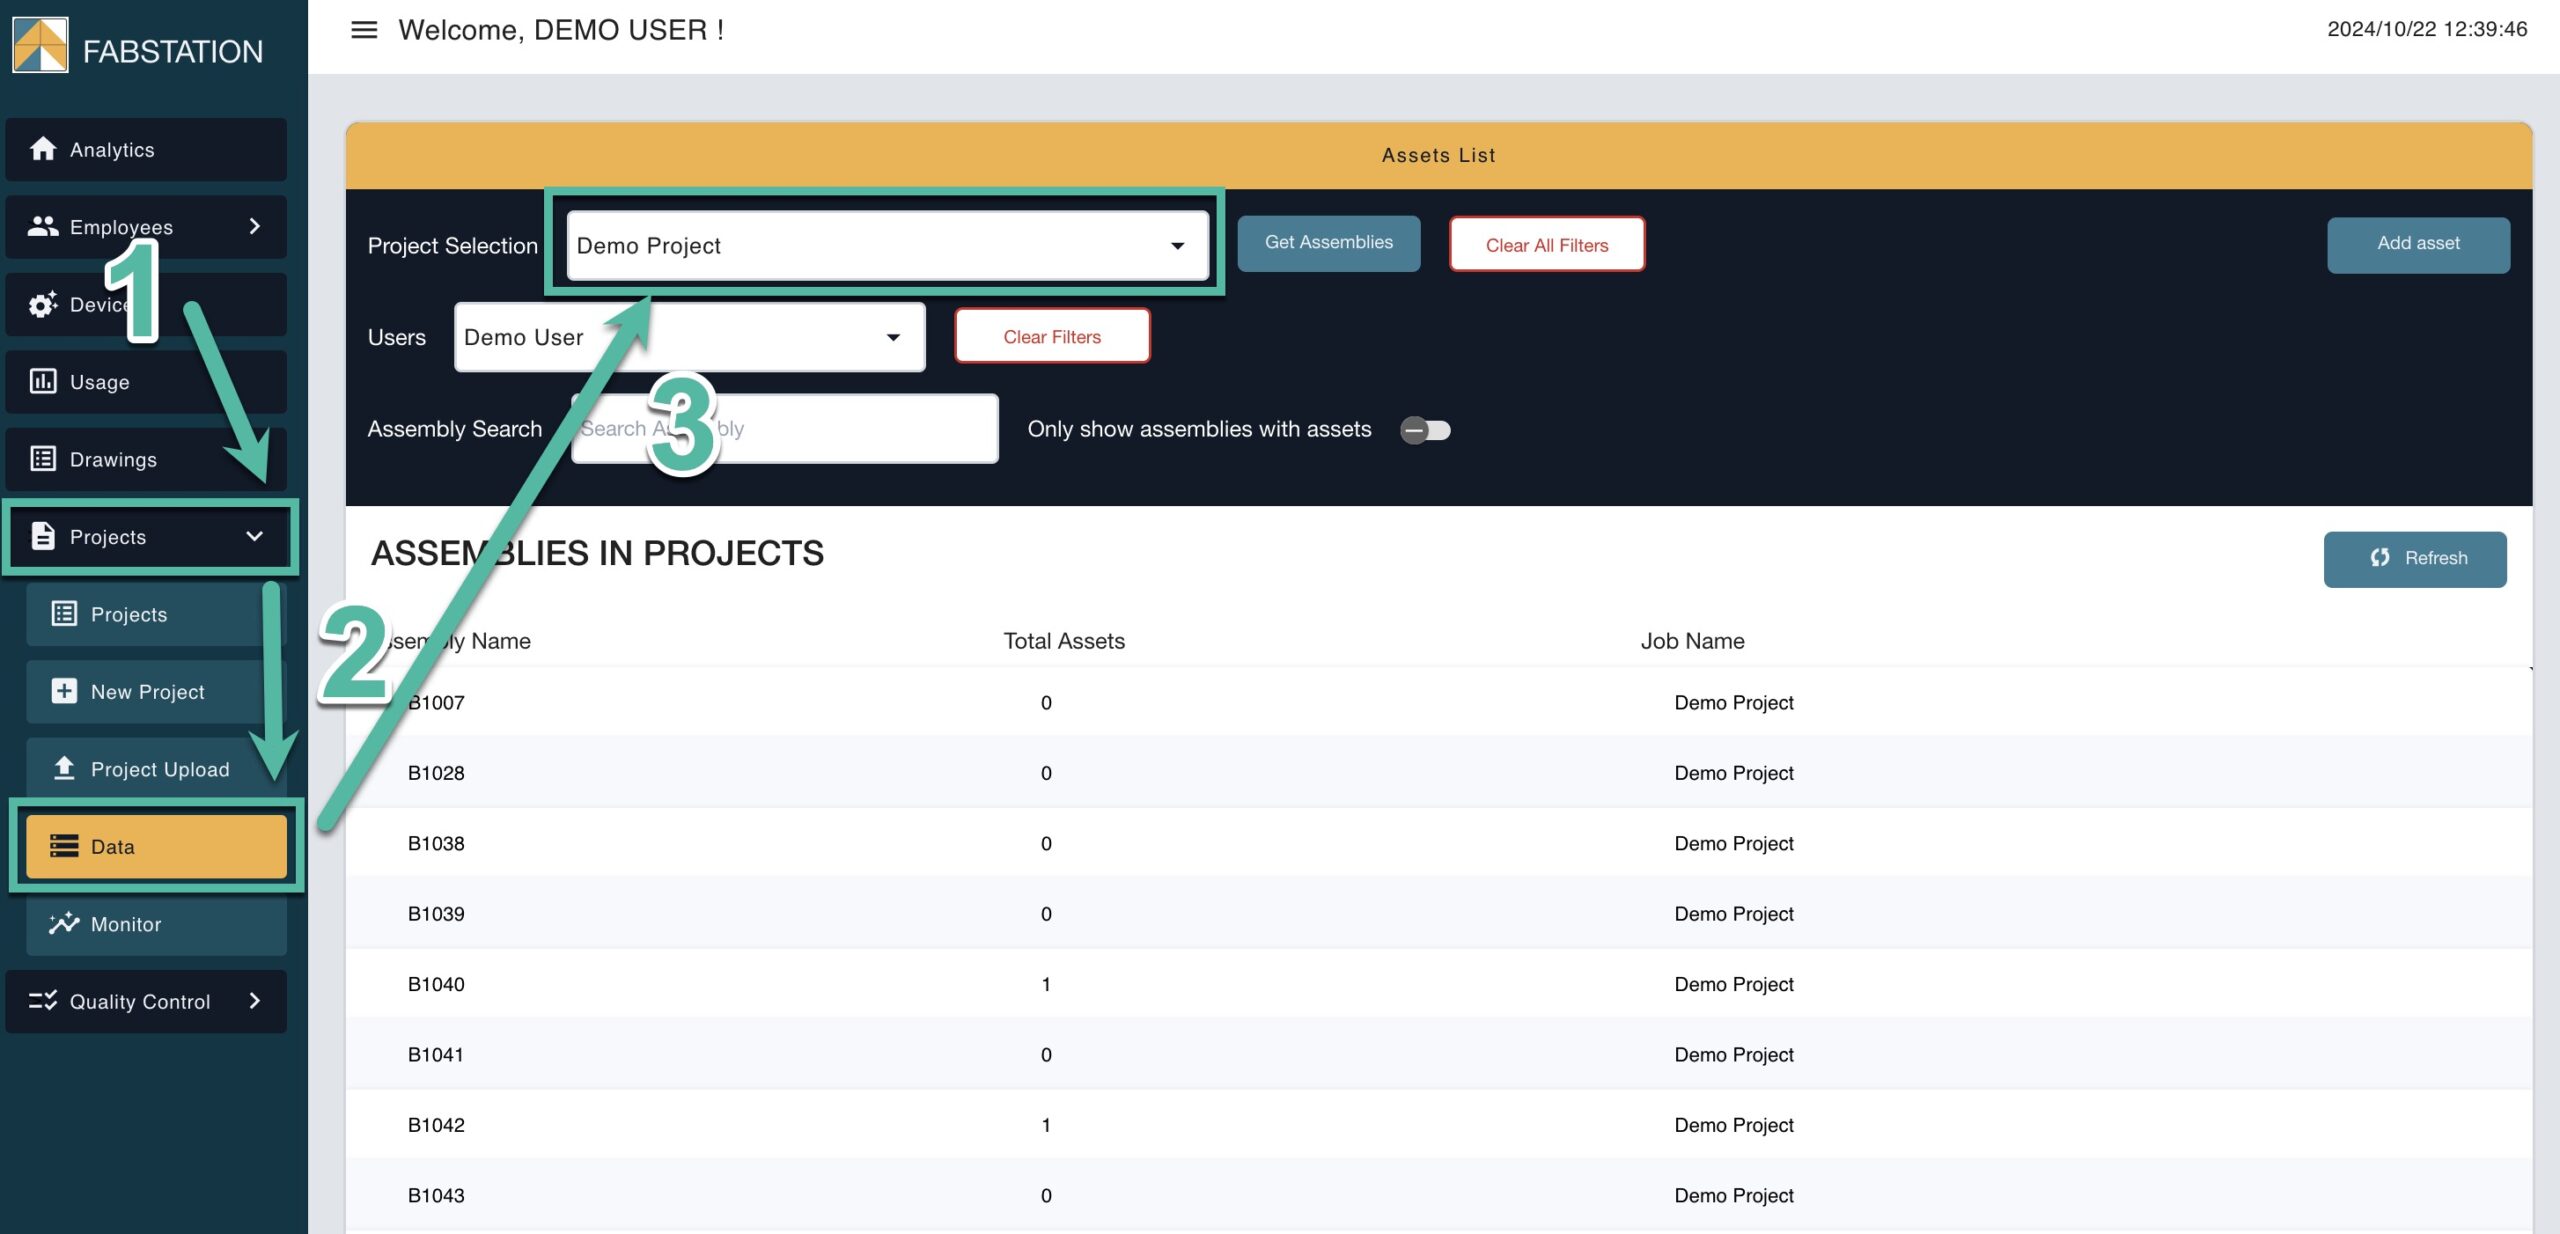
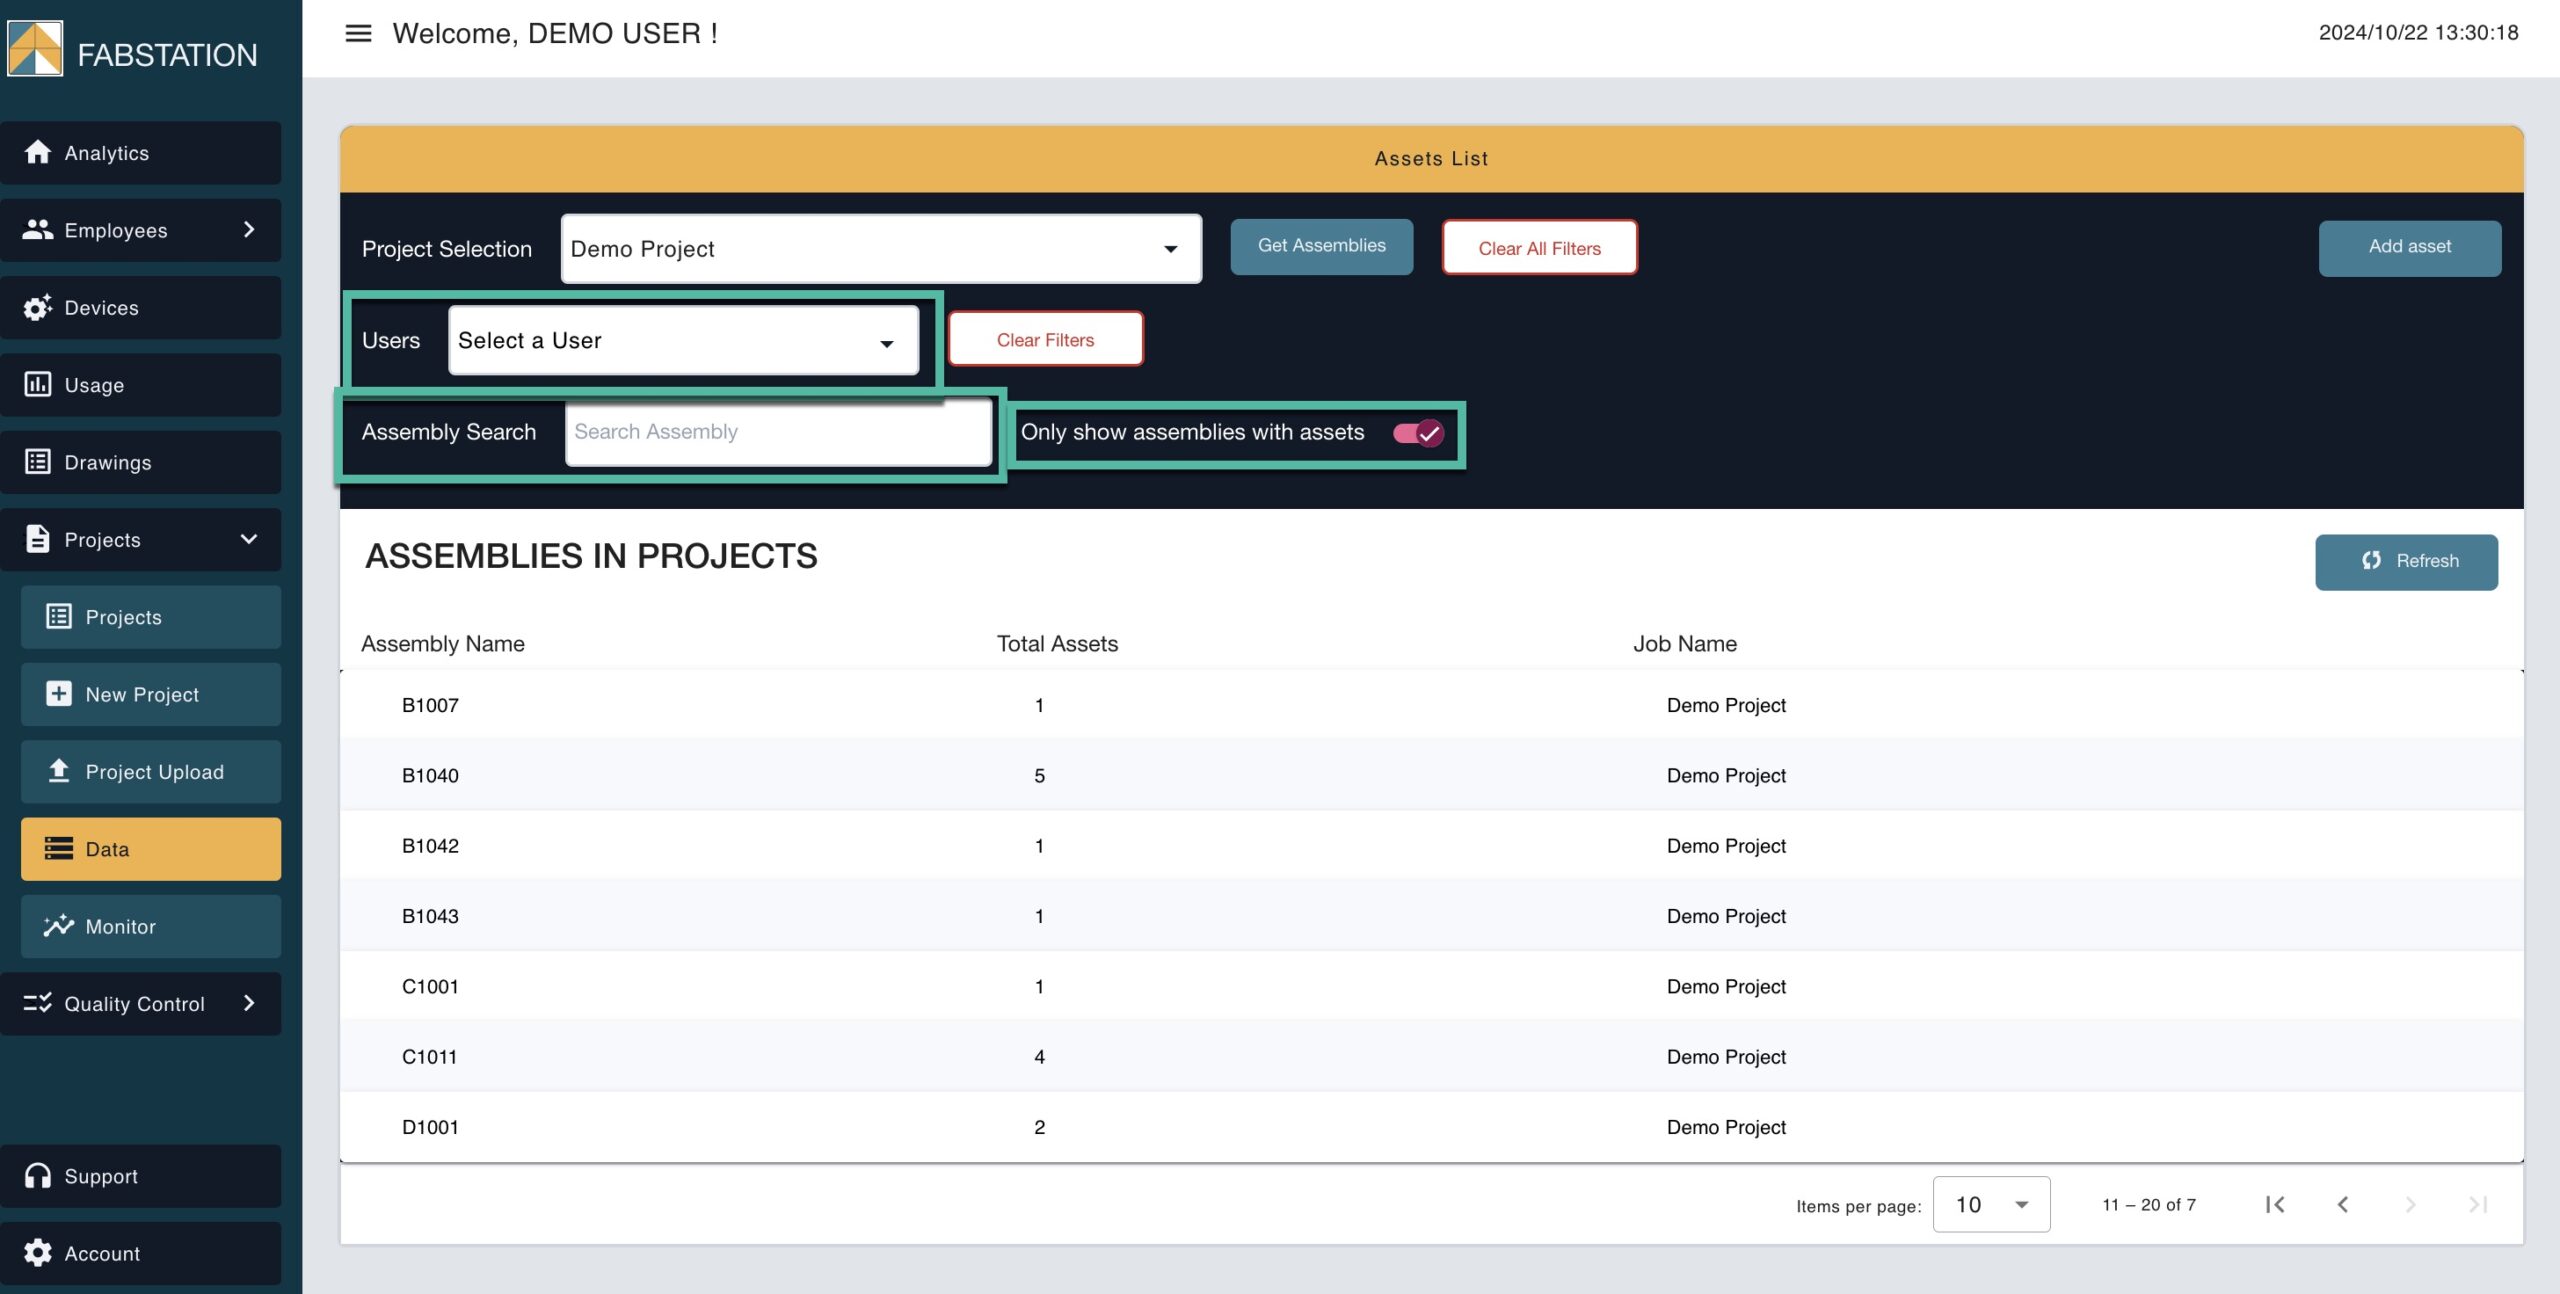
You can further filter your options to search for an asset by:
- Users who took the photo.
- Search by Assembly name by typing in the Assembly Search textbox.
- Toggling ON to only show assemblies with assets attached.
Adding Assets
To add a photo to your assembly in the web portal, there are two options:
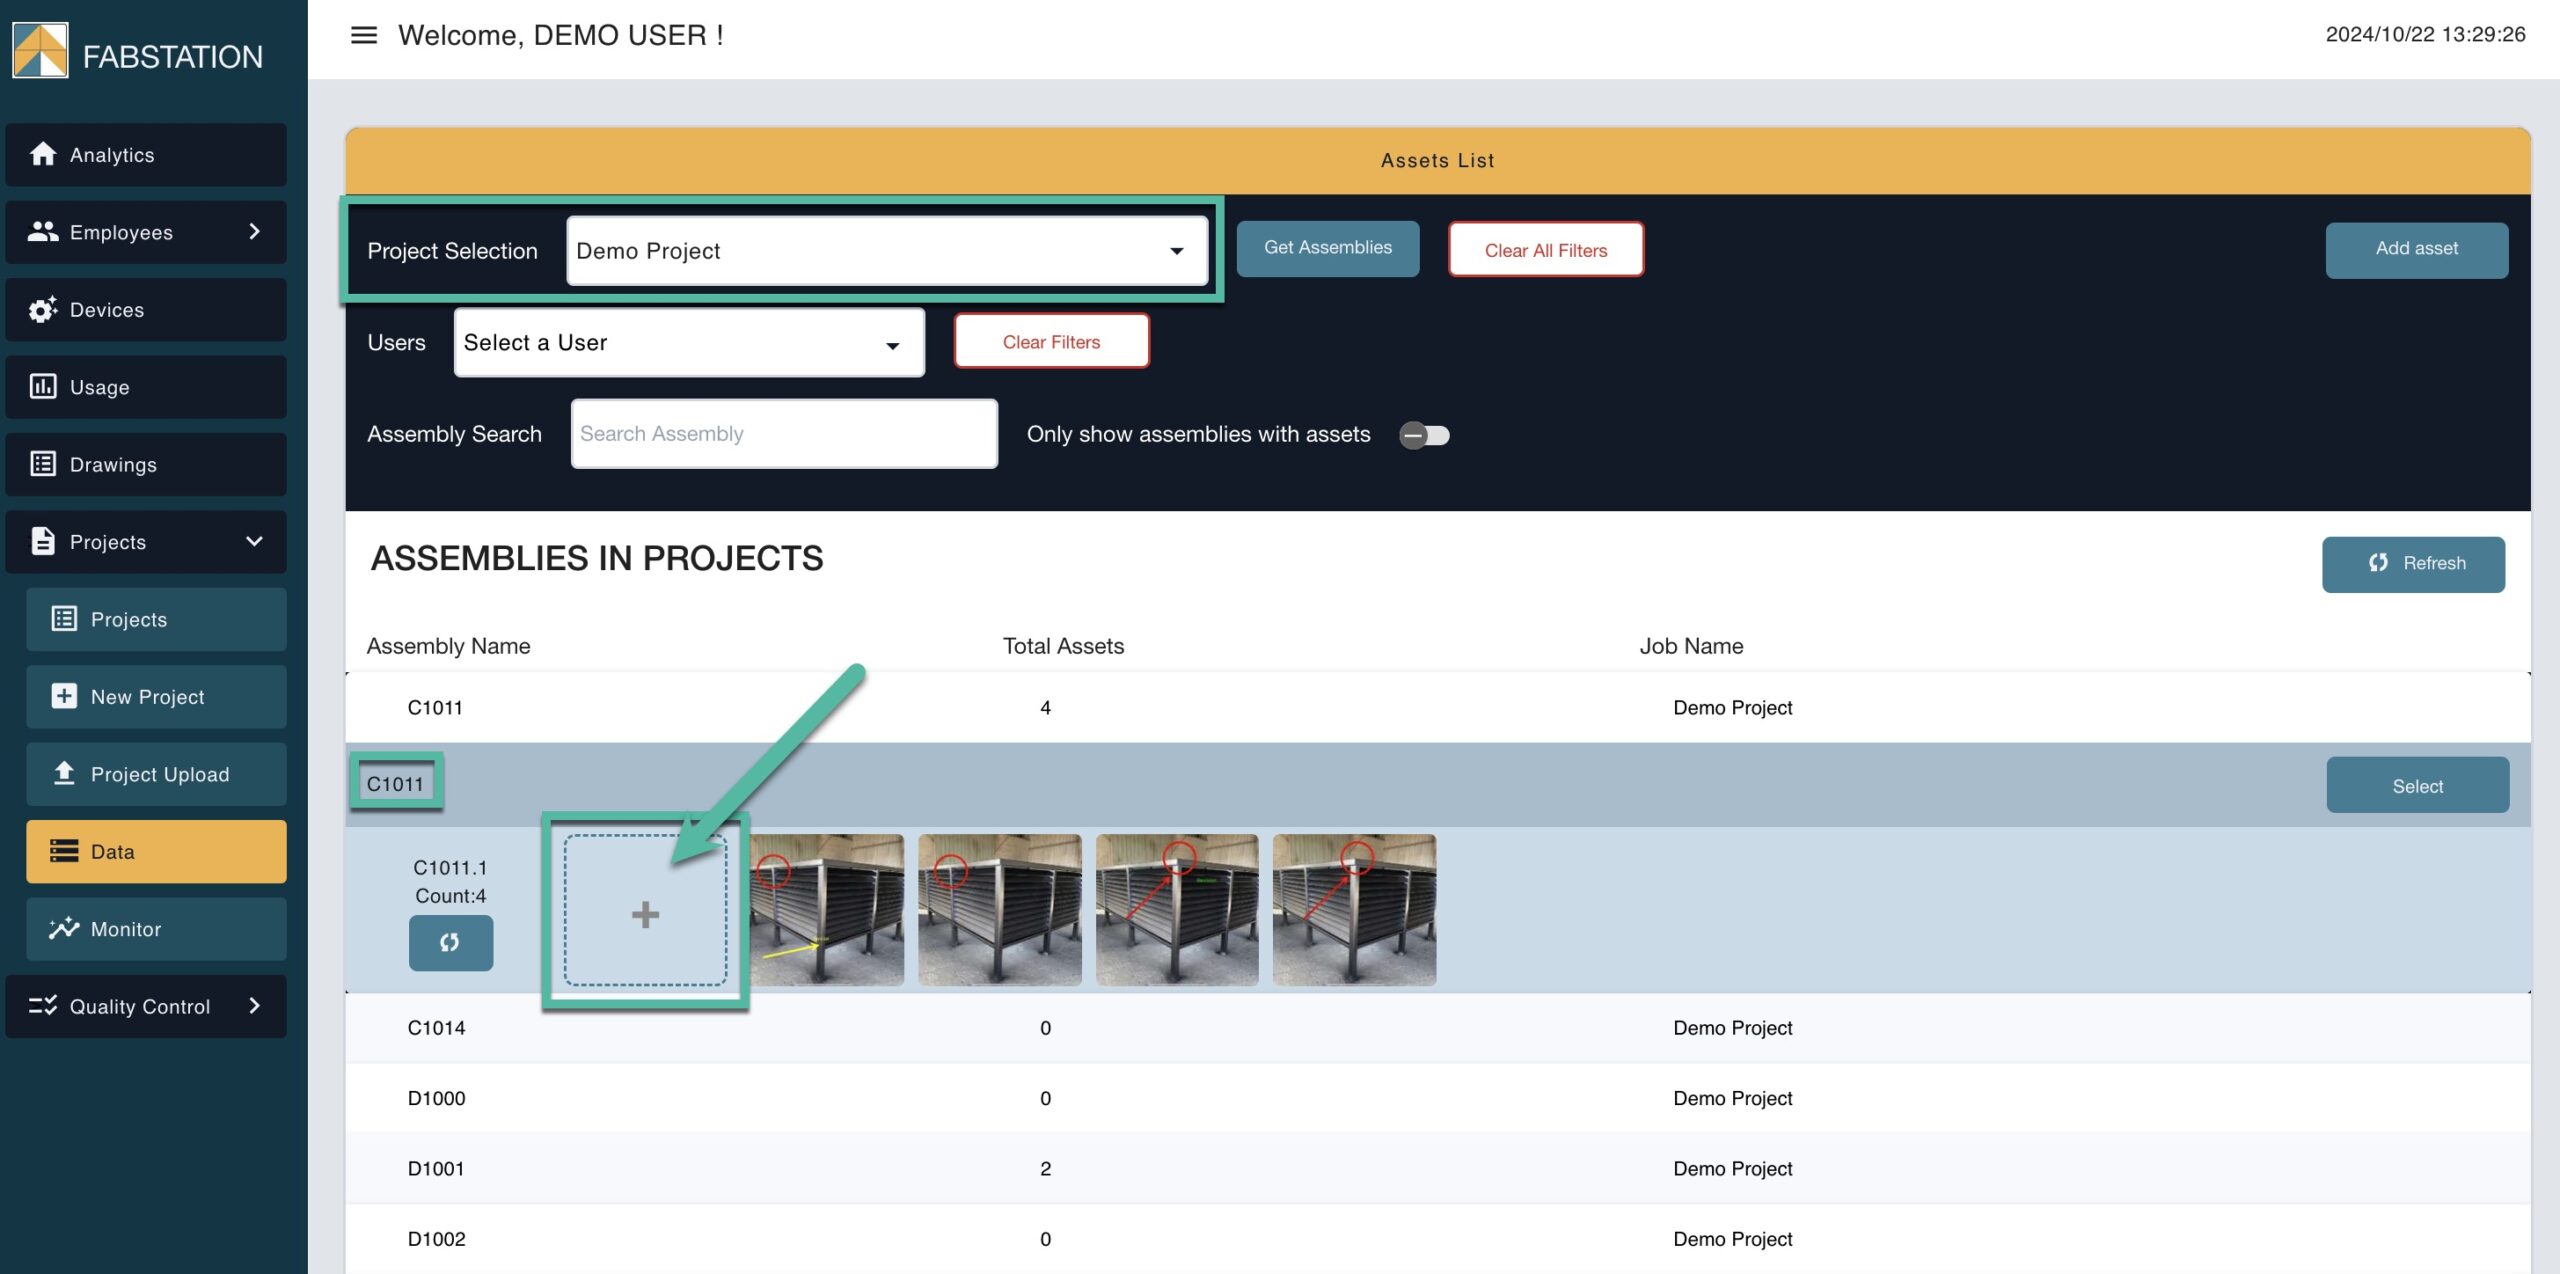
Option 1: Attach a photo under a pre-selected project and assembly:
- First, select the project and assembly you want to attach the photo to.
- Click on the box with the plus sign (+).
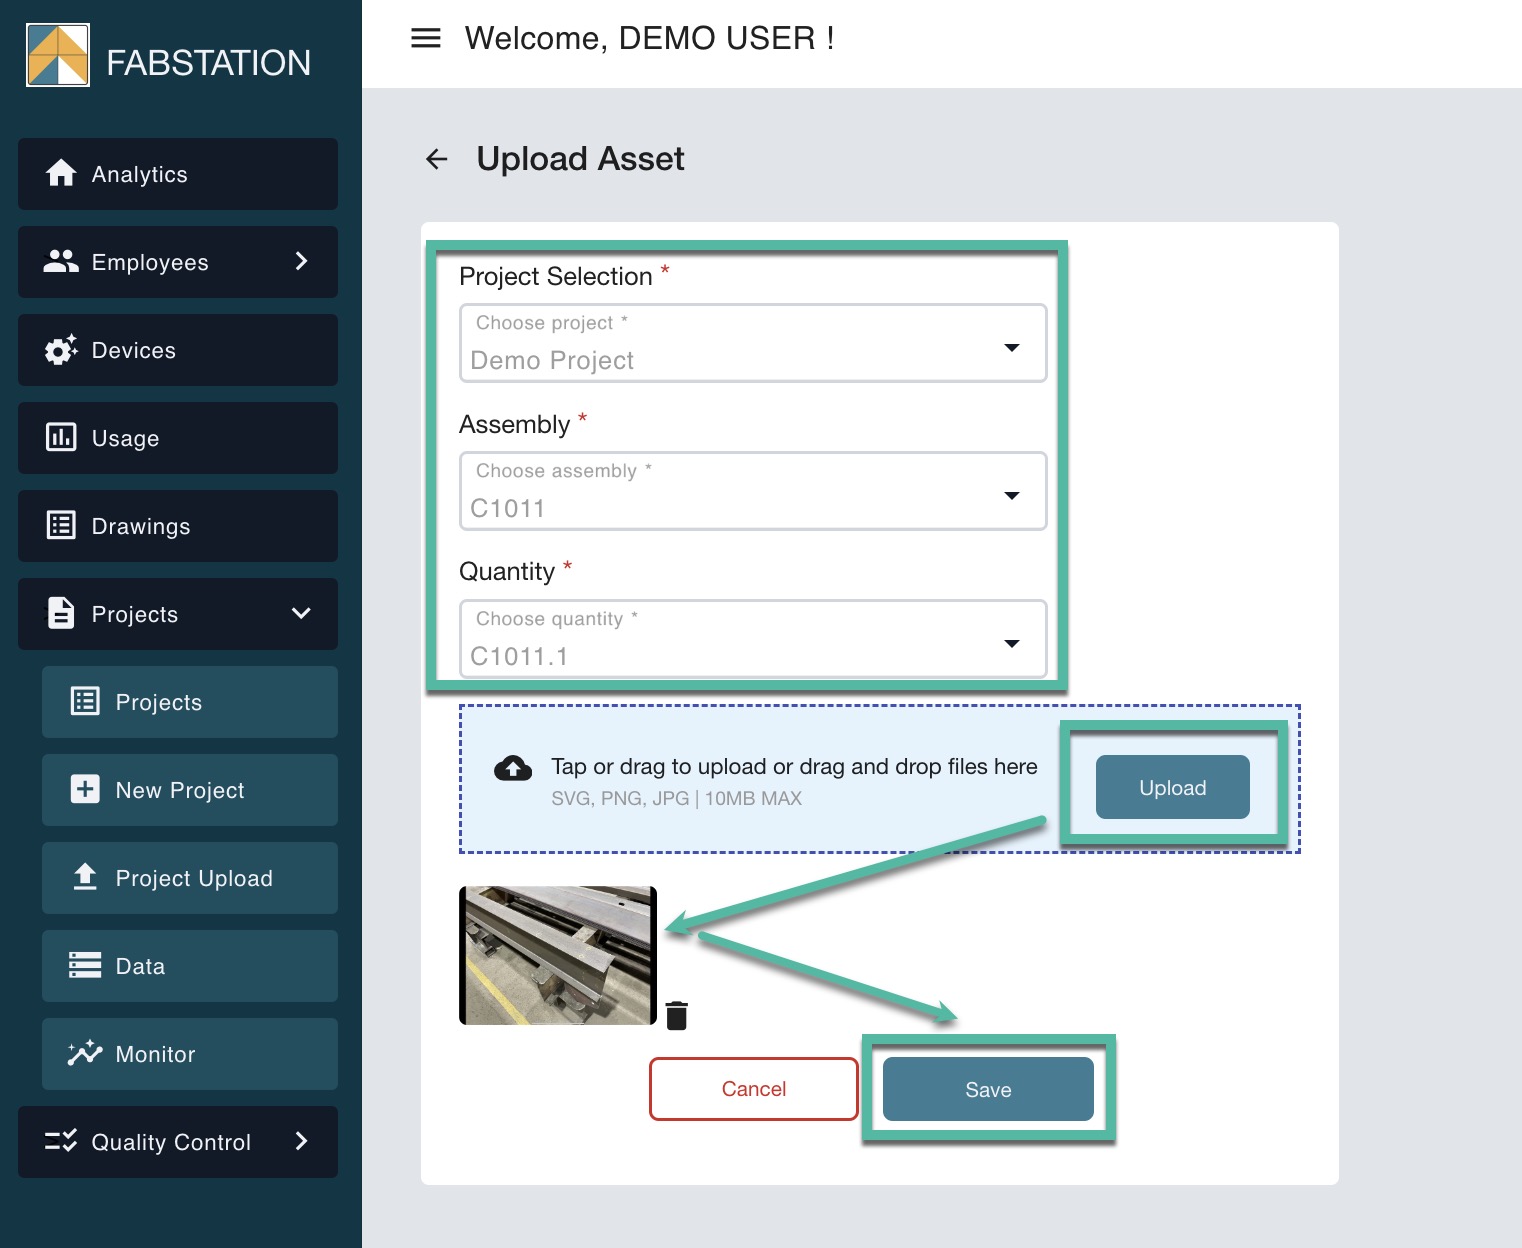
- In the next screen, the Project name, Assembly name, and Quantity will already be pre-filled.
- Click on Upload, then select the photo that you want to upload from your device.
- Once selected, click on Save to attach the photo.
Option 2: Attach an asset and then choose the project and assembly.
- Click on the Add Asset button in the top right corner.
- On the next screen, choose the assembly to attach the asset to from the drop-down list, then select the assembly and quantity.
- Click on Upload, and choose the photo from your device to upload.
- Once all fields are filled in, click on Save.
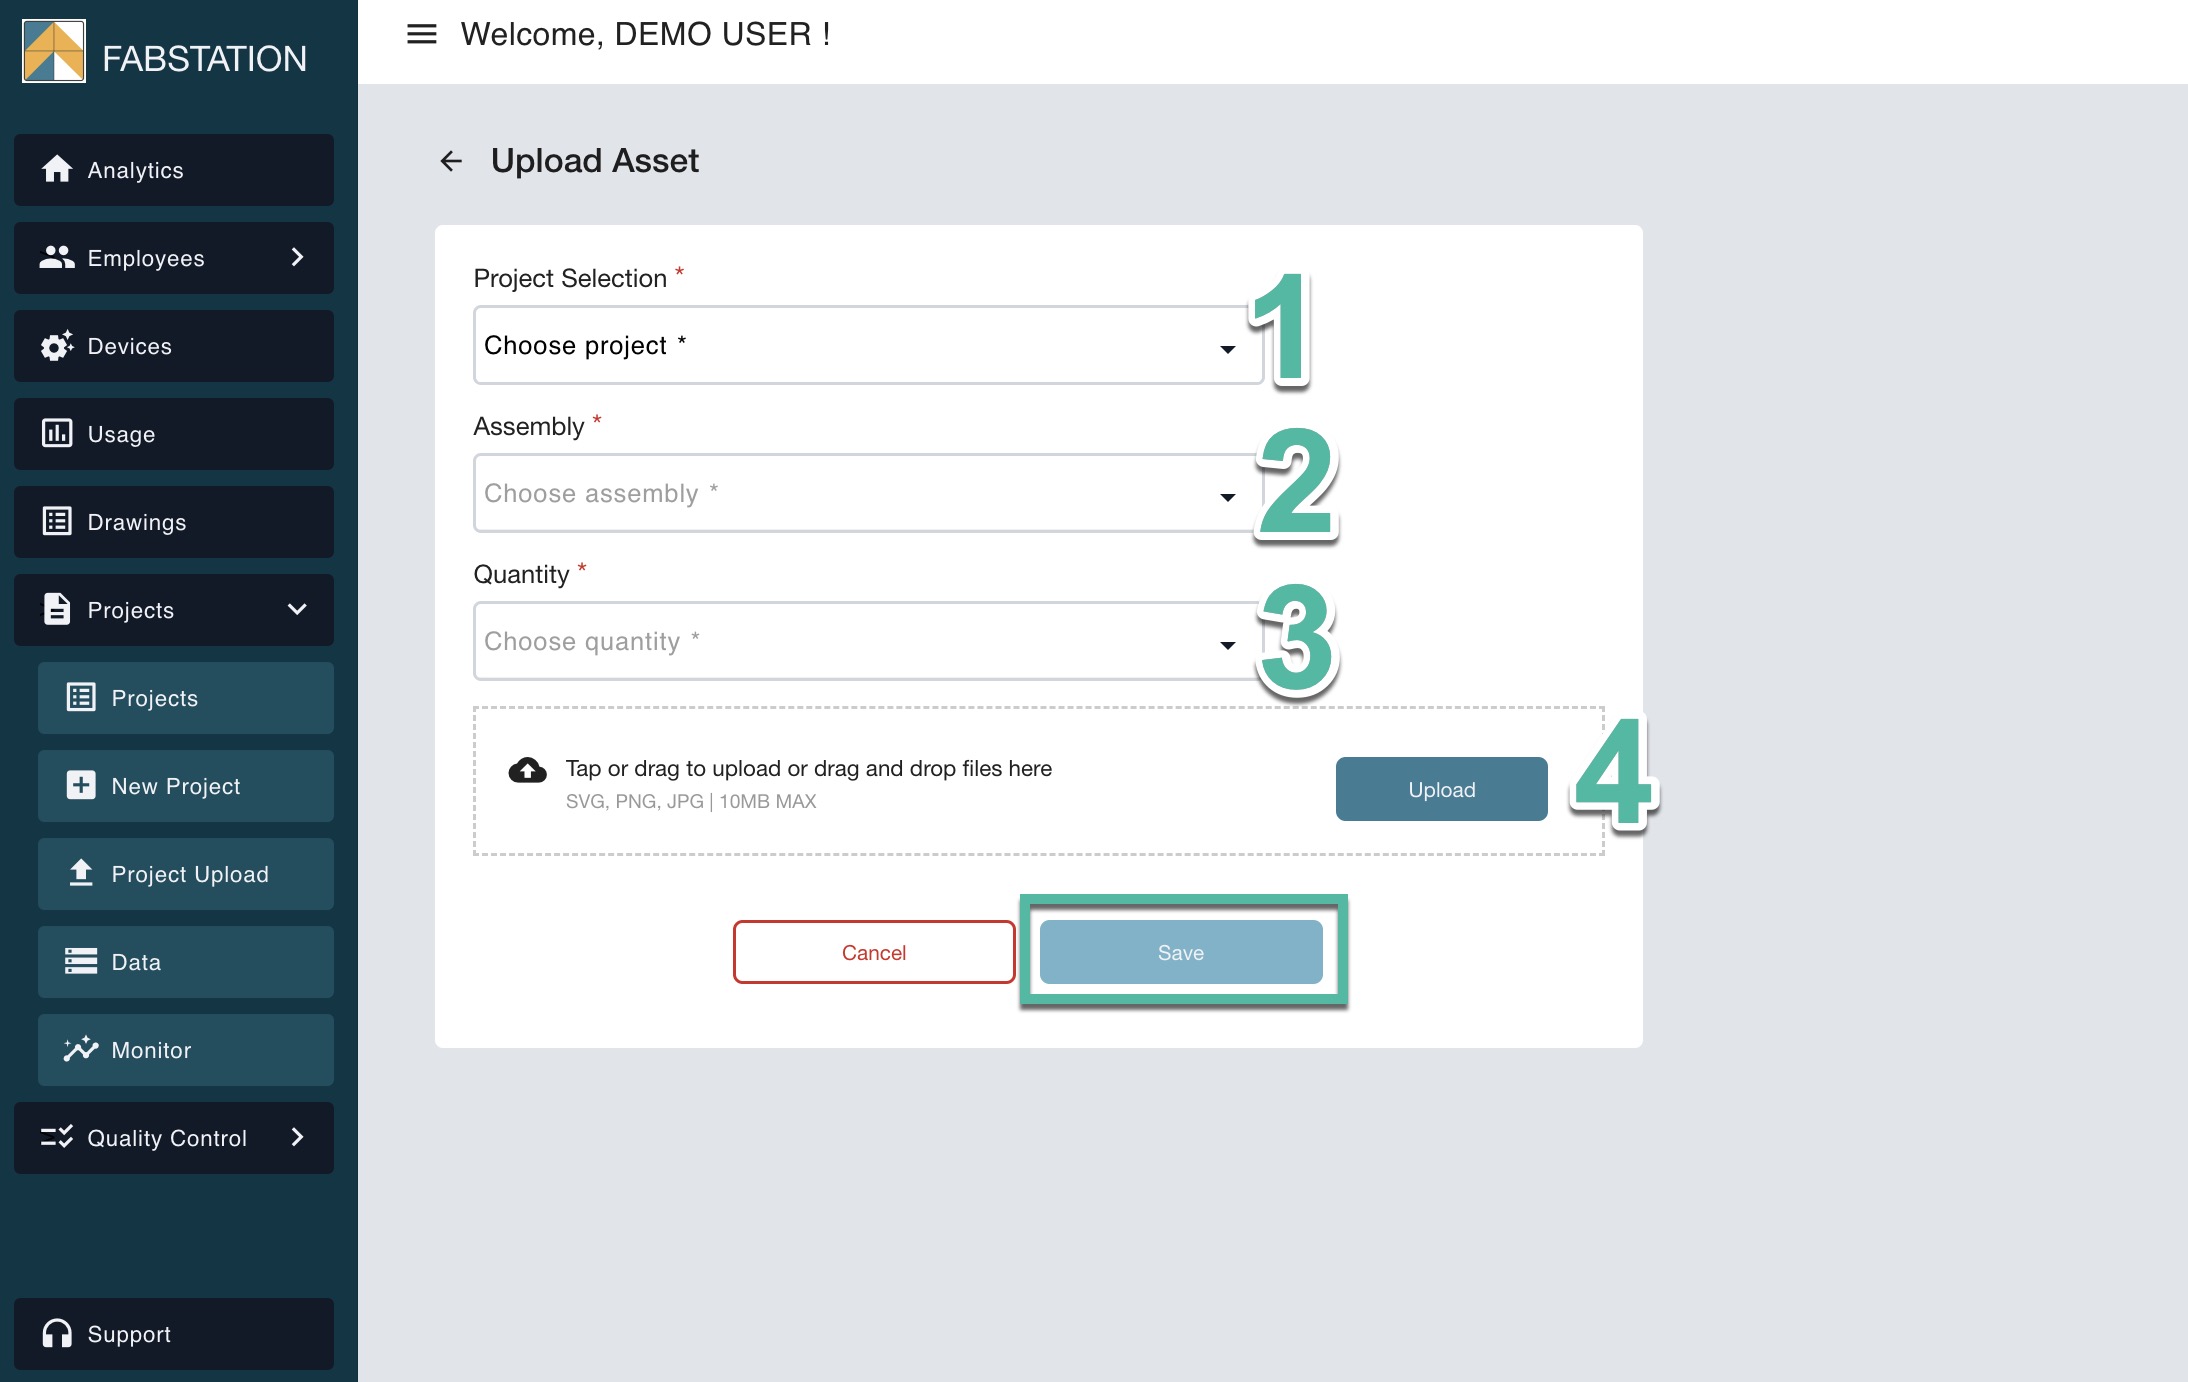
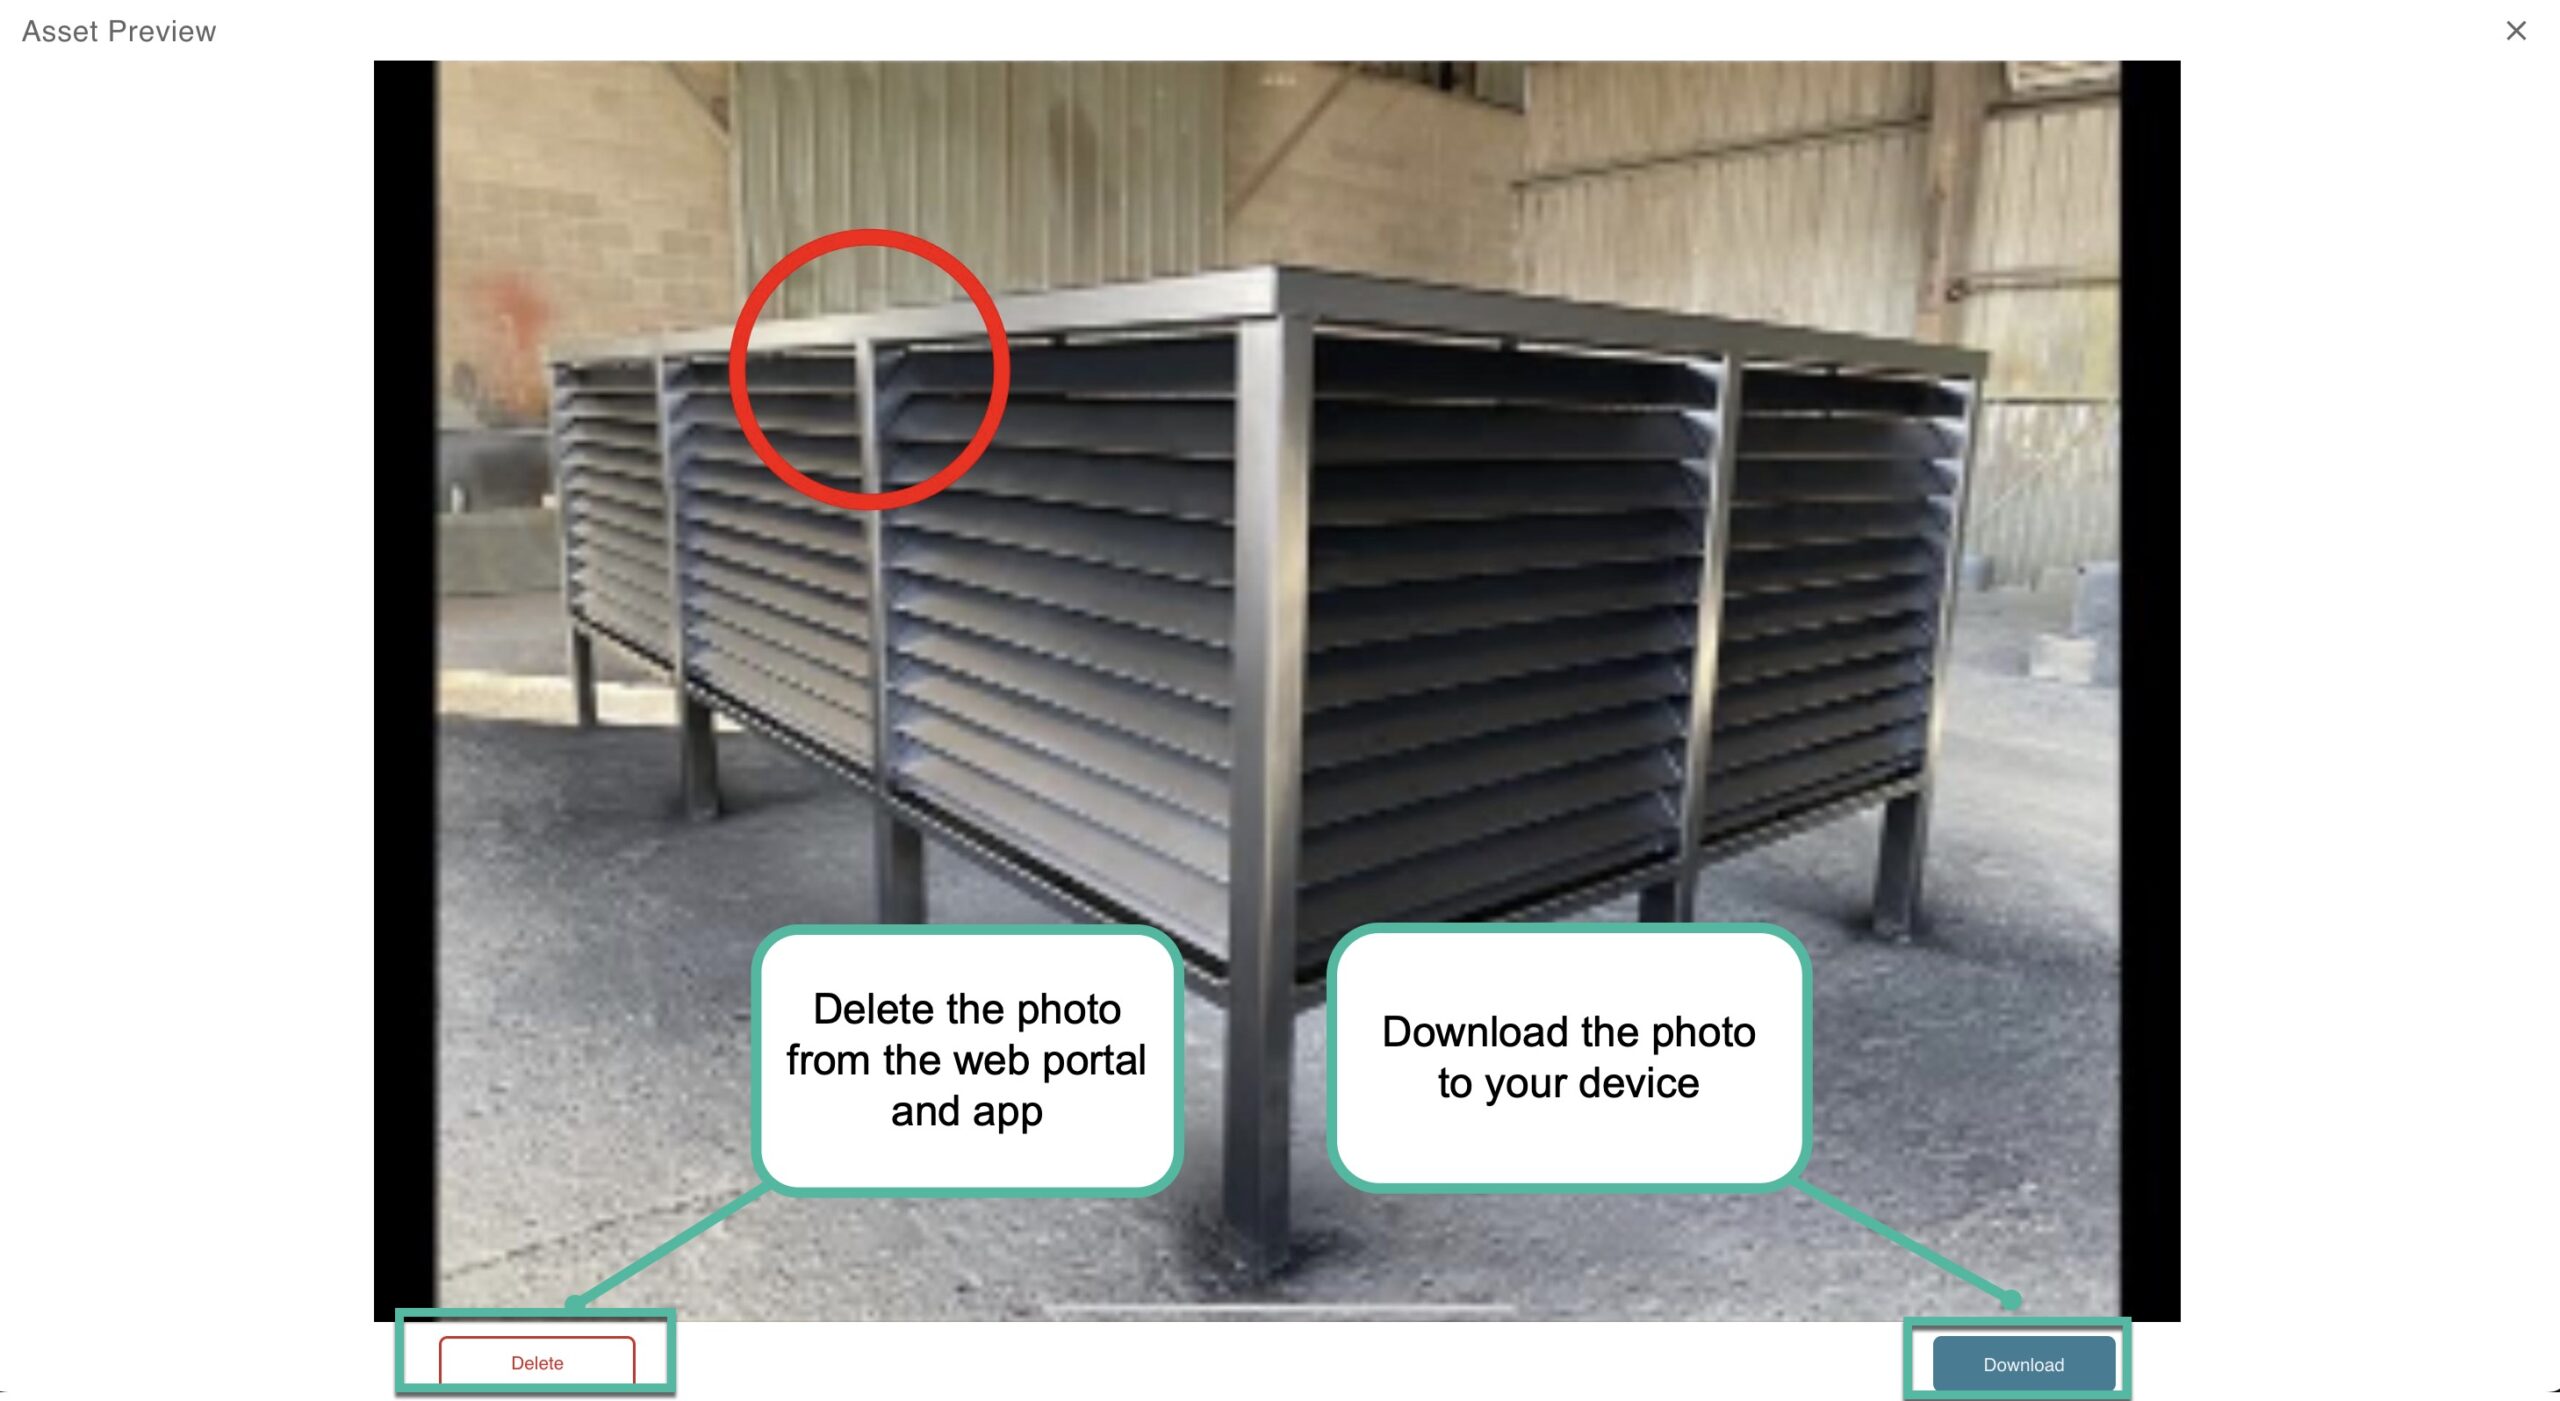
The photo will now be available under this assembly in both the web portal and the tablet app.
