Selecting a Project and Assembly
Selecting an Assembly
To working the FabStation, you need to log in into the App and find the assembly in question.
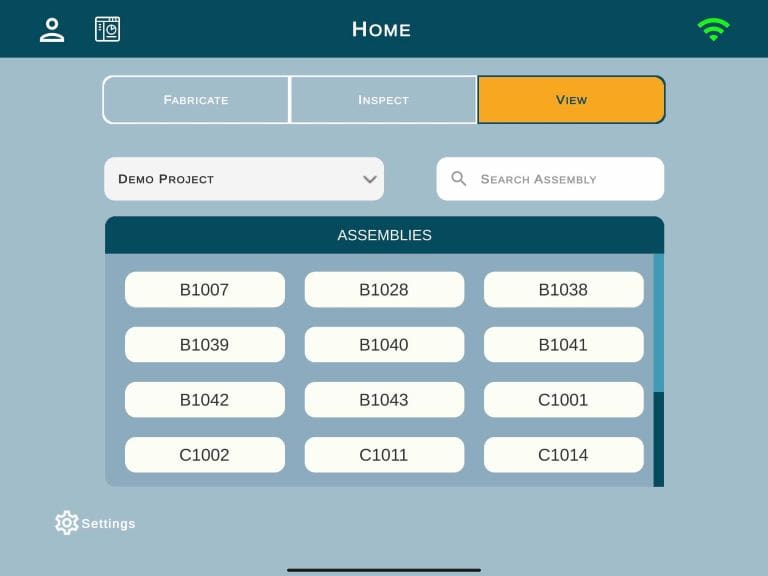
Starting on the Home page, select either Fabricate, Inspect or View depending on which activity is being completed.
Not sure if you selected a correct mode? Check our Choosing a Path: Fabricate, Inspect, or View? article for more details.
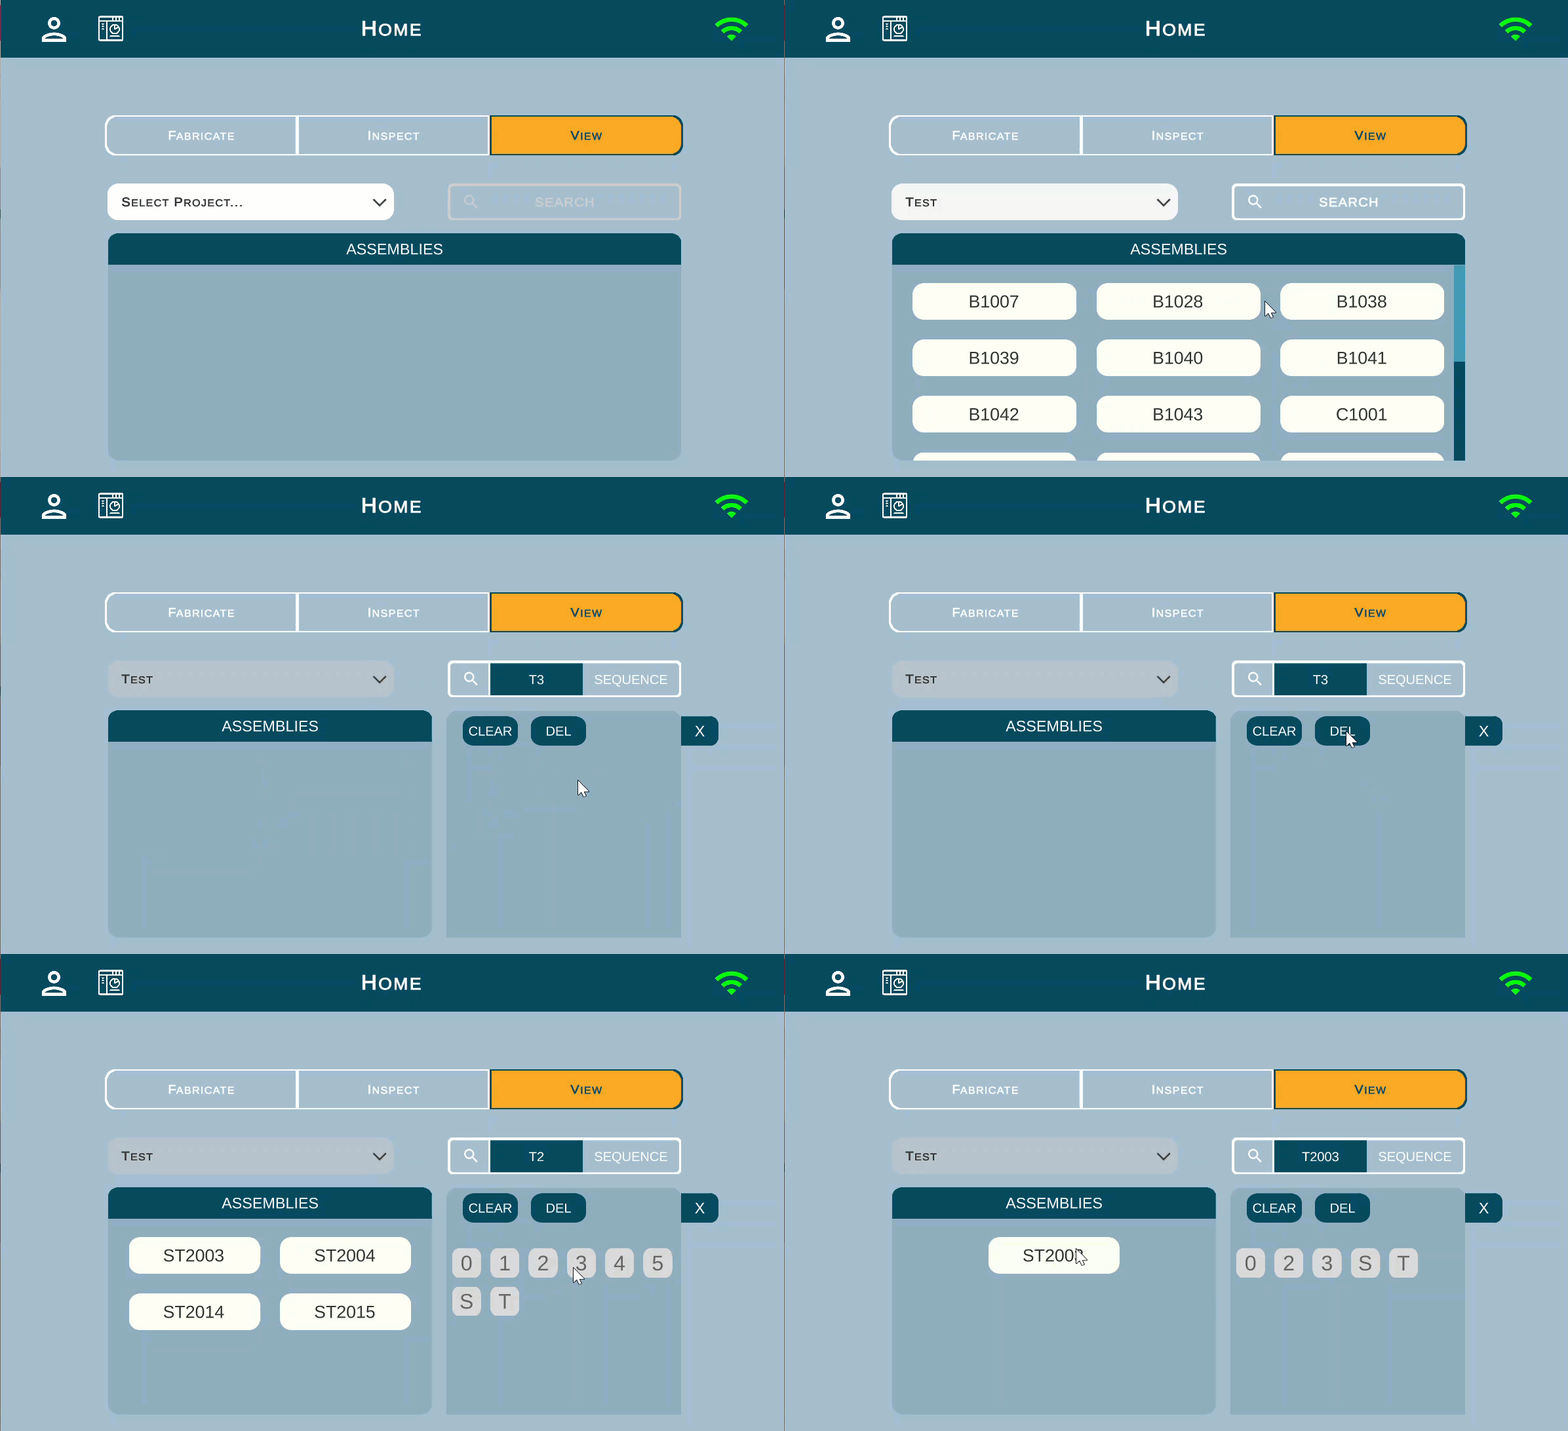
1. Select Project
If a project is not listed, refer to Managing Projects to ensure the project is created and active in the FabStation system
2. Search Assembly
The assemblies can be filtered further by entering criteria in the “search assembly box”.
2.1 Click on “Search” and use the keyboard on the screen to find your assembly.
2.2 As you proceed inputting the assembly name, the correct one will appear:

3. Select Sub-assembly
When the desired assembly is located, select it by clicking on the assembly number.
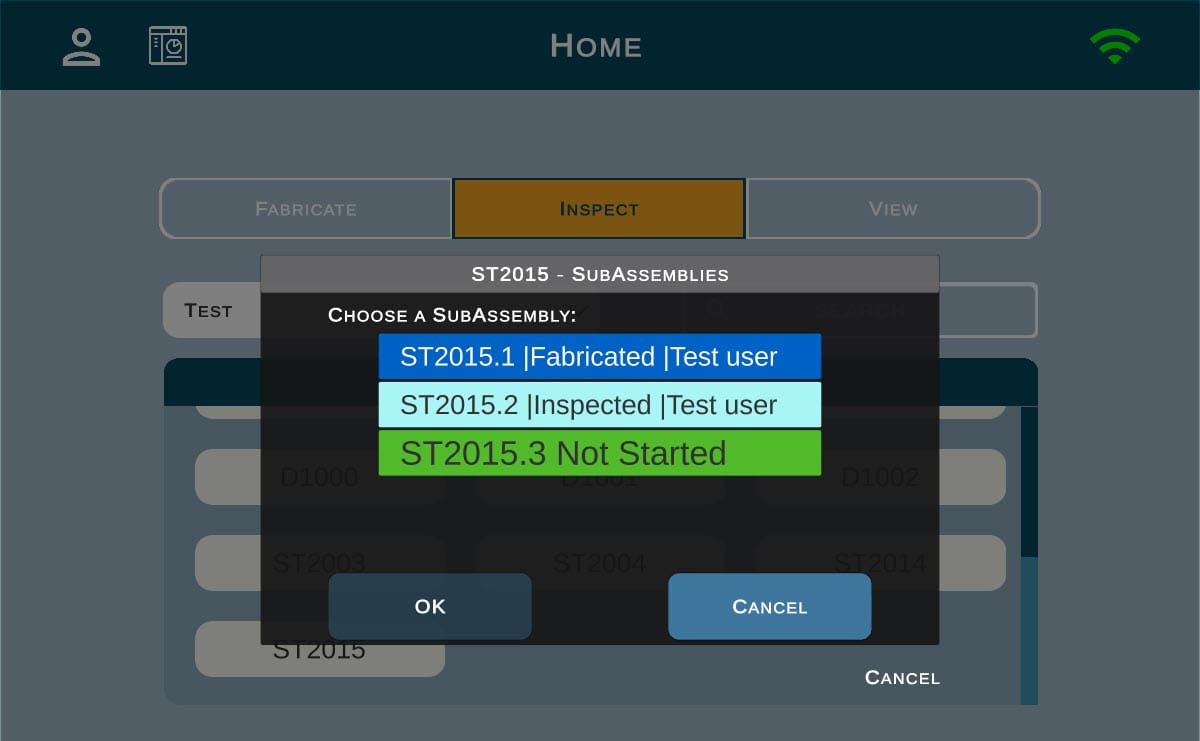
The sub-assembly selection pop-up will appear.
The subassembly represents each instance of the assembly. For example, if you have ST2015, it has a quantity of 4 required (this is reflected in the 2D drawing as well). So, each version (i.e. ST2015.1, ST2015.2) listed is tracking each instance.
Each colour and status has a specific purpose in the system:
Click on the correct sub-assembly and then select “OK“.
Please make sure you pick one “Not Started” or resume on the one you have already started and paused.
When in a View mode, you can choose any one of the versions shown. However, you have to carefully select the right version when in Fabricate or Inspect modes.
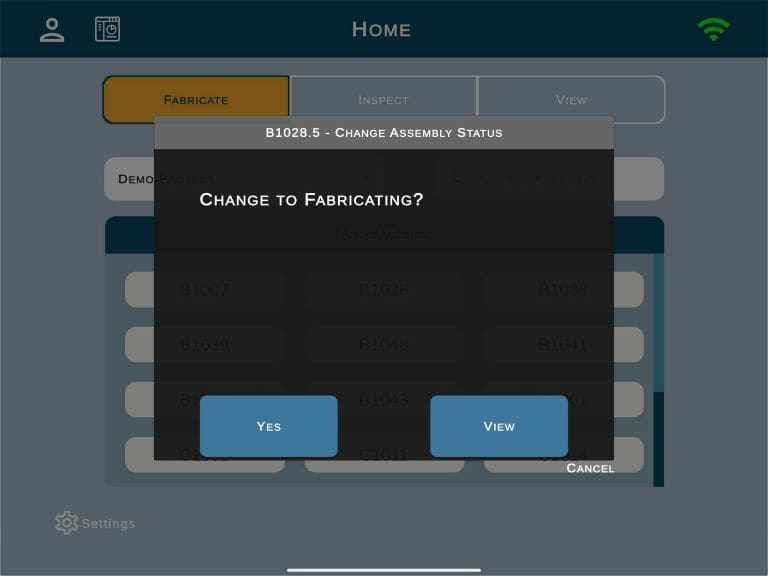
4. Change Status of Assembly
Depending on the path chosen in the home screen (Fabricate, Inspect or View), the system will prompt to change the status for the selected assembly.
If you selected the View path, you will not change the status and will not see this window.


